Popular Woodworking 2009-12 № 180, страница 12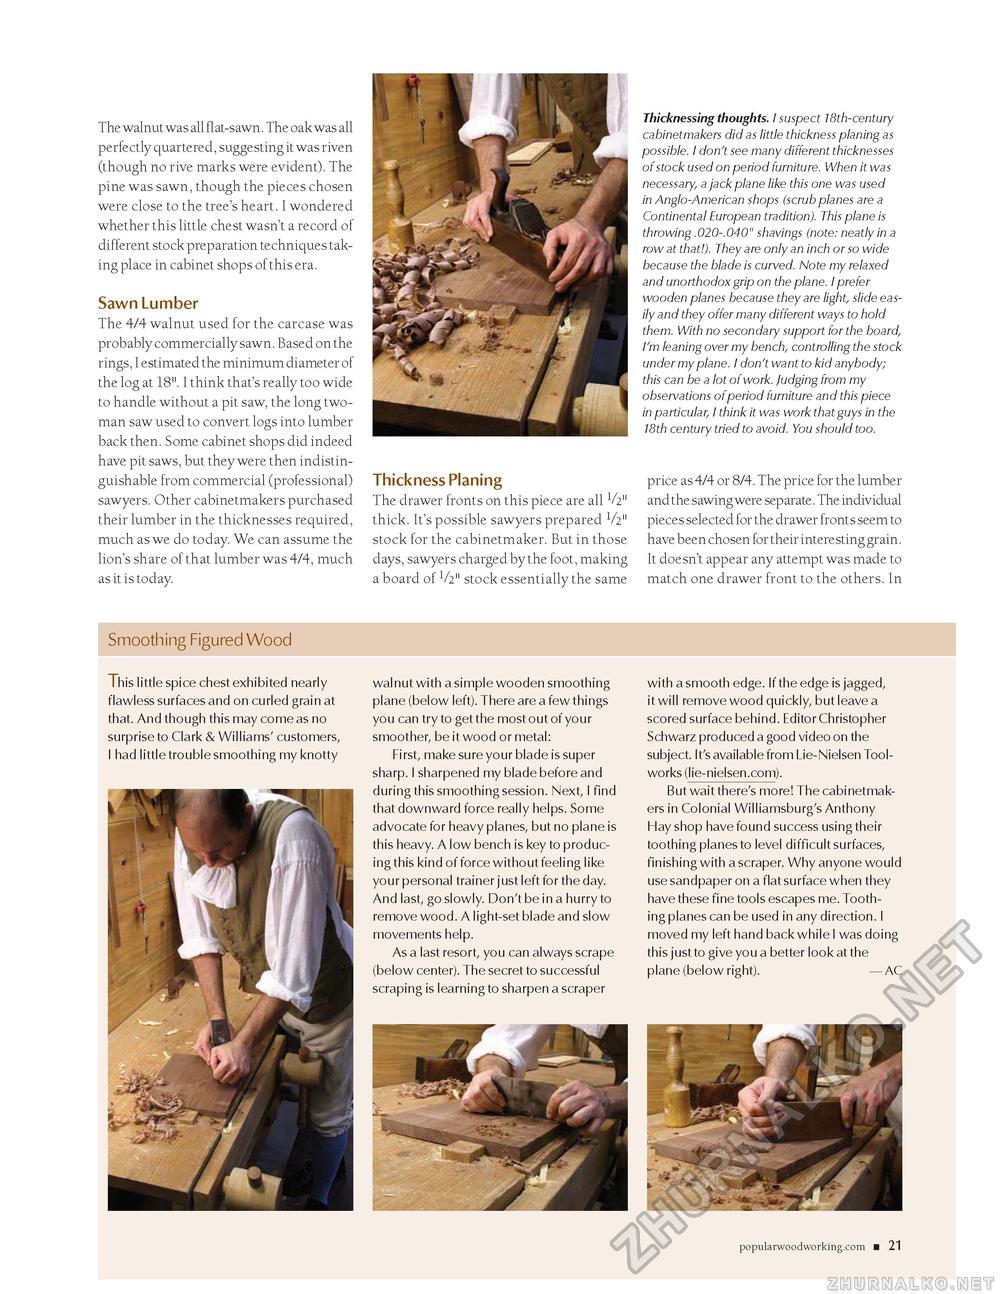
The walnut was all flat-sawn. The oak was all perfectly quartered, suggesting it was riven (though no rive marks were evident). The pine was sawn, though the pieces chosen were close to the tree's heart. I wondered whether this little chest wasn't a record of different stock preparation techniques taking place in cabinet shops of this era. Sawn LumberThe 4/4 walnut used for the carcase was probably commercially sawn. Based on the rings, I estimated the minimum diameter of the log at 18". I think that's really too wide to handle without a pit saw, the long two-man saw used to convert logs into lumber back then. Some cabinet shops did indeed have pit saws, but they were then indistinguishable from commercial (professional) sawyers. Other cabinetmakers purchased their lumber in the thicknesses required, much as we do today. We can assume the lion's share of that lumber was 4/4, much as it is today. Thickness PlaningThe drawer fronts on this piece are all V2" thick. It's possible sawyers prepared 1/2" stock for the cabinetmaker. But in those days, sawyers charged by the foot, making a board of 1/2" stock essentially the same Thicknessing thoughts. I suspect 18th-century cabinetmakers did as little thickness planing as possible. I don't see many different thicknesses of stock used on period furniture. When it was necessary, a jack plane like this one was used in Anglo-American shops (scrub planes are a Continental European tradition). This plane is throwing .020-.040" shavings (note: neatly in a row at that!). They are only an inch or so wide because the blade is curved. Note my relaxed and unorthodox grip on the plane. I prefer wooden planes because they are light, slide easily and they offer many different ways to hold them. With no secondary support for the board, I'm leaning over my bench, controlling the stock under my plane. I don't want to kid anybody; this can be a lot of work. Judging from my observations of period furniture and this piece in particular, I think it was work that guys in the 18th century tried to avoid. You should too. price as 4/4 or 8/4. The price for the lumber and the sawing were separate. The individual pieces selected for the drawer fronts seem to have been chosen for their interesting grain. It doesn't appear any attempt was made to match one drawer front to the others. In Smoothing Figured Wood this little spice chest exhibited nearly flawless surfaces and on curled grain at that. And though this may come as no surprise to Clark & Williams' customers, I had little trouble smoothing my knotty walnut with a simple wooden smoothing plane (below left). There are a few things you can try to get the most out of your smoother, be it wood or metal: First, make sure your blade is super sharp. I sharpened my blade before and during this smoothing session. Next, I find that downward force really helps. Some advocate for heavy planes, but no plane is this heavy. A low bench is key to producing this kind of force without feeling like your personal trainer just left for the day. And last, go slowly. Don't be in a hurry to remove wood. A light-set blade and slow movements help. As a last resort, you can always scrape (below center). The secret to successful scraping is learning to sharpen a scraper with a smooth edge. If the edge is jagged, it will remove wood quickly, but leave a scored surface behind. Editor Christopher Schwarz produced a good video on the subject. It's available from Lie-Nielsen Toolworks (lie-nielsen.com). But wait there's more! The cabinetmakers in Colonial Williamsburg's Anthony Hay shop have found success using their toothing planes to level difficult surfaces, finishing with a scraper. Why anyone would use sandpaper on a flat surface when they have these fine tools escapes me. Toothing planes can be used in any direction. I moved my left hand back while I was doing this just to give you a better look at the plane (below right). — AC popularwoodworking.com ■ 21 |


