Popular Woodworking 2009-12 № 180, страница 15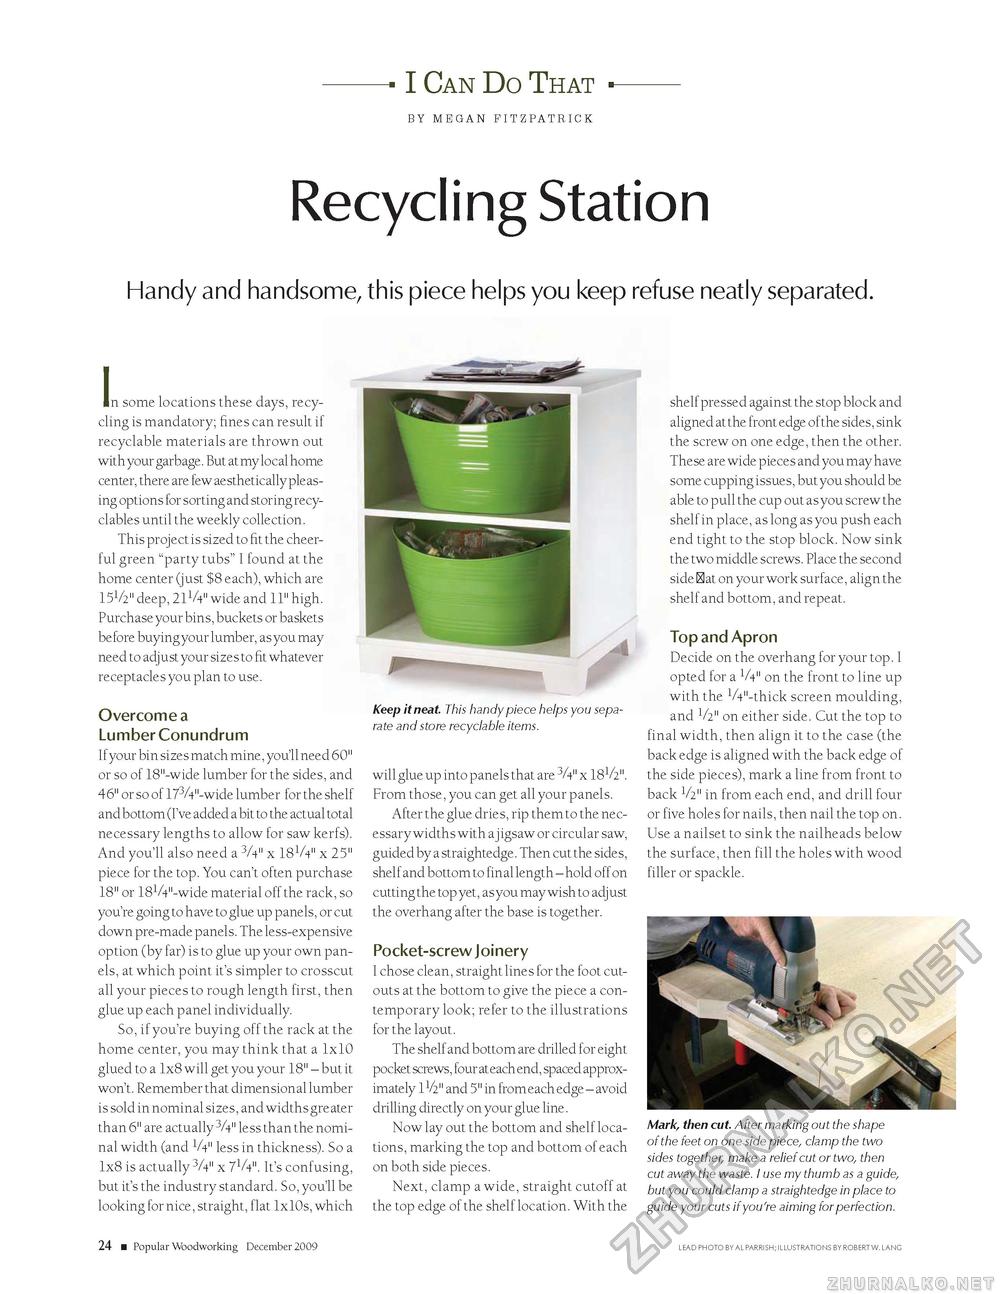
I Can Do ThatBY MEGAN FITZPATRICK Recycling StationHandy and handsome, this piece helps you keep refuse neatly separated.n some locations these days, recycling is mandatory; fines can result if recyclable materials are thrown out with your garbage. But at my local home center, there are few aesthetically pleasing options for sorting and storing recy-clables until the weekly collection. This project is sized to fit the cheerful green "party tubs" I found at the home center (just $8 each), which are 15V2" deep, 21V4" wide and 11" high. Purchase your bins, buckets or baskets be fore buying your lumber, as you may need to adjust your sizes to fit whatever receptacles you plan to use. Overcome a Lumber ConundrumIf your bin sizes match mine, you'll need 60" or so of 18"-wide lumber for the sides, and 46" or so of 173A"-wide lumber for the shelf and bottom (I've added a bit to the actual total necessary lengths to allow for saw kerfs). And you'll also need a 3A" x 18V4" x 25" piece for the top. You can't often purchase 18" or 181/4"-wide material off the rack, so you're going to have to glue up panels, or cut down pre-made panels. The less-expensive option (by far) is to glue up your own panels, at which point it's simpler to crosscut all your pieces to rough length first, then glue up each panel individually. So, if you're buying off the rack at the home center, you may think that a 1x10 glued to a 1x8 will get you your 18" - but it won't. Remember that dimensional lumber is sold in nominal sizes, and widths greater than 6" are actually 3A" less than the nominal width (and V4" less in thickness). So a 1x8 is actually 3A" x 71A". It's confusing, but it's the industry standard. So, you'll be looking for nice, straight, flat 1x10s, which Keep it neat. This handy piece helps you separate and store recyclable items. will glue up into panels that are 3A" x 18V2". From those, you can get all your panels. After the glue dries, rip them to the necessary widths with a jigsaw or circular saw, guided by a straightedge. Then cut the sides, shelf and bottom to final length - hold off on cutting the top yet, as you may wish to adjust the overhang after the base is together. Pocket-screw JoineryI chose clean, straight lines for the foot cutouts at the bottom to give the piece a contemporary look; refer to the illustrations for the layout. The shelf and bottom are drilled for eight pocket screws, four at each end, spaced approx-imately11/2" and 5" in from each edge - avoid drilling directly on your glue line. Now lay out the bottom and shelf locations, marking the top and bottom of each on both side pieces. Next, clamp a wide, straight cutoff at the top edge of the shelf location. With the shelf pressed against the stop block and aligned at the front edge ofthe sides, sink the screw on one edge, then the other. These are wide pieces and you may have some cupping issues, but you should be able to pull the cup out as you screw the shelf in place, as long as you push each end tight to the stop block. Now sink the two middle screws. Place the second side Hat on your work surface, align the shelf and bottom, and repeat. Top and ApronDecide on the overhang for your top. I opted for a V4" on the front to line up with the 1/4"-thick screen moulding, and V2" on either side. Cut the top to final width, then align it to the case (the back edge is aligned with the back edge of the side pieces), mark a line from front to back V2" in from each end, and drill four or five holes for nails, then nail the top on. Use a nailset to sink the nailheads below the surface, then fill the holes with wood filler or spackle. Mark, then cut. After marking out the shape of the feet on one side piece, clamp the two sides together, make a relief cut or two, then cut away the waste. I use my thumb as a guide, but you could clamp a straightedge in place to guide your cuts if you're aiming for perfection. 24 ■ Popular Woodworking December 2009 LEAD PHOTO BY AL PARRISH; ILLUSTRATIONS BY ROBERT W. LANG |


