10 - Heavy Duty Lathe Stand, страница 18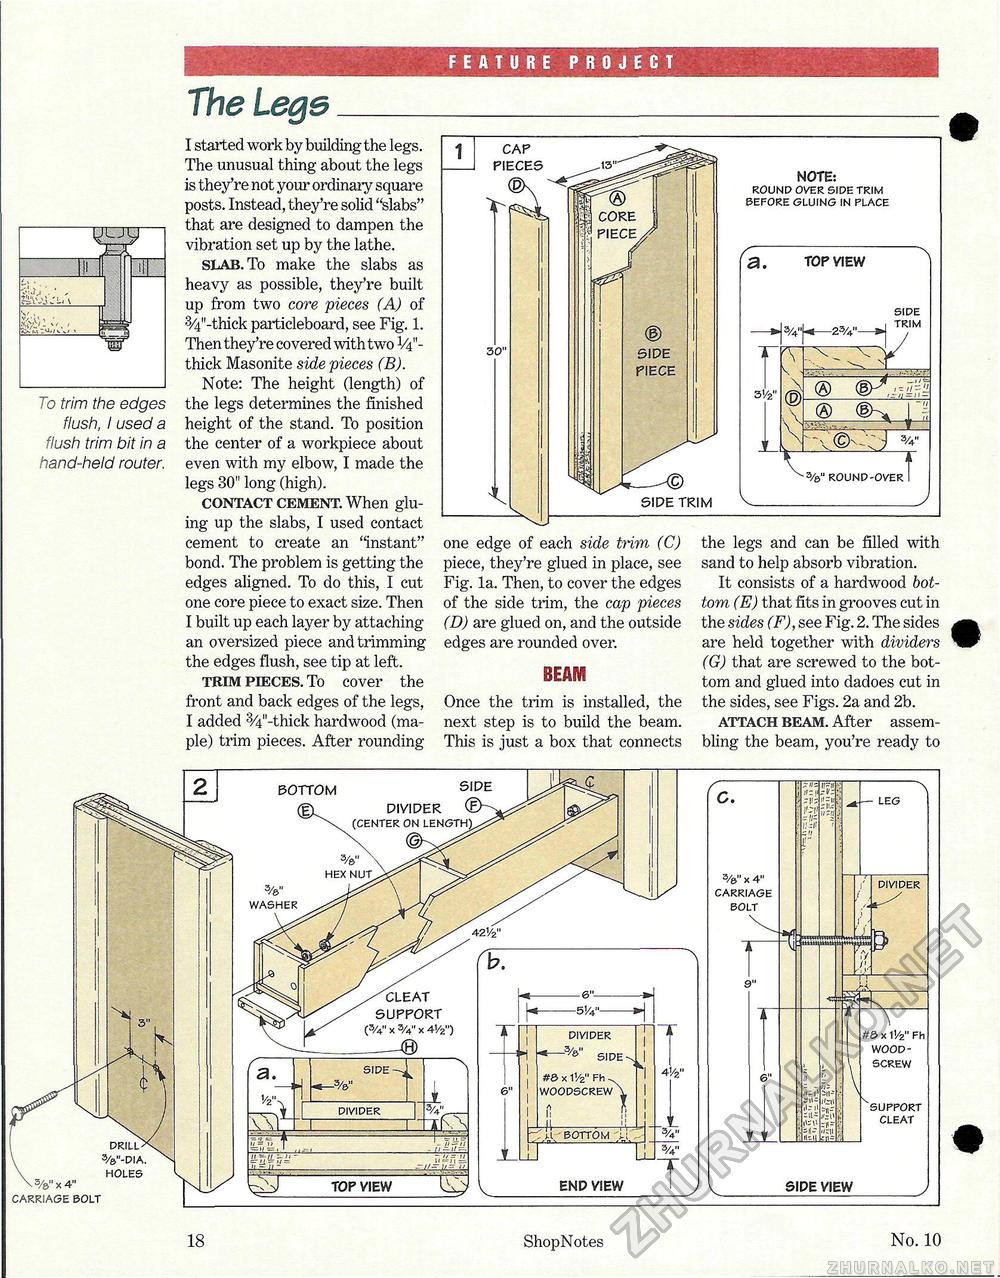
FEATURE PROJECT
To trim the edges flush, I used a flush trim bit in a hand-held router. The LegsI started work by building the legs. The unusual thing about the legs is they're not your ordinaiy square posts. Instead, they're solid "slabs" that are designed to dampen the vibration set up by the lathe. slab. To make the slabs as heavy as possible, they're built up from two core pieces (A) of 3/4"-thick particleboard, see Fig. 1. Then they're covered with two V4"-thick Masonite side pieces (B). Note: The height (length) of the legs determines the finished height of the stand. To position the center of a workpiece about even with my elbow, I made the legs 30" long (high). contact cement. When gluing up the slabs, I used contact cement to create an "instant" bond. The problem is getting the edges aligned. To do this, I cut one core piece to exact size. Then I built up each layer by attaching an oversized piece and trimming the edges flush, see tip at left. trim pieces. To cover the front and back edges of the legs, I added 3/4n-thick hardwood (maple) trim pieces. After rounding one edge of each side trim (C) piece, they're glued in place, see Fig. la. Then, to cover the edges of the side trim, the cap pieces (D) are glued on, and the outside edges are rounded over. BEAM Once the trim is installed, the next step is to build the beam. This is just a box that connects the legs and can be filled with sand to help absorb vibration. It consists of a hardwood bottom (E) that fits in grooves cut in the sides (F), see Fig. 2. The sides are held together with dividers (G) that are screwed to the bottom and glued into dadoes cut in the sides, see Figs. 2a and 2b. attach beam. After assembling the beam, you're ready to 3/&" x 4" carriage bolt 18 ShopNotes No. 10 |
||||||||||||||


