10 - Heavy Duty Lathe Stand, страница 21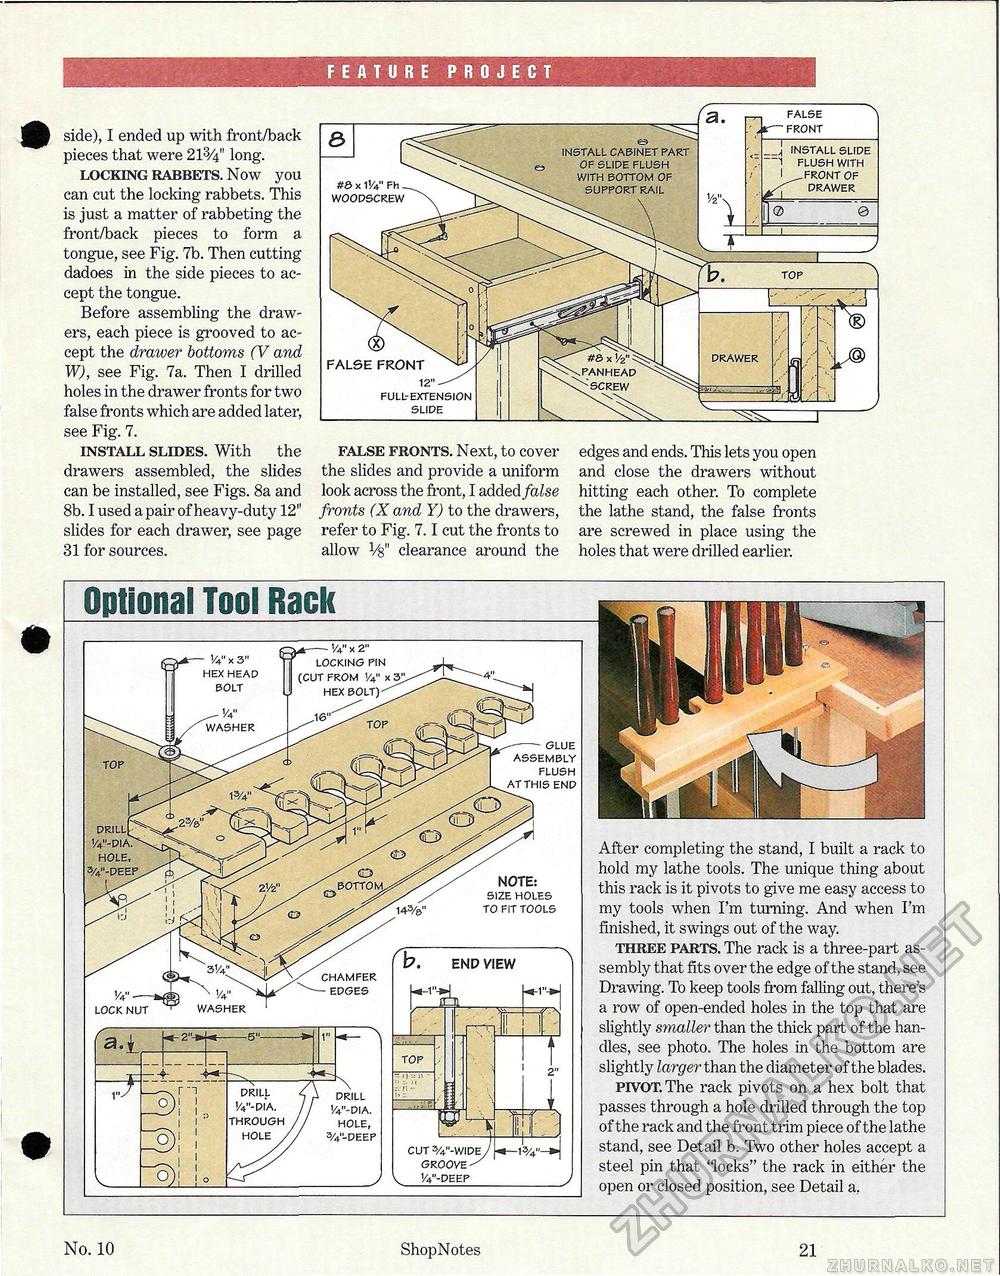
FEATURE PROJECT side), I ended up with front/back pieces that were 213/4M long. locking rabbets. Now you can cut the locking rabbets. This is just a matter of rabbeting the front/back pieces to form a tongue, see Fig. 7b. Then cutting dadoes in the side pieces to accept the tongue. Before assembling the drawers, each piece is grooved to accept the drawer bottoms (V and W), see Fig. 7a. Then I drilled holes in the drawer fronts for two false fronts which are added later, see Fig. 7. install slides. With the drawers assembled, the slides can be installed, see Figs. 8a and 8b. I used a pair of heavy-duty 12" slides for each drawer, see page 31 for sources. false fronts. Next, to cover the slides and provide a uniform look across the front, I added false fronts (X and Y) to the drawers, refer to Fig. 7.1 cut the fronts to allow Vg" clearance around the edges and ends. This lets you open and close the drawers without hitting each other. To complete the lathe stand, the false fronts are screwed in place using the holes that were drilled earlier. Optional Tool Rack After completing the stand, I built a rack to hold my lathe tools. The unique thing about this rack is it pivots to give me easy access to my tools when I'm turning. And when I'm finished, it swings out of the way. three parts. The rack is a three-part assembly that fits over the edge of the stand, see Drawing. To keep tools from falling out, there's a row of open-ended holes in the top that are slightly smaller than the thick part of the handles, see photo. The holes in the bottom are slightly larger than the diameter of the blades. pivot. The rack pivots on a hex bolt that passes through a hole drilled through the top of the rack and the front trim piece of the lathe stand, see Detail b. Two other holes accept a steel pin that 'locks" the rack in either the open or closed position, see Detail a, 1/4"-dia. hole, 3/4"-deep '/v lock nut drill '/4"-dia. hole, 3/4"-deep chamfer edges END VIEW NOTE: size holes to fit tools glue ASSEMBLY flush at this end No. 10 ShopNotes 21 |


