16 - Custonize Your Radial Arm Saw, страница 9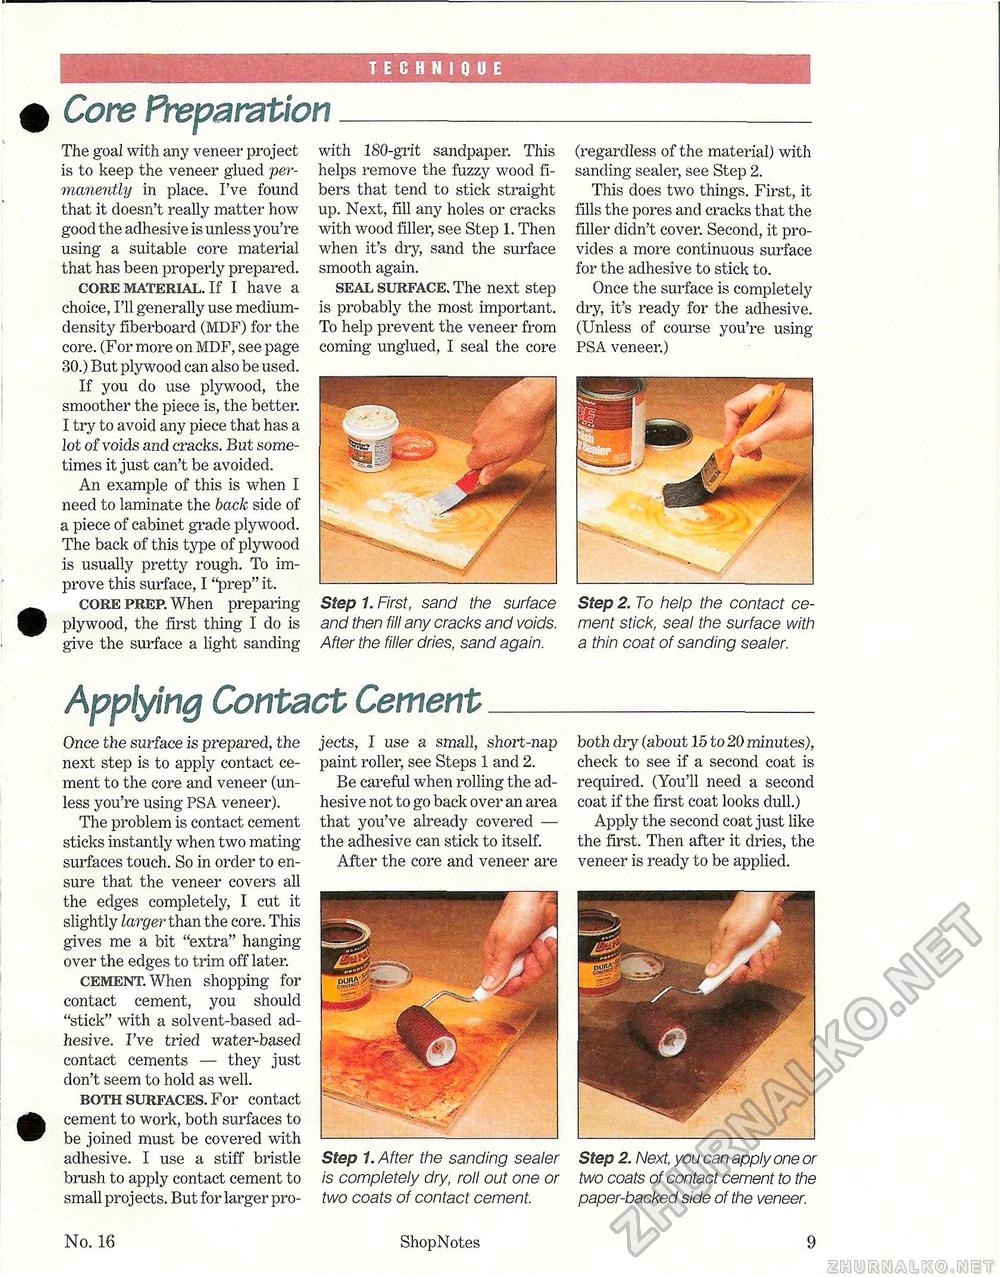
TECHNIQUE Core Preparation The goal with any veneer project is to keep the veneer glued permanently in place. I've found that it doesn't really matter how good the adhesive is unless you're using a suitable core material that has been properly prepared. core material. If I have a choice, I'll generally use medium-density fiberboard (MDF) for the core. (For more on MDF, see page 30.) But plywood can also be used. If you do use plywood, the smoother the piece is, the better. I try to avoid any piece that has a lot of voids and cracks. But sometimes it just can't be avoided. An example of this is when I need to laminate the back side of a piece of cabinet grade plywood. The back of this type of plywood is usually pretty rough. To improve this surface, I "prep" it. core prep. When preparing plywood, the first thing I do is give the surface a light sanding with 180-grit sandpaper. This helps remove the fuzzy wood fibers that tend to stick straight up. Next, fill any holes or cracks with wood filler, see Step 1. Then when it's dry, sand the surface smooth again. seal surface. The next step is probably the most important. To help prevent the veneer from coming unglued, I seal the core (regardless of the material) with sanding sealer, see Step 2. This does two things. First, it fills the pores and cracks that the filler didn't cover. Second, it provides a more continuous surface for the adhesive to stick to. Once the surface is completely dry, it's ready for the adhesive. (Unless of course you're using PSA veneer.) Step 1. First, sand the surface and then fill any cracks and voids. After the filler dries, sand again. Step 2. To help the contact cement stick, seal the surface with a thin coat of sanding sealer. Applying Contact Cement Once the surface is prepared, the next step is to apply contact cement to the core and veneer (unless you're using PSA veneer). The problem is contact cement sticks instantly when two mating surfaces touch. So in order to ensure that the veneer covers all the edges completely, I cut it slightly larger than the core. This gives me a bit "extra" hanging-over the edges to trim off later. cement. When shopping for contact cement, you should "stick" with a solvent-based adhesive. I've tried water-based contact cements — they just don't seem to hold as well. both surfaces. For contact cement to work, both surfaces to be joined must be covered with adhesive. I use a stiff bristle brush to apply contact cement to small projects. But for larger pro jects, I use a small, short-nap paint roller, see Steps 1 and 2. Be careful when rolling the adhesive not to go back over an area that you've already covered — the adhesive can stick to itself. After the core and veneer are both dry (about 15 to 20 minutes), check to see if a second coat is required. (You'll need a second coat if the first coat looks dull.) Apply the second coat just like the first. Then after it dries, the veneer is ready to be applied. Step 1. After the sanding sealer is completely dry, roll out one or two coats of contact cement. Step 2. Next, you can apply one or two coats of contact cement to the paper-backed side of the veneer. No. 16 ShopNotes 9 |


