16 - Custonize Your Radial Arm Saw, страница 7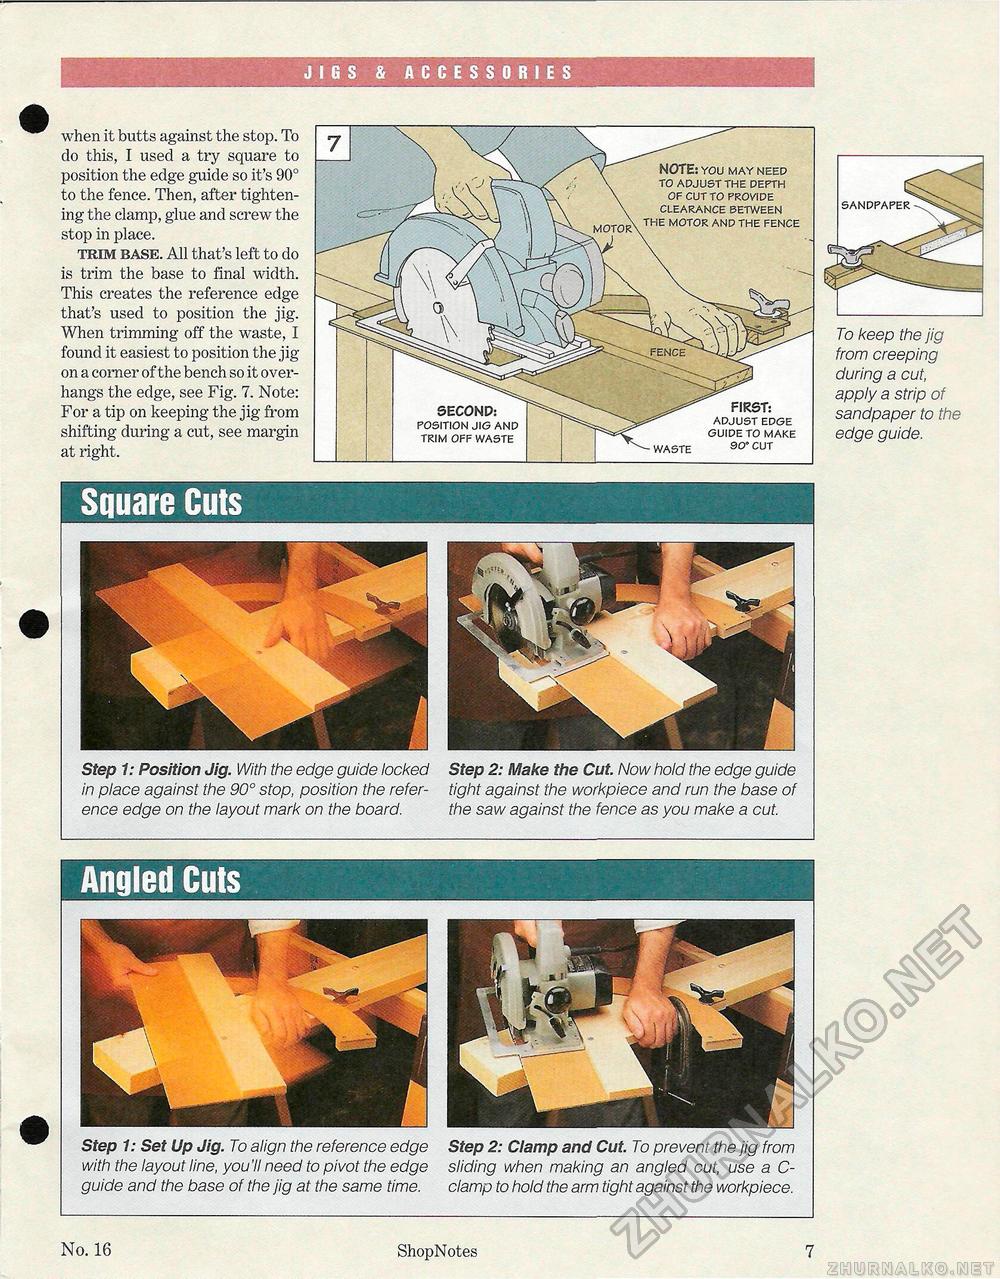
JIGS & ACCESSORIES when it butts against the stop. To do this, I used a try square to position the edge guide so it's 90° to the fence. Then, after tightening the clamp, glue and screw the stop in place. trim base. All that's left to do is trim the base to final width. This creates the reference edge that's used to position the jig. When trimming off the waste, I found it easiest to position the jig on a comer of the bench so it overhangs the edge, see Fig. 7. Note: For a tip on keeping the jig from shifting during a cut, see margin at right. Square CutsStep 1: Position Jig. With the edge guide locked in place against the 90° stop, position the reference edge on the layout mark on the board. Step 2: Make the Cut. Now hold the edge guide tight against the workpiece and run the base of the saw against the fence as you make a cut. To keep the jig from creeping during a cut, apply a strip of sandpaper to the edge guide. Angled CutsStep 1: Set Up Jig. To align the reference edge with the layout line, you'll need to pivot the edge guide and the base of the jig at the same time. Step 2: Clamp and Cut. To prevent the jig from sliding when making an angled cut, use a C-clamp to hold the arm tight against the workpiece. No. 16 ShopNotes 7 |


