19 - Clamp Storage System, страница 4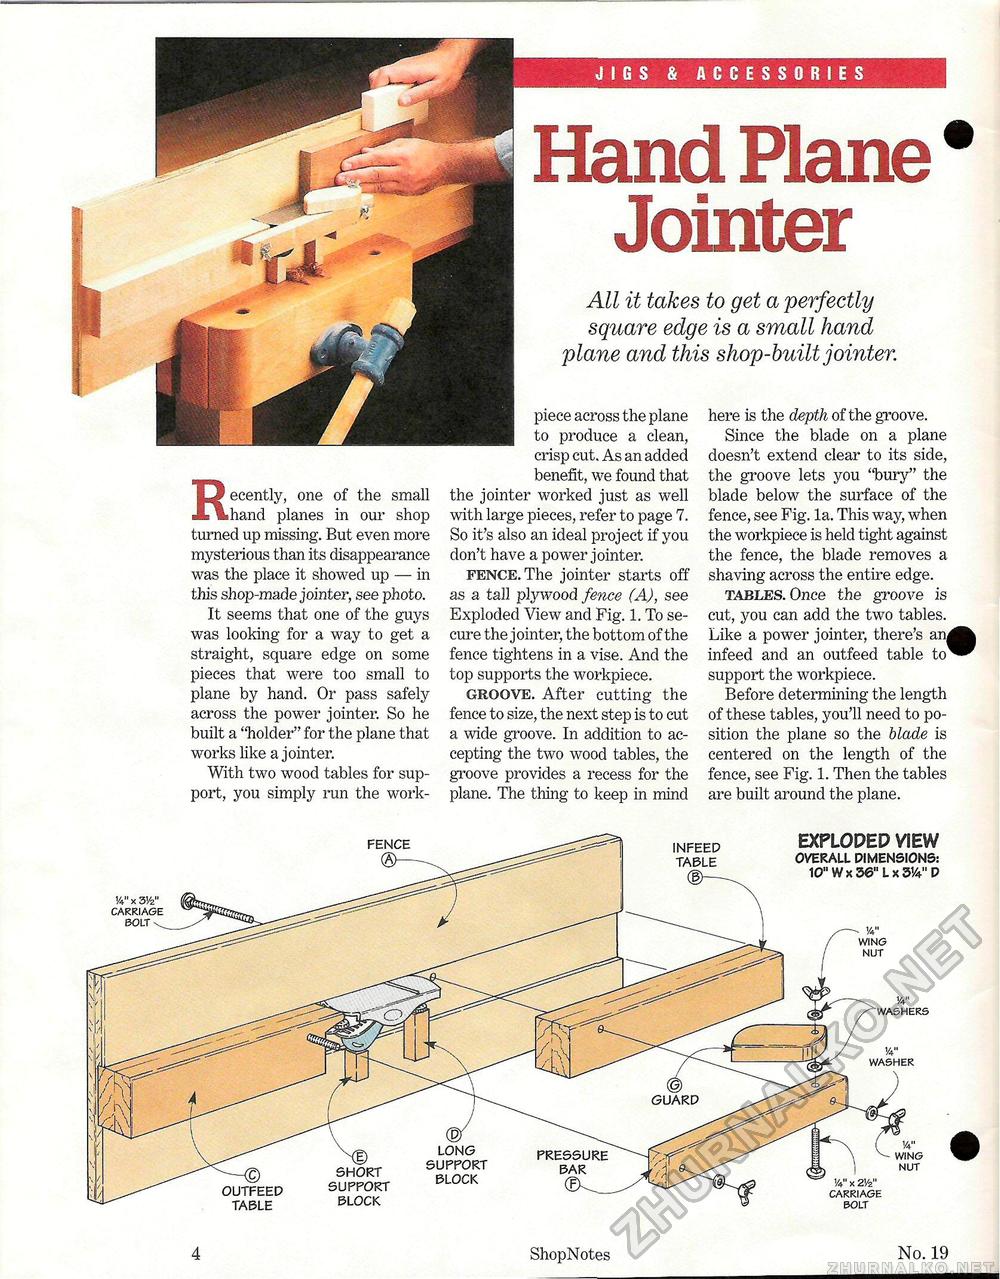
JHtelUCl PlcHlG Jointer All it takes to get a perfectly square edge is a small hand plane and this shop-built jointer. here is the depth of the groove. Since the blade on a plane doesn't extend clear to its side, the groove lets you "bury" the blade below the surface of the fence, see Fig. la. This way, when the workpiece is held tight against the fence, the blade removes a shaving across the entire edge. tables. Once the groove is cut, you can add the two tables. Like a power jointer, there's am infeed and an outfeed table to support the workpiece. Before determining the length of these tables, you'll need to position the plane so the blade is centered on the length of the fence, see Fig. 1. Then the tables are built around the plane. ecently, one of the small JL la hand planes in our shop turned up missing. But even more mysterious than its disappearance was the place it showed up — in this shop-made jointer, see photo. It seems that one of the guys was looking for a way to get a straight, square edge on some pieces that were too small to plane by hand. Or pass safely across the power jointer. So he built a "holder" for the plane that works like a jointer. With two wood tables for support, you simply run the work- piece across the plane to produce a clean, crisp cut. As an added benefit, we found that the jointer worked just as well with large pieces, refer to page 7. So it's also an ideal project if you don't have a power jointer. fence. The jointer starts off as a tall plywood fence (A), see Exploded View and Fig. 1. To secure the jointer, the bottom of the fence tightens in a vise. And the top supports the workpiece. groove. After cutting the fence to size, the next step is to cut a wide groove. In addition to accepting the two wood tables, the groove provides a recess for the plane. The thing to keep in mind 4 ShopNotes No. 19 |


