19 - Clamp Storage System, страница 5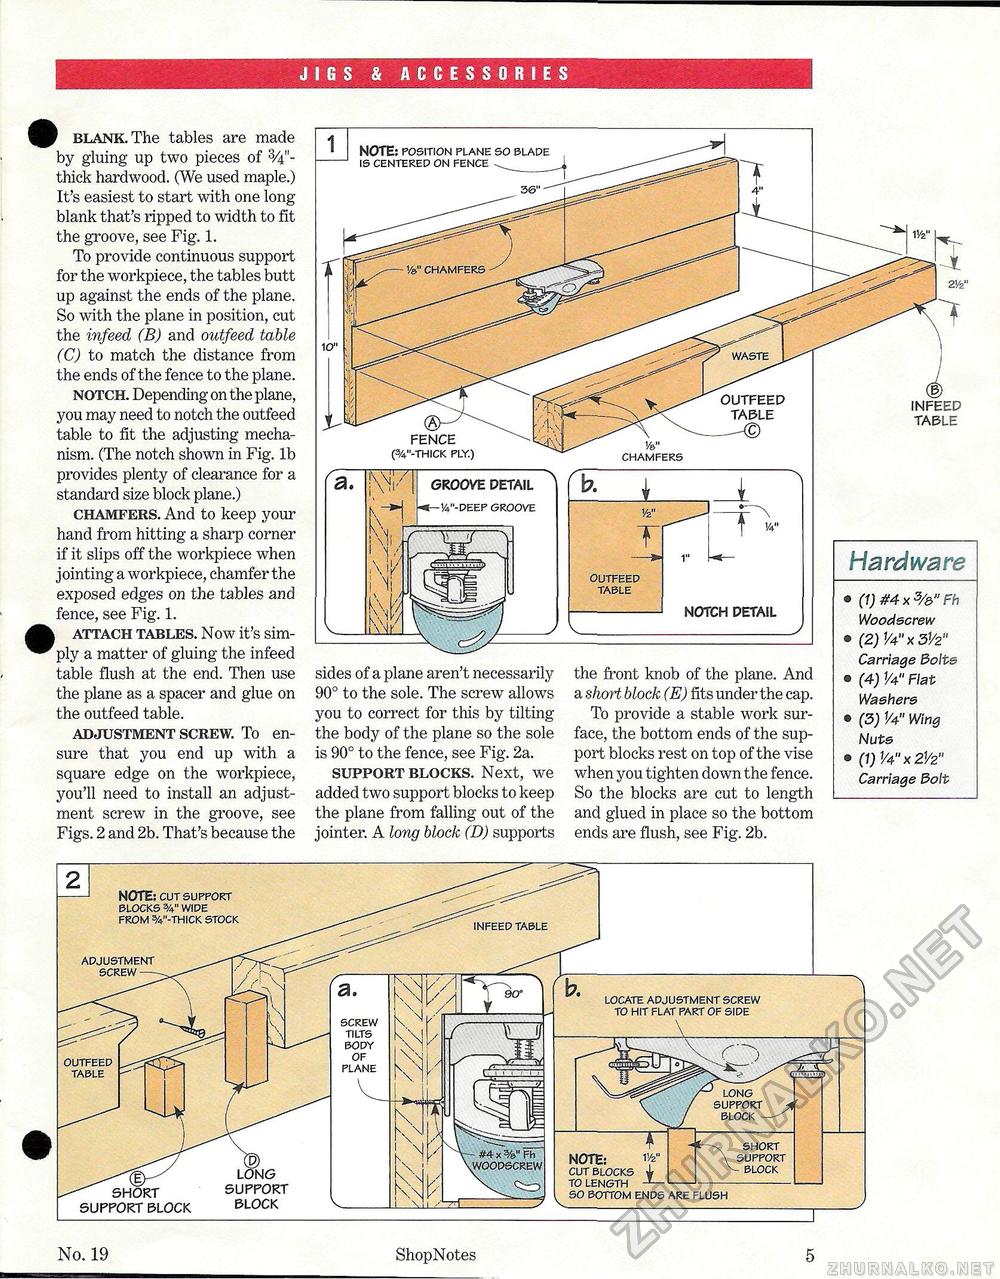
JIGS & ACCESSORIES i blank. The tables are made by gluing up two pieces of thick hardwood. (We used maple.) It's easiest to start with one long blank that's ripped to width to fit the groove, see Fig. 1. To provide continuous support for the workpiece, the tables butt up against the ends of the plane. So with the plane in position, cut the infeecl (B) and outfeed table (C) to match the distance from the ends of the fence to the plane. notch. Depending on the plane, you may need to notch the outfeed table to fit the adjusting mechanism. (The notch shown in Fig. lb provides plenty of clearance for a standard size block plane.) chamfers. And to keep your hand from hitting a sharp corner if it slips off the workpiece when jointing a workpiece, chamfer the exposed edges on the tables and fence, see Fig. 1. attach tables. Now it's simply a matter of gluing the infeed table flush at the end. Then use the plane as a spacer and glue on the outfeed table. adjustment screw. To ensure that you end up with a square edge on the workpiece, you'll need to install an adjustment screw in the groove, see Figs. 2 and 2b. That's because the sides of a plane aren't necessarily 90° to the sole. The screw allows you to correct for this by tilting the body of the plane so the sole is 90° to the fence, see Fig. 2a. support blocks. Next, we added two support blocks to keep the plane from falling out of the jointer. A long block (D) supports the front knob of the plane. And a short block (E) fits under the cap. To provide a stable work surface, the bottom ends of the support blocks rest on top of the vise when you tighten down the fence. So the blocks are cut to length and glued in place so the bottom ends are flush, see Fig. 2b. (1) #4 x 3/&" Fh Woodscrew (2)1/4"X3V2" Carriage dolts (4) ?/4" Flat Washers (3) 1/4" Wing Nuts (1)1/4"X21/2" Carriage Bolt No. 19 ShopNotes 5 |


