19 - Clamp Storage System, страница 6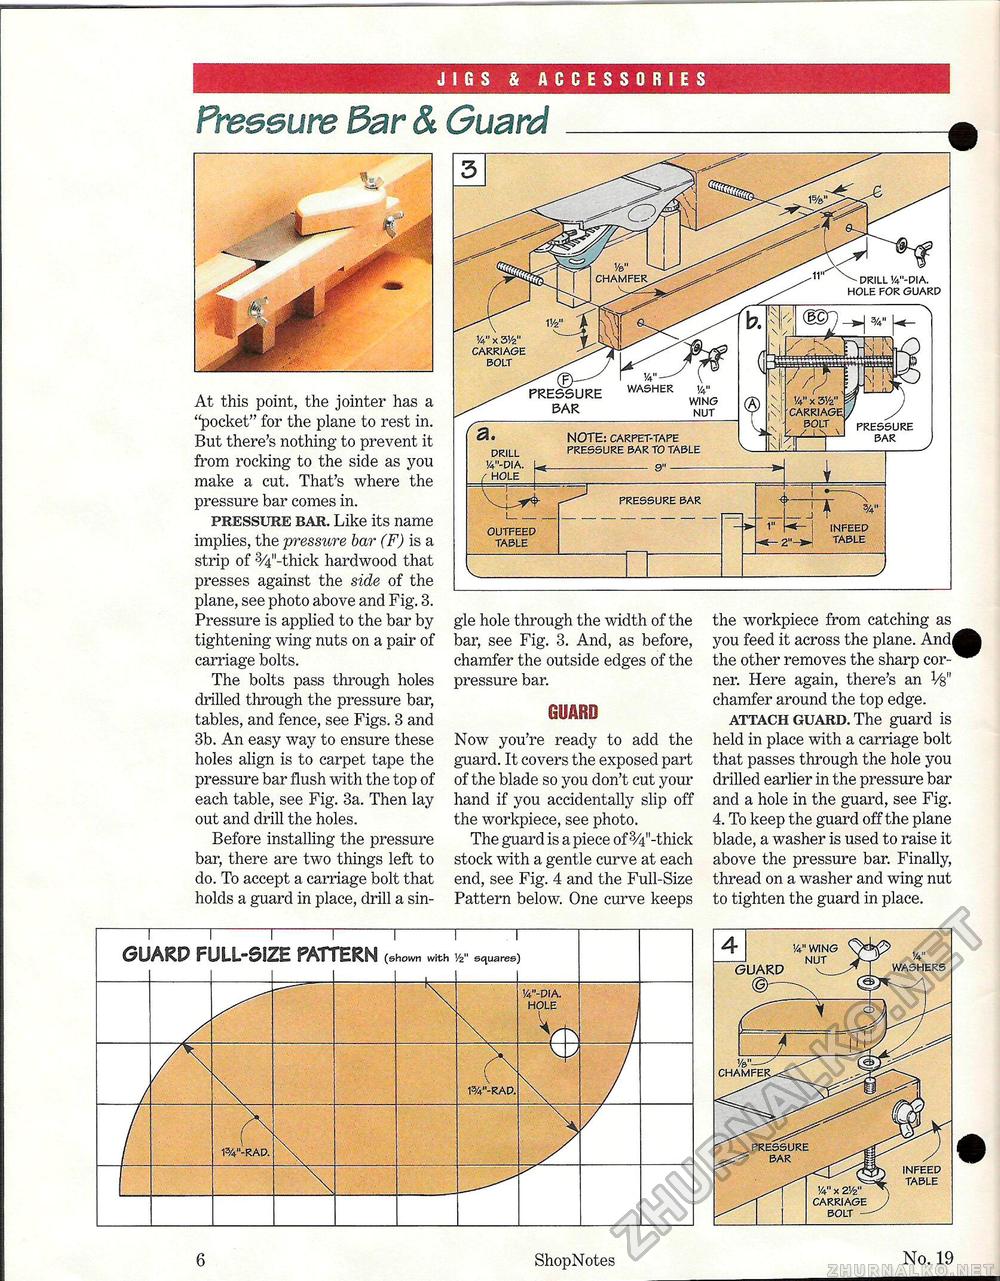
JIGS & ACCESSORIES Pmeeure Bar & Guard At this point, the jointer has a "pocket" for the plane to rest in. But there's nothing to prevent it from rocking to the side as you make a cut. That's where the pressure bar comes in. pressure bar. Like its name implies, the pressure bar (F) is a strip of 3/4"-thick hardwood that presses against the side of the plane, see photo above and Fig. 3. Pressure is applied to the bar by tightening wing nuts on a pair of carriage bolts. The bolts pass through holes drilled through the pressure bar, tables, and fence, see Figs. 3 and 3b. An easy way to ensure these holes align is to carpet tape the pressure bar flush with the top of each table, see Fig. 3a. Then lay out and drill the holes. Before installing the pressure bar, there are two things left to do. To accept a carriage bolt that holds a guard in place, drill a sin gle hole through the width of the bar, see Fig. 3. And, as before, chamfer the outside edges of the pressure bar. GUARD Now you're ready to add the guard. It covers the exposed part of the blade so you don't cut your hand if you accidentally slip off the workpiece, see photo. The guard is a piece of 3/4"-thick stock with a gentle curve at each end, see Fig. 4 and the Full-Size Pattern below. One curve keeps the workpiece from catching as you feed it across the plane. Andl the other removes the sharp corner. Here again, there's an V$" chamfer around the top edge. attach guard. The guard is held in place with a carriage bolt that passes through the hole you drilled earlier in the pressure bar and a hole in the guard, see Fig. 4. To keep the guard off the plane blade, a washer is used to raise it above the pressure bar. Finally, thread on a washer and wing nut to tighten the guard in place. GUARD FULL-SIZE PATTERN (shown with Vz" squares) W-RAP. 1%"-RAP. !4"-DIA. HOLE w 6 ShopNotes No. 19 |


