19 - Clamp Storage System, страница 7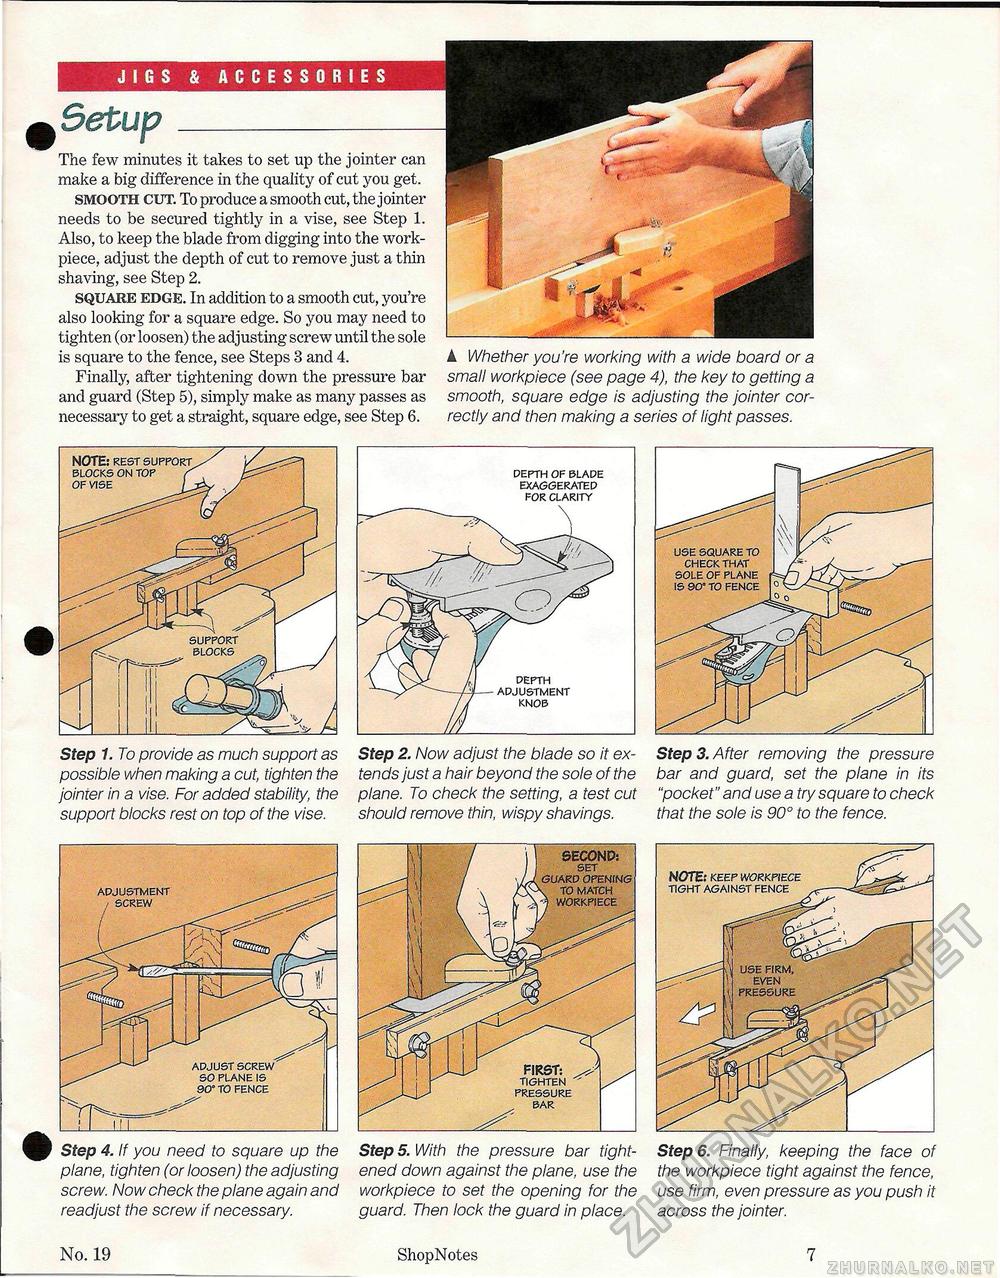
A Whether you're working with a wide board or a small workpiece (see page 4), the key to getting a smooth, square edge is adjusting the jointer correctly and then making a series of light passes. Setup The few minutes it takes to set up the jointer can make a big difference in the quality of cut you get. smooth cut. To produce a smooth cut, the jointer needs to be secured tightly in a vise, see Step 1. Also, to keep the blade from digging into the work-piece, adjust the depth of cut to remove just a thin shaving, see Step 2. square edge. In addition to a smooth cut, you're also looking for a square edge. So you may need to tighten (or loosen) the adjusting screw until the sole is square to the fence, see Steps 3 and 4. Finally, after tightening down the pressure bar and guard (Step 5), simply make as many passes as necessary to get a straight, square edge, see Step 6. Step 1. To provide as much support as possible when making a cut, tighten the joinier in a vise. For added stability, the support blocks rest on top of the vise. Step 2. Now adjust the blade so it extends just a hair beyond the sole of the plane. To check the setting, a test cut should remove thin, wispy shavings. Step 3. After removing the pressure bar and guard, set the plane in its "pocket" and use a try square to check that the sole is 90° to the fence. Step 4. If you need to square up the plane, tighten (or loosen) the adjusting screw. Now check the plane again and readjust the screw if necessary. Step 5. With the pressure bar tightened down against the plane, use the workpiece to set the opening for the guard. Then lock the guard in place. Step 6. Finally, keeping the face of the workpiece tight against the fence, use firm, even pressure as you push it across the jointer. NOTE: REST SUPPORT BLOCKS ON TOP OF VISE SECOND: SET GUARD OPENING TO MATCH NOTE: KEEP WORKPIECE TIGHT AGAINST FENCE No. 19 ShopNotes 7 |


