36 - Miter Trimmer, страница 24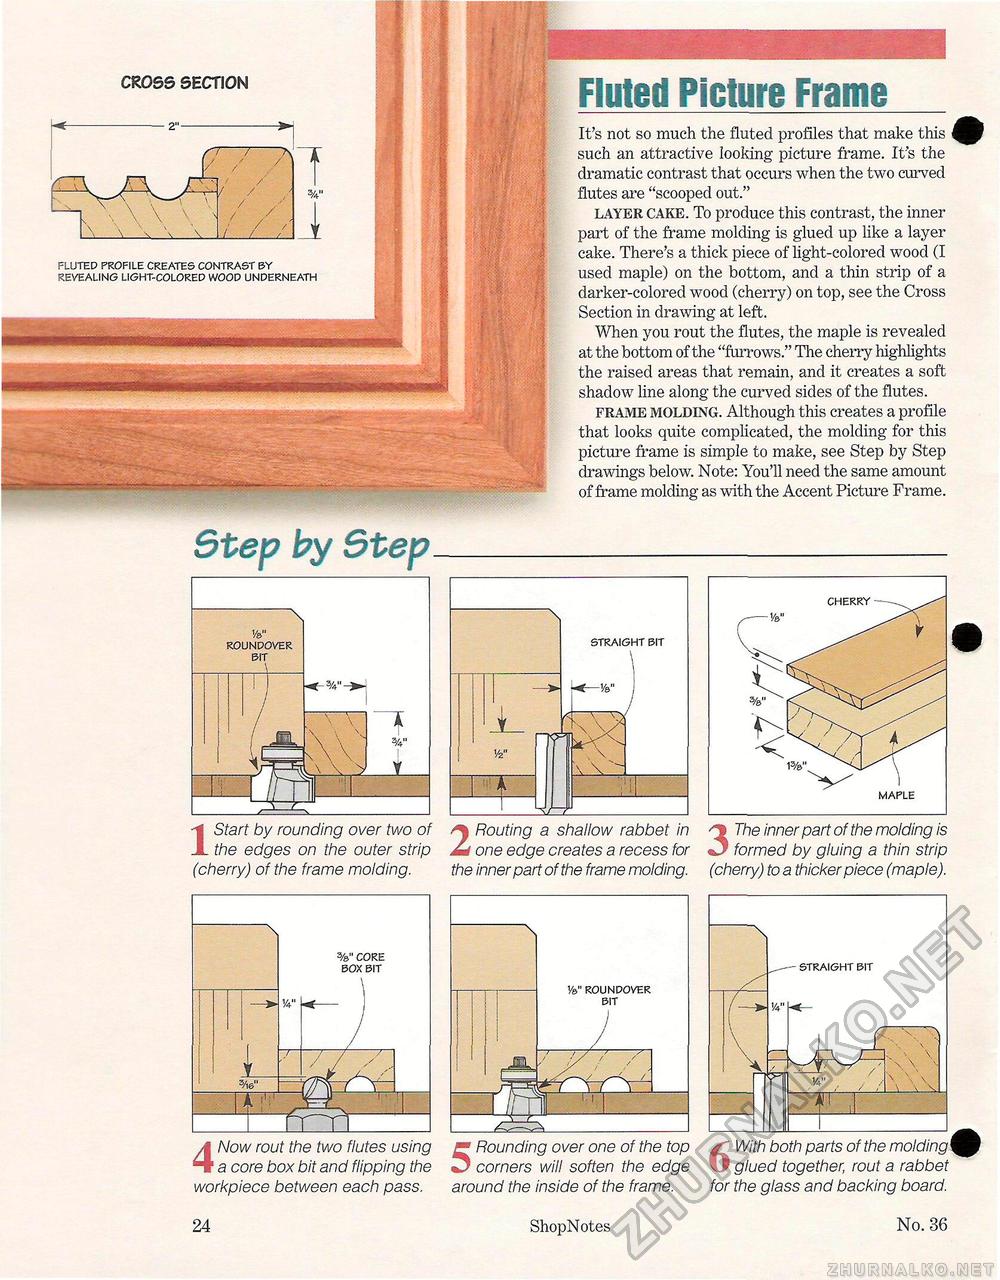
CROSS SECTION ---- — Fluted Picture FrameIt's not so much the fluted profiles that make this such an attractive looking picture frame. It s the dramatic contrast that occurs when the two curved flutes are "scooped out." layer cake. To produce this contrast, the inner part of the frame molding is glued up like a layer cake. There's a thick piece of light-colored wood (I used maple) on the bottom, and a thin strip of a darker-colored wood (cherry) on top, see the Cross Section in drawing at left. When you rout the flutes, the maple is revealed at the bottom of the "furrows." The cherry highlights the raised areas that remain, and it creates a soft shadow line along the curved sides of the flutes. frame molding. Although this creates a profile that looks quite complicated, the molding for this picture frame is simple to make, see Step by Step drawings below. Note: You'll need the same amount of frame molding as with the Accent Picture Frame. Step by Step1 Start by rounding over two of the edges on the outer strip (cherry) of the frame molding. 2 Routing a shallow rabbet in one edge creates a recess for the inner part of the frame molding. Now rout the two flutes using a core box bit and flipping the Rounding over one of the top corners will soften the edge 3 The inner part of the molding is formed by gluing a thin strip (cherry) to a thicker piece (maple). x straight sit W W IP v v \ \ \ X \\ y i \ workpiece between each pass. around the inside of the frame. 6 With both parts of the molding \ glued together, rout a rabbet for the glass and backing board. CHERRY maple 24 Shop Notes No. 36 |


