36 - Miter Trimmer, страница 23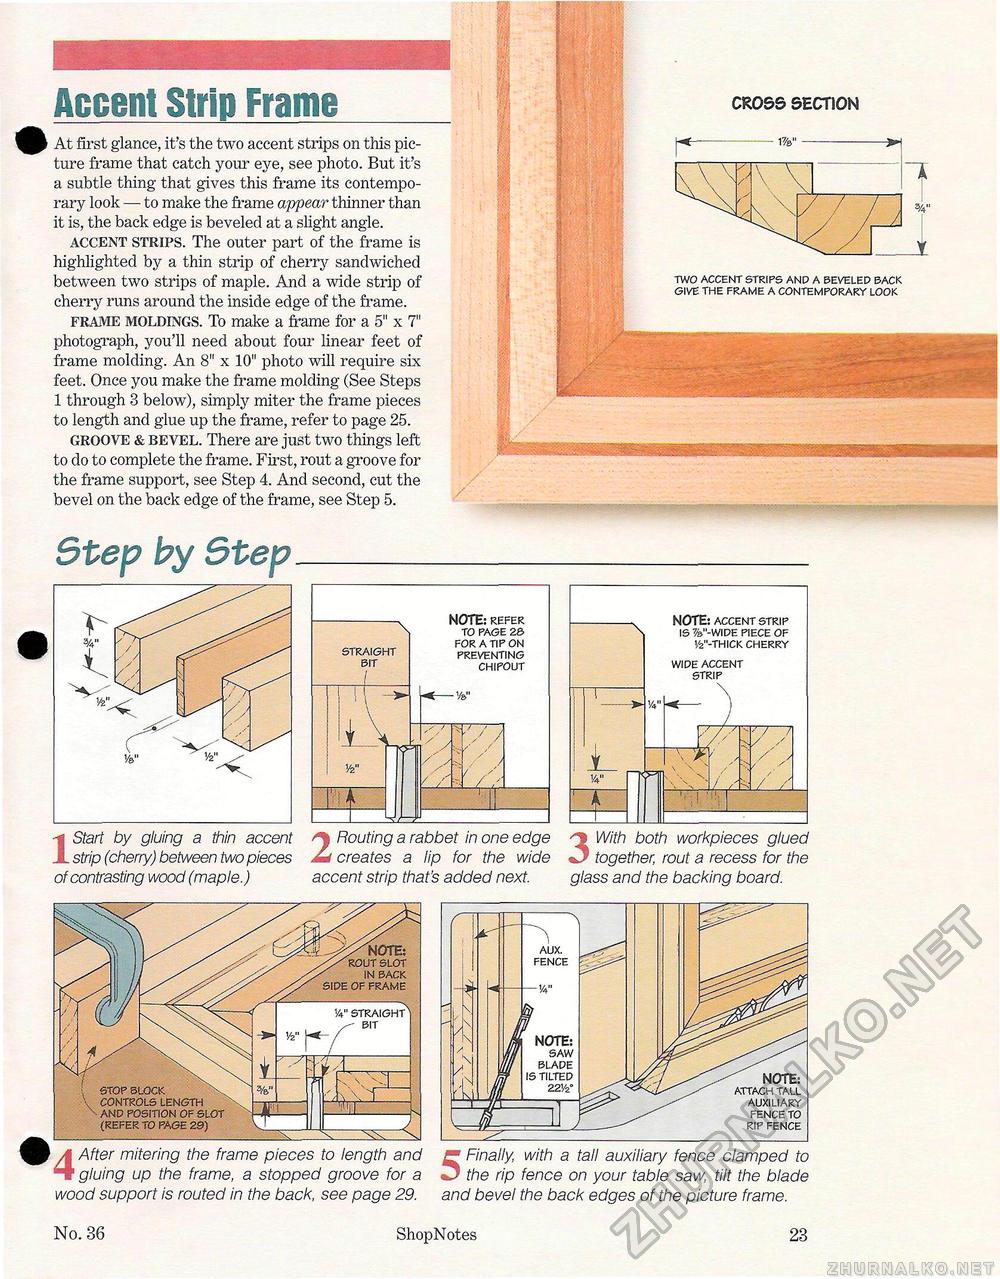
Accent Strip Frame At first glance, it's the two accent strips on this picture frame that catch your eye, see photo. But it's a subtle thing that gives this frame its contemporary look — to make the frame appear thinner than it is, the back edge is beveled at a slight angle. accent strips. The outer part of the frame is highlighted by a thin strip of cherry sandwiched between two strips of maple. And a wide strip of cherry runs around the inside edge of the frame. frame moldings. To make a frame for a 5" x 7" photograph, you'll need about four linear feet of frame molding. An 8" x 10" photo wall require six feet. Once you make the frame molding (See Steps 1 through 3 below), simply miter the frame pieces to length and glue up the frame, refer to page 25. groove & bevel. There are just two things left to do to complete the frame. First, rout a groove for the frame support, see Step 4. And second, cut the bevel on the back edge of the frame, see Step 5. 1 1 w T CROSS SECTION -1%"->i two accent strips and a beveled back give the frame a contemporary look 1 5 ■KHMMP^ " " . ......v-.....~ Step by Step 1 Start by gluing a thin accent strip (cherry) between two pieces of contrasting wood (maple.) straight bit L V2" NOTE: refer to page 26 for a tip on preventing chipout - v&" / /I V / / / 2 Routing a rabbet in one edge creates a lip for the wide accent strip that's added next. "TT W NOTE: accent strip is %"-wide piece of '/2"-thick cherry wide accent strip V \ \ - \ \ -
3 With both workpieces glued together, rout a recess for the glass and the backing board. A-" straight bit stop block controls length and position of slot (refer to page 29) \\ 4 After mitering the frame pieces to length and gluing up the frame, a stopped groove for a wood support is routed in the back, see page 29. NOTE: ' rout slot in back side of frame NOTE: attach tall auxiliary fence to rip fence 5 Finally, with a tall auxiliary fence clamped to the rip fence on your table saw, tilt the blade and bevel the back edges of the picture frame. No. 36 ShopNotes 23 |


