40 - Vacuum Clamping System, страница 6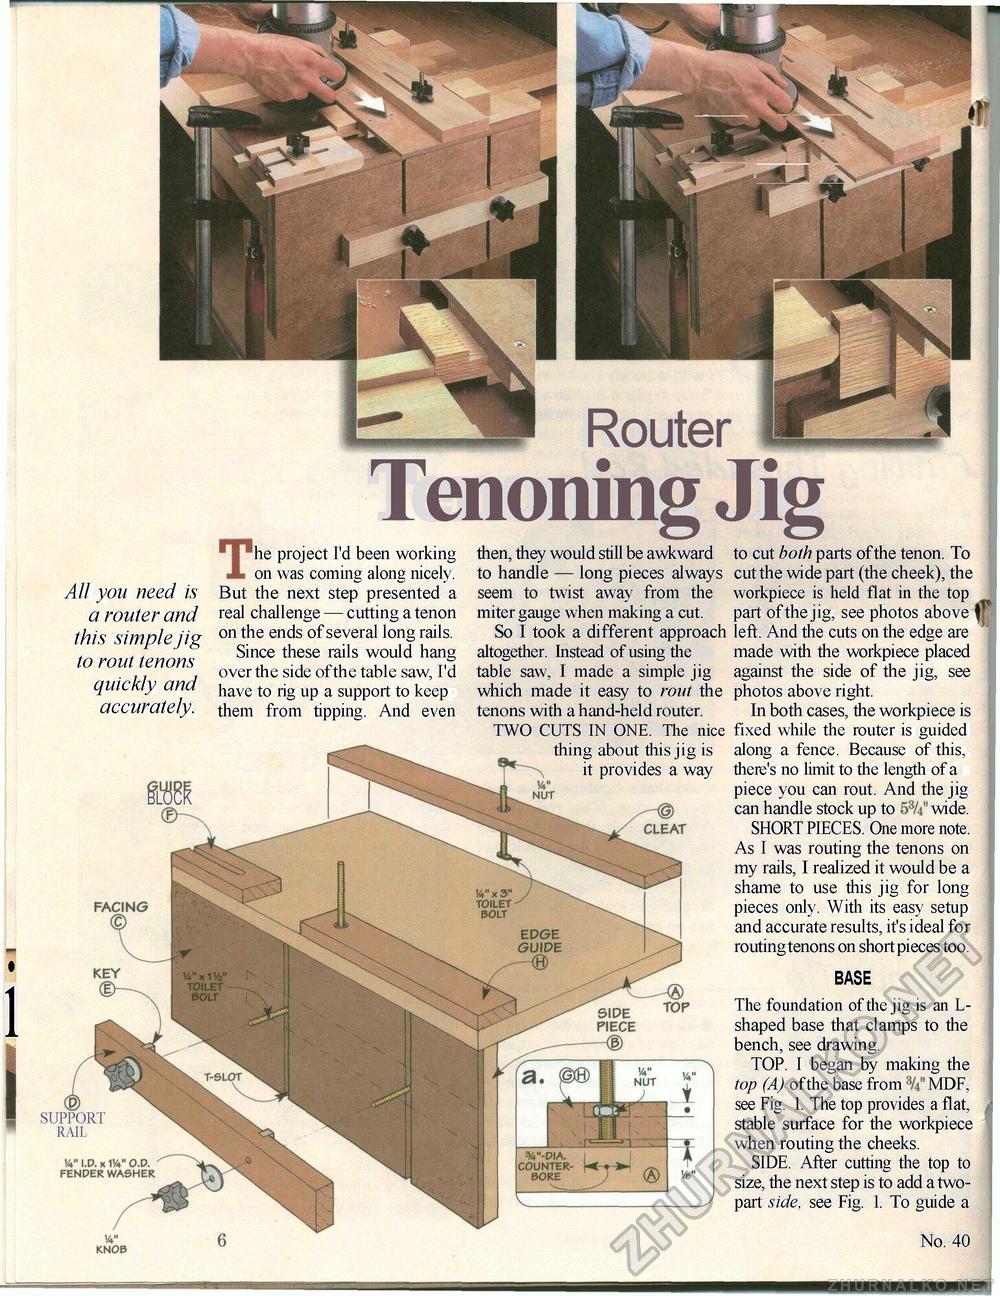
Router All you need is a router and this simple jig to rout tenons quickly and accurately. The project I'd been working on was coming along nicely. But the next step presented a real challenge — cutting a tenon on the ends of several long rails. Since these rails would hang over the side of the table saw, I'd have to rig up a support to keep them from tipping. And even Tenoning Jig it provides a way i <E SUPPORT RAIL then, they would still be awkward to cut both parts of the tenon. To to handle — long pieces always cut the wide part (the cheek), the seem to twist away from the workpiece is held flat in the top miter gauge when making a cut. part of the jig, see photos above f So I took a different approach left. And the cuts on the edge are altogether. Instead of using the made with the workpiece placed table saw, I made a simple jig against the side of the jig, see which made it easy to rout the photos above right. tenons with a hand-held router. In both cases, the workpiece is TWO CUTS IN ONE. The nice fixed while the router is guided thing about this jig is along a fence. Because of this, there's no limit to the length of a piece you can rout. And the jig can handle stock up to 53/4" wide. SHORT PIECES. One more note. As I was routing the tenons on my rails, I realized it would be a shame to use this jig for long pieces only. With its easy setup and accurate results, it's ideal for routing tenons on short pieces too. BASE The foundation of the jig is an L-shaped base that clamps to the bench, see drawing. TOP. I began by making the top (A) ofthe base from 3/4"MDF, see Fig. 1. The top provides a flat, stable surface for the workpiece when routing the cheeks. SIDE. After cutting the top to size, the next step is to add a two-part side, see Fig. 1. To guide a No. 40 |


