40 - Vacuum Clamping System, страница 8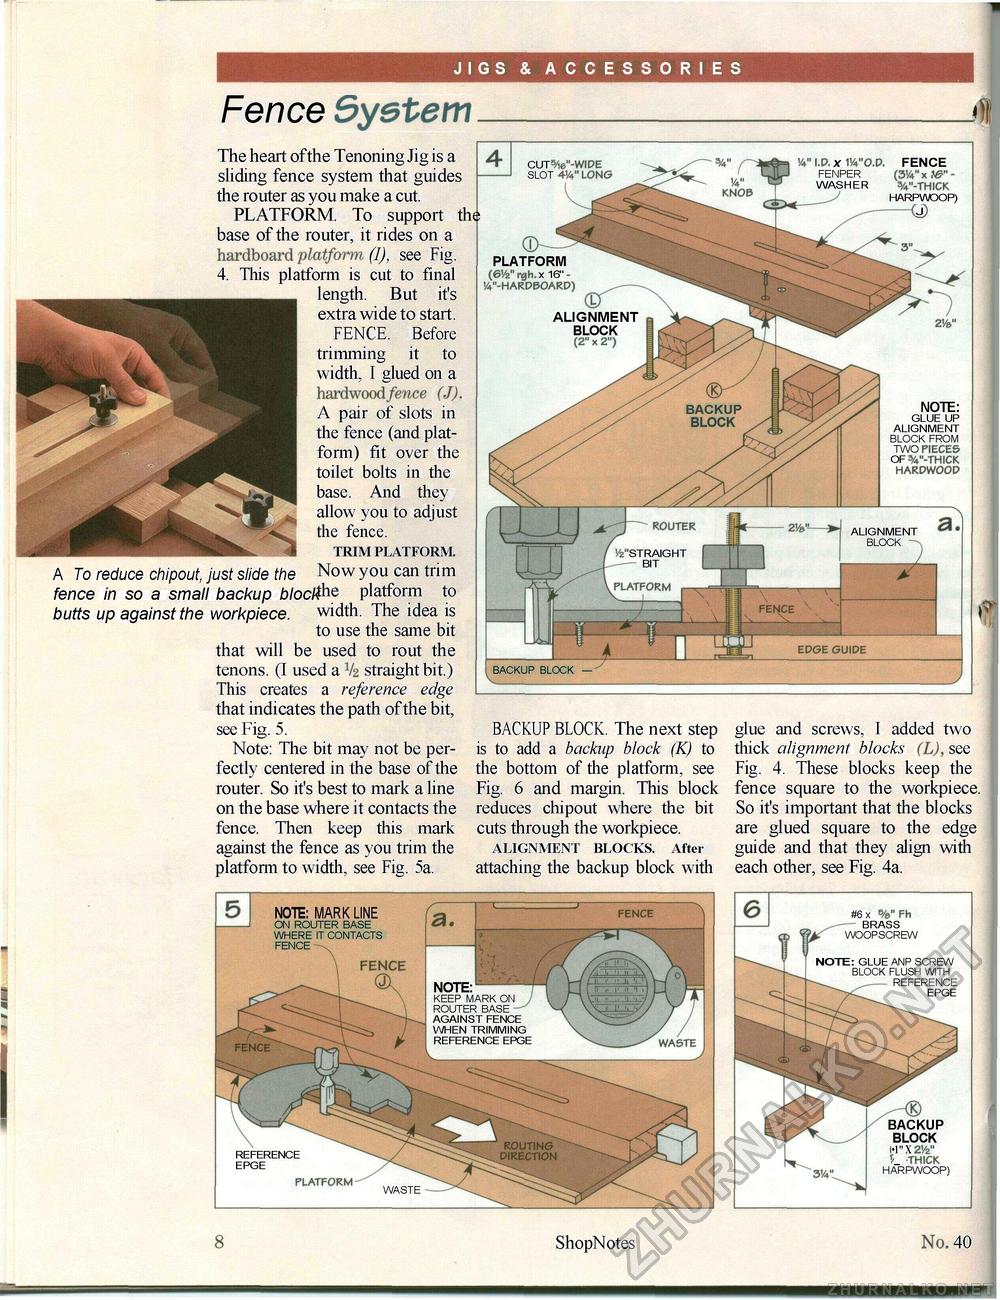
JIGS & ACCESSORIES Fence System The heart of the Tenoning Jig is a sliding fence system that guides the router as you make a cut. PLATFORM. To support the base of the router, it rides on a hardboard platform (I), see Fig. 4. This platform is cut to final length. But it's extra wide to start. FENCE. Before trimming it to width, I glued on a hardwood fence (J). A pair of slots in the fence (and platform) fit over the toilet bolts in the base. And they allow you to adjust the fence. TRIM PLATFORM. A To reduce chipout, just slide the Now you can trim fence in so a small backup blockhe piatfoi-m to butts up against the workpiece. wMtii. The idea is to use the same bit that will be used to rout the tenons. (I used a V2 straight bit.) This creates a reference edge that indicates the path of the bit, see Fig. 5. Note: The bit may not be perfectly centered in the base of the router. So it's best to mark a line on the base where it contacts the fence. Then keep this mark against the fence as you trim the platform to width, see Fig. 5a. BACKUP BLOCK. The next step is to add a backup block (K) to the bottom of the platform, see Fig. 6 and margin. This block reduces chipout where the bit cuts through the workpiece. ALIGNMENT BLOCKS. After attaching the backup block with glue and screws, I added two thick alignment blocks (L), see Fig. 4. These blocks keep the fence square to the workpiece. So it's important that the blocks are glued square to the edge guide and that they align with each other, see Fig. 4a. 40 ShopNotes 11 |


