43 - Build Your Own Dovetail Jig, страница 15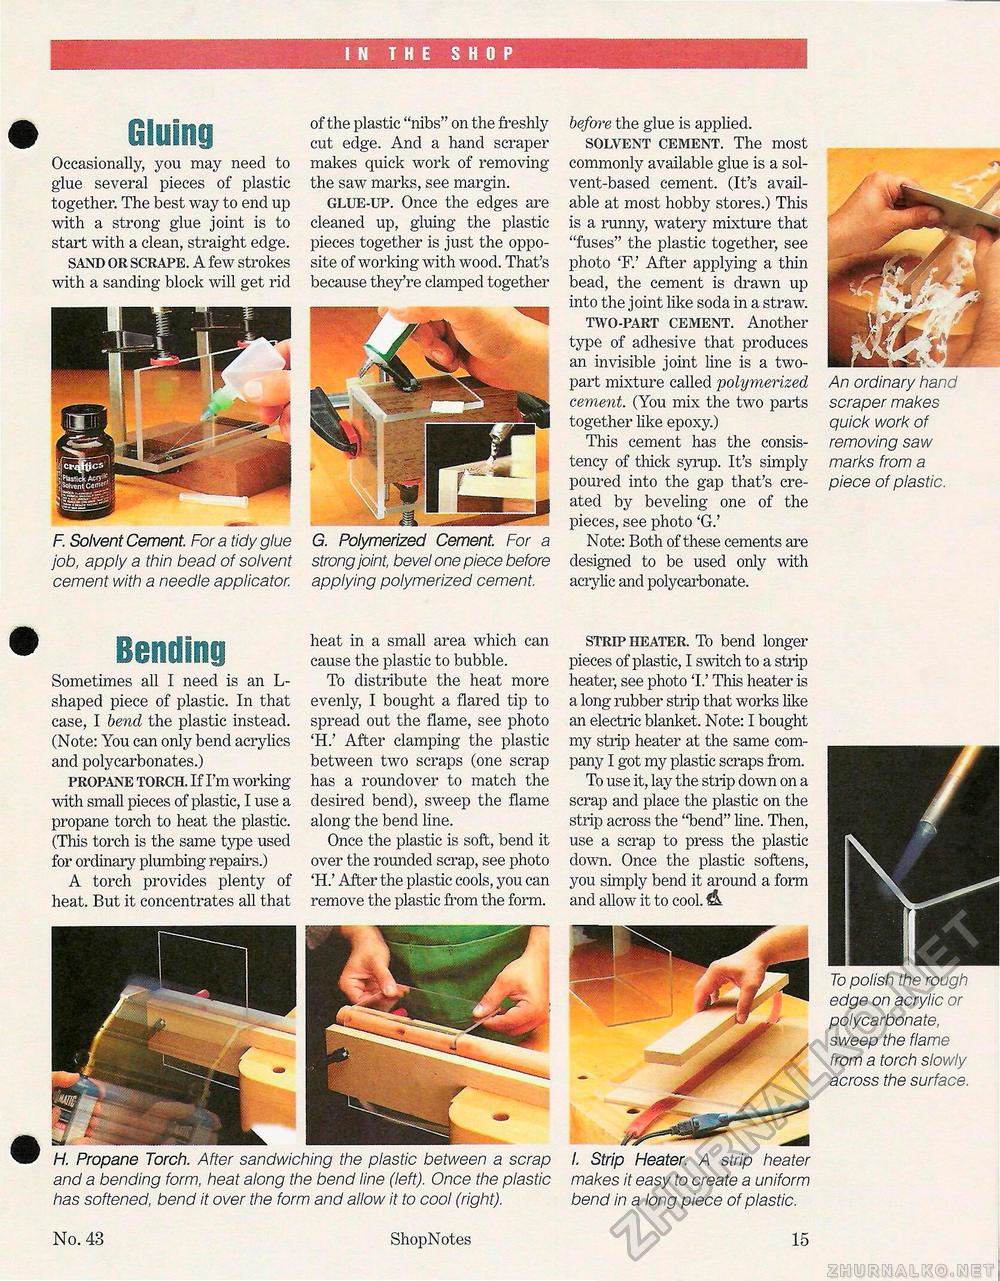
IN THE SHOP • Gluingof the plastic "nibs" on the freshly cut edge. And a hand scraper makes quick work of removing the saw marks, see margin. GLUE-UP. Once the edges are cleaned up, gluing the plastic pieces together is just the opposite of working with wood. That's because they're clamped together G. Polymerized Cement. For a strong joint, bevel one piece before applying polymerized cement. before the glue is applied. SOLVENT CEMENT. The most commonly available glue is a solvent-based cement. (It's available at most hobby stores.) This is a runny, watery mixture that "fuses" the plastic together, see photo 'F.' After applying a thin bead, the cement is drawn up into the joint like soda in a straw. TWO-PART CEMENT. Another type of adhesive that produces an invisible joint line is a two-part mixture called polymerized cement. (You mix the two parts together like epoxy.) This cement has the consistency of thick syrup. It's simply poured into the gap that's created by beveling one of the pieces, see photo 'G.' Note: Both of these cements are designed to be used only with acrylic and polycarbonate. Occasionally, you may need to glue several pieces of plastic together. The best way to end up with a strong glue joint is to start with a clean, straight edge. SAND OR SCRAPE. A few strokes with a sanding block will get rid F. Solvent Cement. For a tidy glue job, apply a thin bead of solvent cement with a needle applicator. removing saw marks from a piece of plastic. An ordinary hand scraper makes quick work of Bending Sometimes all I need is an Li-shaped piece of plastic. In that case, I bend the plastic instead. (Note: You can only bend acrylics and polycarbonates.) PROPANE TORCH. If I'm working with small pieces of plastic, I use a propane torch to heat the plastic. (This torch is the same type used for ordinary plumbing repairs.) A torch provides plenty of heat. But it concentrates all that heat in a small area which can cause the plastic to bubble. To distribute the heat more evenly, I bought a flared tip to spread out the flame, see photo 'H.' After clamping the plastic between two scraps (one scrap has a roundover to match the desired bend), sweep the flame along the bend line. Once the plastic is soft, bend it over the rounded scrap, see photo 'H.' After the plastic cools, you can remove the plastic from the form. STRIP HEATER. To bend longer pieces of plastic, I switch to a strip heater, see photo T.' This heater is a long rubber strip that works like an electric blanket. Note: I bought my strip heater at the same company I got my plastic scraps from. To use it, lay the strip down on a scrap and place the plastic on the strip across the "bend" line. Then, use a scrap to press the plastic down. Once the plastic softens, you simply bend it around a form and allow it to cool. & To polish the rough edge on acrylic or polycarbonate, sweep the flame from a torch slowly across the surface. I. Strip Heater. A strip heater makes it easy to create a uniform bend in a long piece of plastic. 15 H. Propane Torch. After sandwiching the plastic between a scrap and a bending form, heat along the bend line (left). Once the plastic has softened, bend it over the form and allow it to cool (right). No. 43 ShopNotes |


