43 - Build Your Own Dovetail Jig, страница 16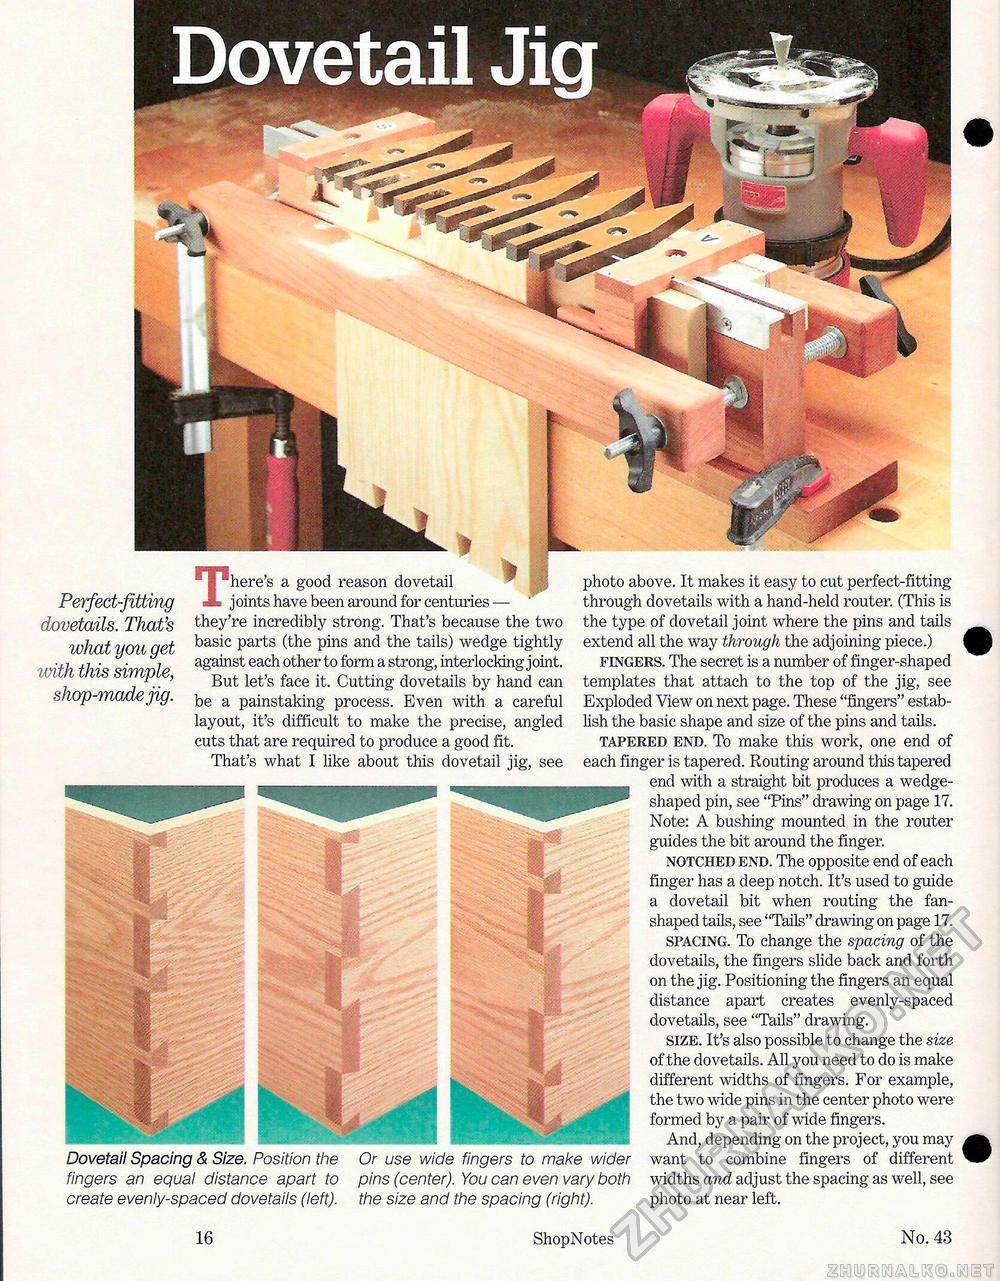
Perfect-fitting dovetails. That's what you get with this simple, shop-made jig. -here's a good reason dovetail > # rfe joints have been around for centuries — they're incredibly strong. That's because the two basic parts (the pins and the tails) wedge tightly against each other to form a strong, interlocking joint. But let's face it. Cutting dovetails by hand can be a painstaking process. Even with a careful layout, it's difficult to make the precise, angled cuts that are required to produce a good fit. That's what I like about this dovetail jig, see Dovetail Spacing & Size. Position the fingers an equal distance apart to create evenly-spaced dovetails (left). Or use wide fingers to make wider pins (center). You can even vary both the size and the spacing (right). photo above. It makes it easy to cut perfect-fitting through dovetails with a hand-held router. (This is the type of dovetail joint where the pins and tails extend all the way through the adjoining piece.) FINGERS. The secret is a number of finger-shaped templates that attach to the top of the jig, see Exploded View on next page. These "fingers" establish the basic shape and size of the pins and tails. TAPERED END. To make this work, one end of each finger is tapered. Routing around this tapered end with a straight bit produces a wedge-shaped pin, see "Pins" drawing on page 17. Note: A bushing mounted in the router guides the bit around the finger. NOTCHED END. The opposite end of each finger has a deep notch. It's used to guide a dovetail bit when routing the fan-shaped tails, see "Tails" drawing on page 17. SPACING. To change the spacing of the dovetails, the fingers slide back and forth on the jig. Positioning the fingers an equal distance apart creates evenly-spaced dovetails, see "Tails" drawing. SIZE. It's also possible to change the size of the dovetails. All you need to do is make different widths of fingers. For example, the two wide pins in the center photo were formed by a pair of wide fingers. And, depending on the project, you may want to combine fingers of different widths and adjust the spacing as well, see photo at near left. 16 ShopNotes No. 43 |


