47 - Build Your Own Mortising Machine , страница 8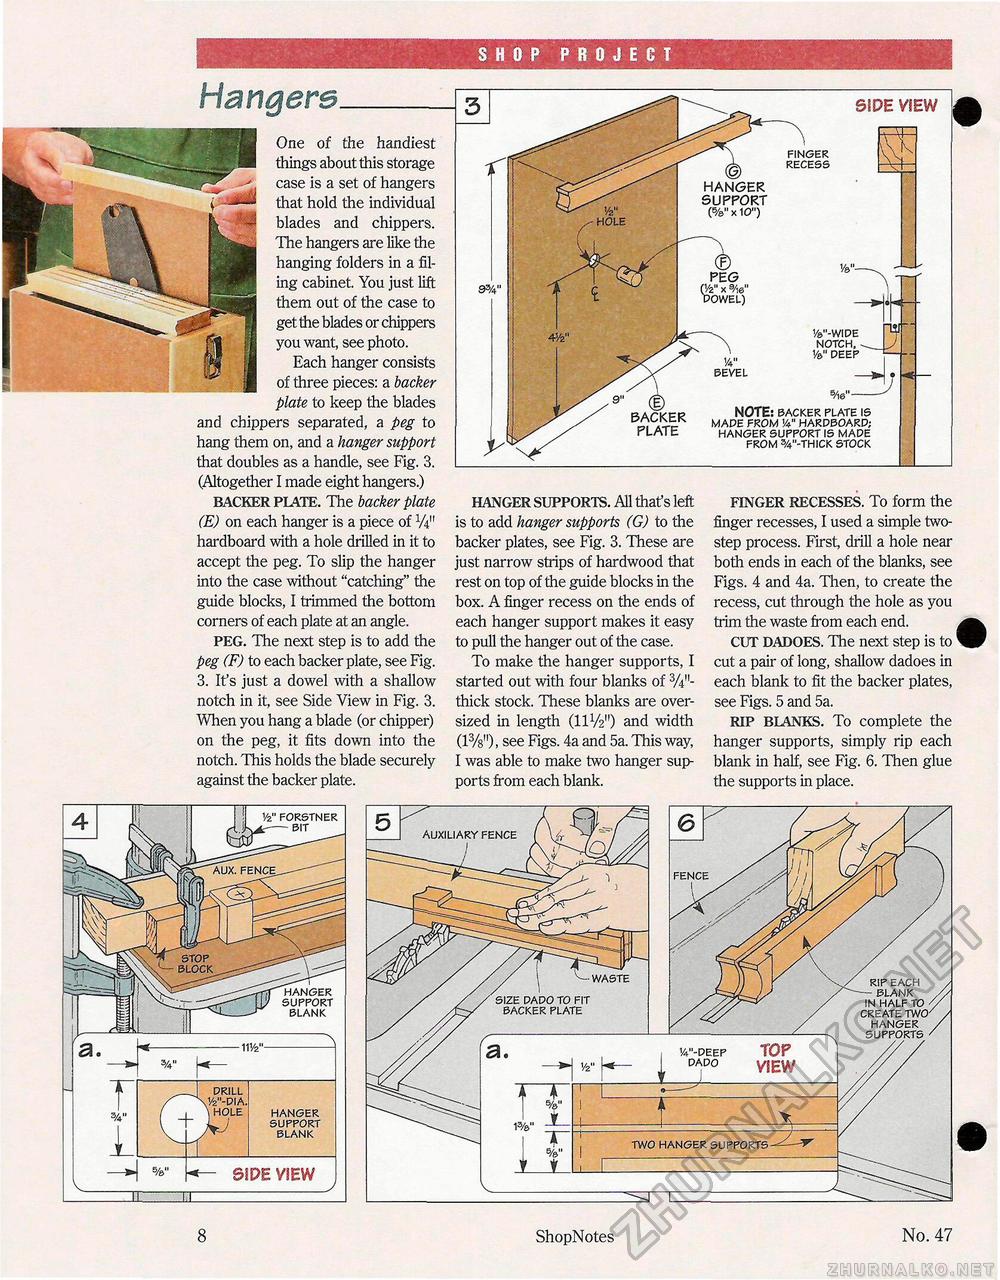
SHOP PROJECT Hangers. One of the handiest things about this storage case is a set of hangers that hold the individual blades and chippers. The hangers are like the hanging folders in a filing cabinet. You just lift them out of the case to get the blades or chippers you want, see photo. Each hanger consists of three pieces: a backer plate to keep the blades and chippers separated, a peg to hang them on, and a hanger support that doubles as a handle, see Fig. 3. (Altogether I made eight hangers.) BACKER PLATE. The backer plate (E) on each hanger is a piece of W hardboard with a hole drilled in it to accept the peg. To slip the hanger into the case without "catching" the guide blocks, I trimmed the bottom corners of each plate at an angle. PEG. The next step is to add the peg (F) to each backer plate, see Fig. 3. It's just a dowel with a shallow notch in it, see Side View in Fig. 3. When you hang a blade (or chipper) on the peg, it fits down into the notch. This holds the blade securely against the backer plate. HANGER SUPPORTS. All that's left is to add hanger supports (G) to the backer plates, see Fig. 3. These are just narrow strips of hardwood that rest on top of the guide blocks in the box. A finger recess on the ends of each hanger support makes it easy to pull the hanger out of the case. To make the hanger supports, I started out with four blanks of 3/4M-thick stock. These blanks are oversized in length (IIV211) and width (1%")> see Figs. 4a and 5a. This way, I was able to make two hanger supports from each blank. FINGER RECESSES. To form the finger recesses, I used a simple two-step process. First, drill a hole near both ends in each of the blanks, see Figs. 4 and 4a. Then, to create the recess, cut through the hole as you trim the waste from each end. CUT DADOES. The next step is to' cut a pair of long, shallow dadoes in each blank to fit the backer plates, see Figs. 5 and 5a. RIP BLANKS. To complete the hanger supports, simply rip each blank in half, see Fig. 6. Then glue the supports in place. 8 ShopNotes No. 47 |


