51 - Band Saw Upgrade, страница 10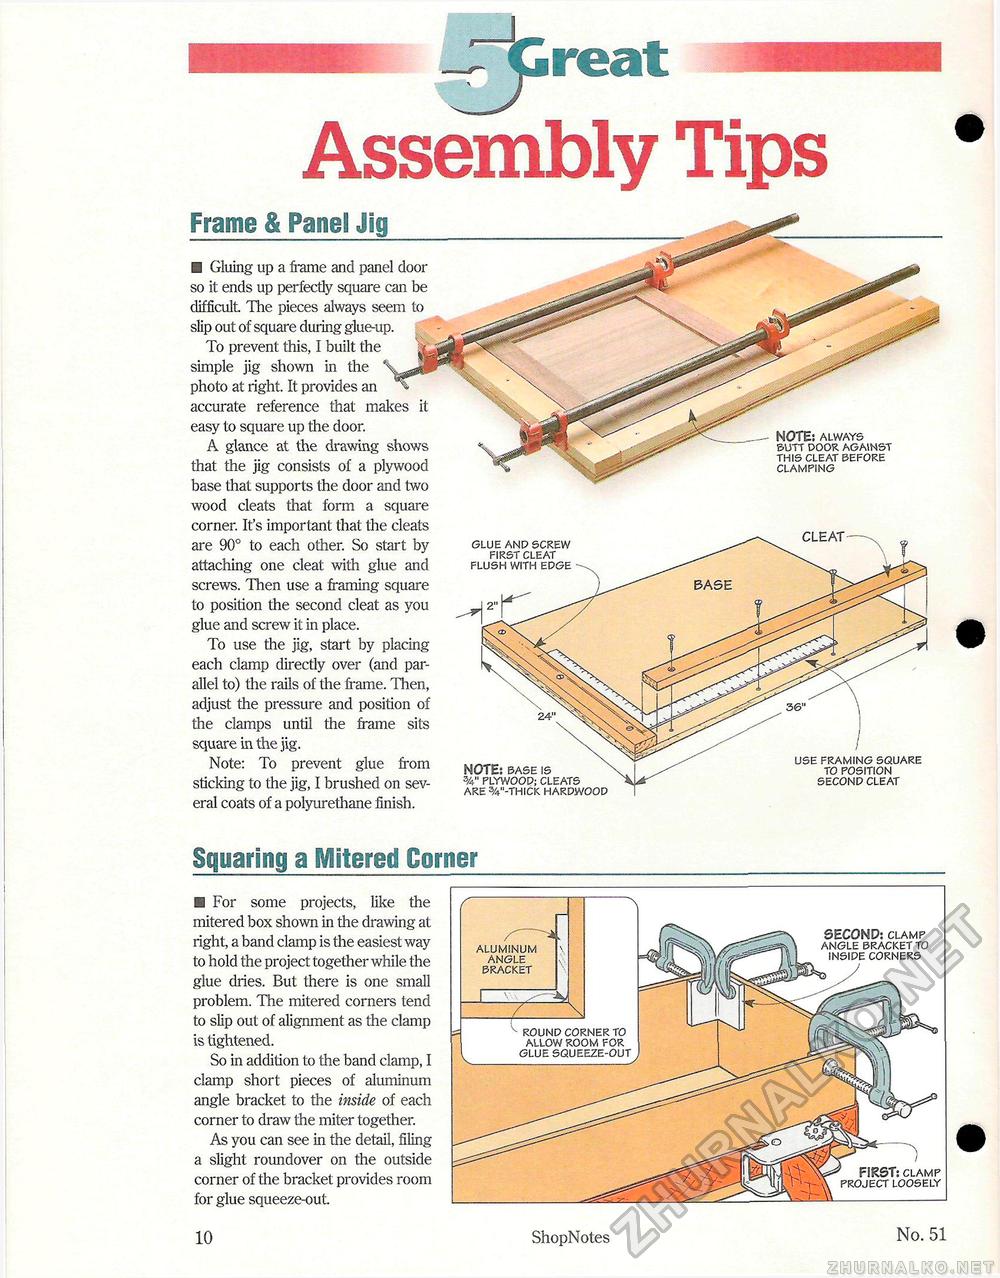
reat Assembly TipsFrame & Panel Jig□ Gluing up a frame and panel door so it ends up perfectly square can be difficult The pieces always seem to slip out of square during glue-up. To prevent this, I built the simple jig shown in the photo at right. It provides an accurate reference that makes it easy to square up the door. A glance at the drawing shows that the jig consists of a plywood base that supports the door and two wood cleats that form a square corner. It's important that the cleats are 90° to each other. So start by attaching one cleat with glue and screws. Then use a framing square to position the second cleat as you glue and screw it in place. To use the jig, start by placing each clamp directly over (and parallel to) the rails of the frame. Then, adjust the pressure and position of the clamps until the frame sits square in the jig. Note: To prevent glue from sticking to the jig, I brushed on several coats of a polyurethane finish. glue and screw first cleat flush with edge NOTE: always butt door against this cleat before clamping CLEAT NOTE: base is 3/4" plywood; cleats are 3/v'-thick hardwood use framing square to position second cleat Squaring a Mitered Corner□ For some projects, like the mitered box shown in the drawing at right, a band clamp is the easiest way to hold the project together while the glue dries. But there is one small problem. The mitered corners tend to slip out of alignment as the clamp is tightened. So in addition to the band clamp, I clamp short pieces of aluminum angle bracket to the inside of each corner to draw the miter together. As you can see in the detail, filing a slight roundover on the outside corner of the bracket provides room for glue squeeze-out.
SECOND: clamp angle bracket to inside corners FIRST: clamp project loosely 10 ShopNotes No. 51 |
||||||||||||||||||


