51 - Band Saw Upgrade, страница 7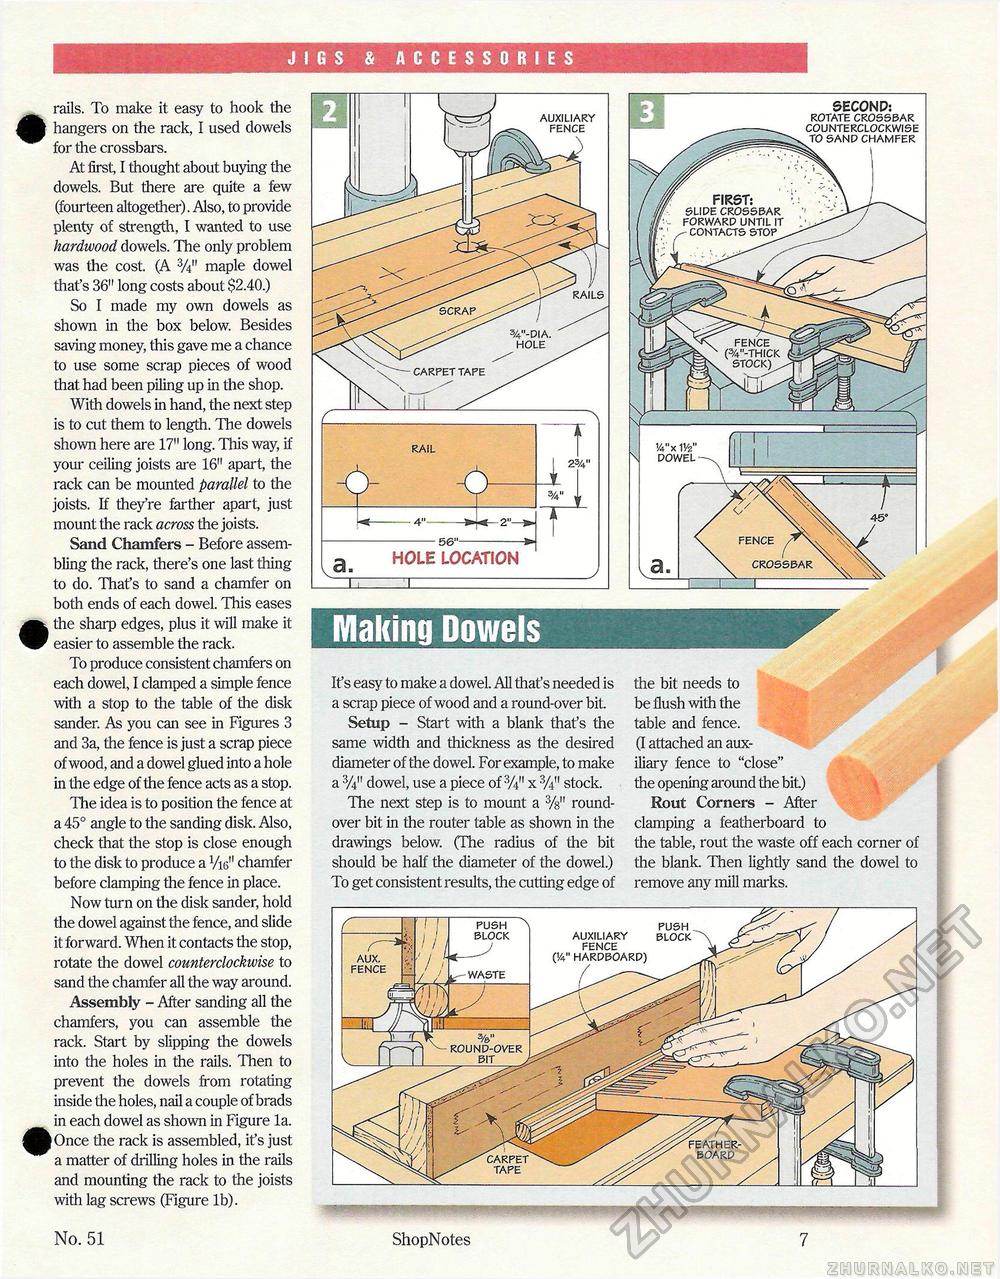
JIGS & ACCESSORIES • rails. To make it easy to hook the hangers on the rack, I used dowels for the crossbars. At first, I thought about buying the dowels. But there are quite a few (fourteen altogether). Also, to provide plenty of strength, I wanted to use hardwood dowels. The only problem was the cost. (A SA" maple dowel that's 36" long costs about $2.40.) So I made my own dowels as shown in the box below. Besides saving money, this gave me a chance to use some scrap pieces of wood that had been piling up in the shop. With dowels in hand, the next step is to cut them to length. The dowels shown here are 17" long. This way, if your ceiling joists are 16" apart, the rack can be mounted parallel to the joists. If they're farther apart, just mount the rack across the joists. Sand Chamfers - Before assembling the rack, there's one last thing to do. That's to sand a chamfer on both ends of each dowel. This eases • the sharp edges, plus it will make it easier to assemble the rack. To produce consistent chamfers on each dowel, I clamped a simple fence with a stop to the table of the disk sander. As you can see in Figures 3 and 3a, the fence is just a scrap piece of wood, and a dowel glued into a hole in the edge of the fence acts as a stop. The idea is to position the fence at a 45° angle to the sanding disk. Also, check that the stop is close enough to the disk to produce a VW' chamfer before clamping the fence in place. Now turn on the disk sander, hold the dowel against the fence, and slide it forward. When it contacts the stop, rotate the dowel counterclockwise to sand the chamfer all the way around. Assembly - After sanding all the chamfers, you can assemble the rack. Start by slipping the dowels into the holes in the rails. Then to prevent the dowels from rotating inside the holes, nail a couple of brads in each dowel as shown in Figure la. ^J^Once the rack is assembled, it's just a matter of drilling holes in the rails and mounting the rack to the joists with lag screws (Figure lb). Making DowelsIt's easy to make a dowel. All that's needed is a scrap piece of wood and a round-over bit. Setup - Start with a blank that's the same width and thickness as the desired diameter of the dowel. For example, to make a dowel, use a piece of %u x stock. The next step is to mount a %" round-over bit in the router table as shown in the drawings below. (The radius of the bit should be half the diameter of the dowel.) To get consistent results, the cutting edge of the bit needs to be flush with the table and fence. (I attached an auxiliary fence to "close" the opening around the bit) Rout Corners - After clamping a featherboard to the table, rout the waste off each corner of the blank. Then lightly sand the dowel to remove any mill marks. ■MMMMHMN PgMHMIMHHnaMH ^PIIPMMPMIPPPN !4"x V/2" powel SECOND: rotate crossbar counterclockwise to sand chamfer \ No. 51 ShopNotes 7 |


