51 - Band Saw Upgrade, страница 4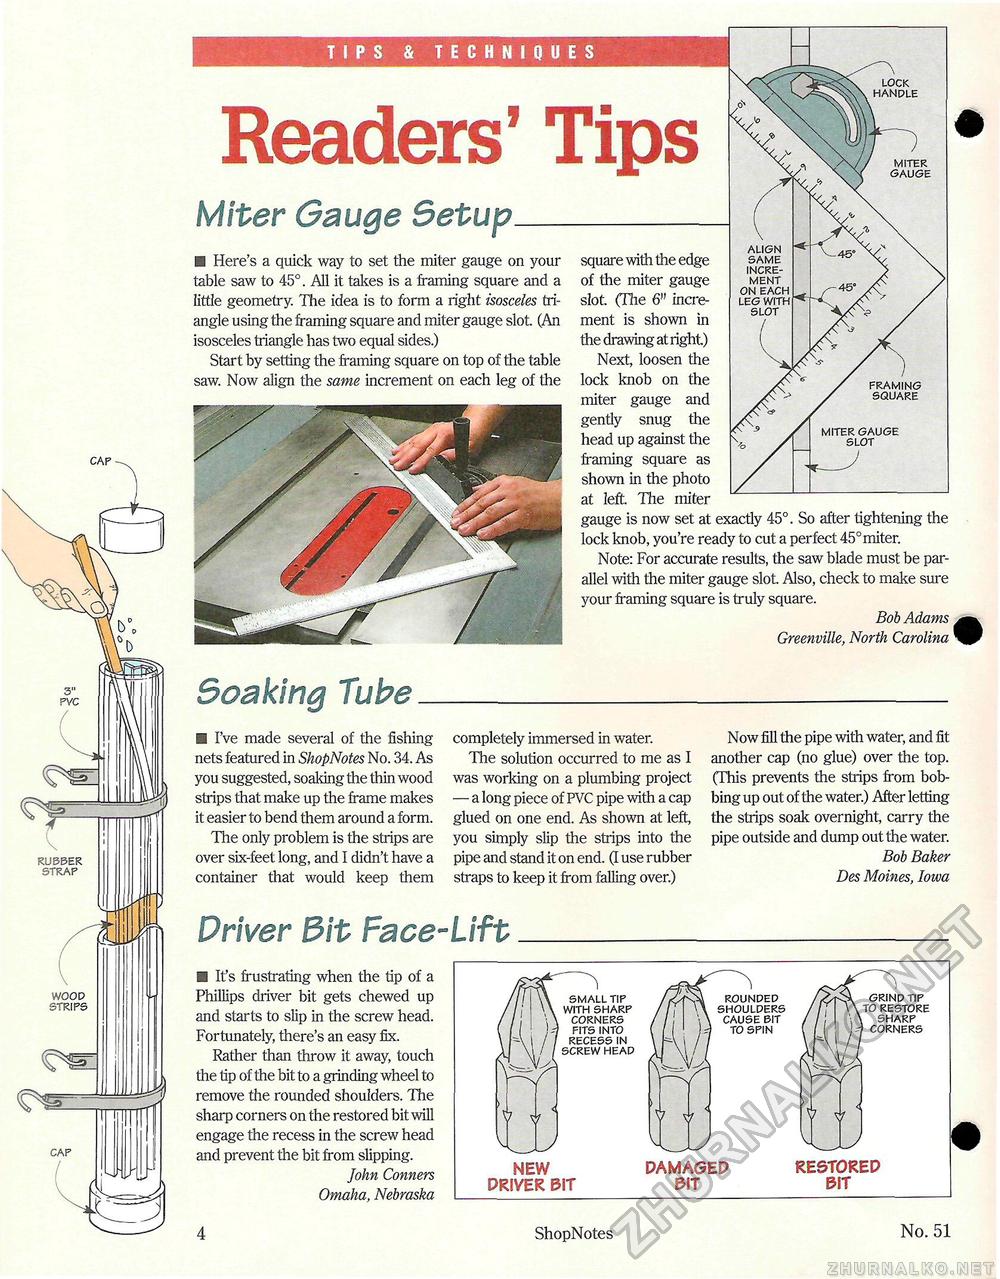
cap cap Soaking Tube ■ I've made several of the fishing nets featured in ShopNotes No. 34. As you suggested, soaking the thin wood strips that make up the frame makes it easier to bend them around a form. The only problem is the strips are over six-feet long, and I didn't have a container that would keep them completely immersed in water. The solution occurred to me as I was working on a plumbing project — a long piece of PVC pipe with a cap glued on one end. As shown at left, you simply slip the strips into the pipe and stand it on end. (I use rubber straps to keep it from falling over.) Now fill the pipe with water, and fit another cap (no glue) over the top. (This prevents the strips from bobbing up out of the water.) After letting the strips soak overnight, carry the pipe outside and dump out the water. Bob Baker Des Moines, Iowa Driver Bit Face-Lift □ It's frustrating when the tip of a Phillips driver bit gets chewed up and starts to slip in the screw head. Fortunately, there's an easy fix. Rather than throw it away, touch the tip of the bit to a grinding wheel to remove the rounded shoulders. The sharp corners on the restored bit will engage the recess in the screw head and prevent the bit from slipping. John Conners Omaha, Nebraska small tip with sharp corners fits into recess in screw head rounded shoulders cause bit to spin NEW DRIVER m DAMAGED m RESTORED m Readers' Tips Miter Gauge Setup_ □ Here's a quick way to set the miter gauge on your table saw to 45°. All it takes is a framing square and a little geometry. The idea is to form a right isosceles triangle using the framing square and miter gauge slot. (An isosceles triangle has two equal sides.) Start by setting the framing square on top of the table saw. Now align the same increment on each leg of the framing square . , align square with the edge same ^ . ° incre- of the miter gauge ment , . on each slot. (The 6" mere- leg with , . , . slot ment is shown m the drawing at right) Next, loosen the lock knob on the miter gauge and gently snug the head up against the framing square as shown in the photo at left. The miter gauge is now set at exactly 45°. So after tightening the lock knob, you're ready to cut a perfect 45°miter. Note: For accurate results, the saw blade must be parallel with the miter gauge slot. Also, check to make sure your framing square is truly square. Bob Adams Greenville, North Carolina miter gauge slot lock handle miter gauge 4 ShopNotes No. 51 |


