58 - Miter Saw Station, страница 19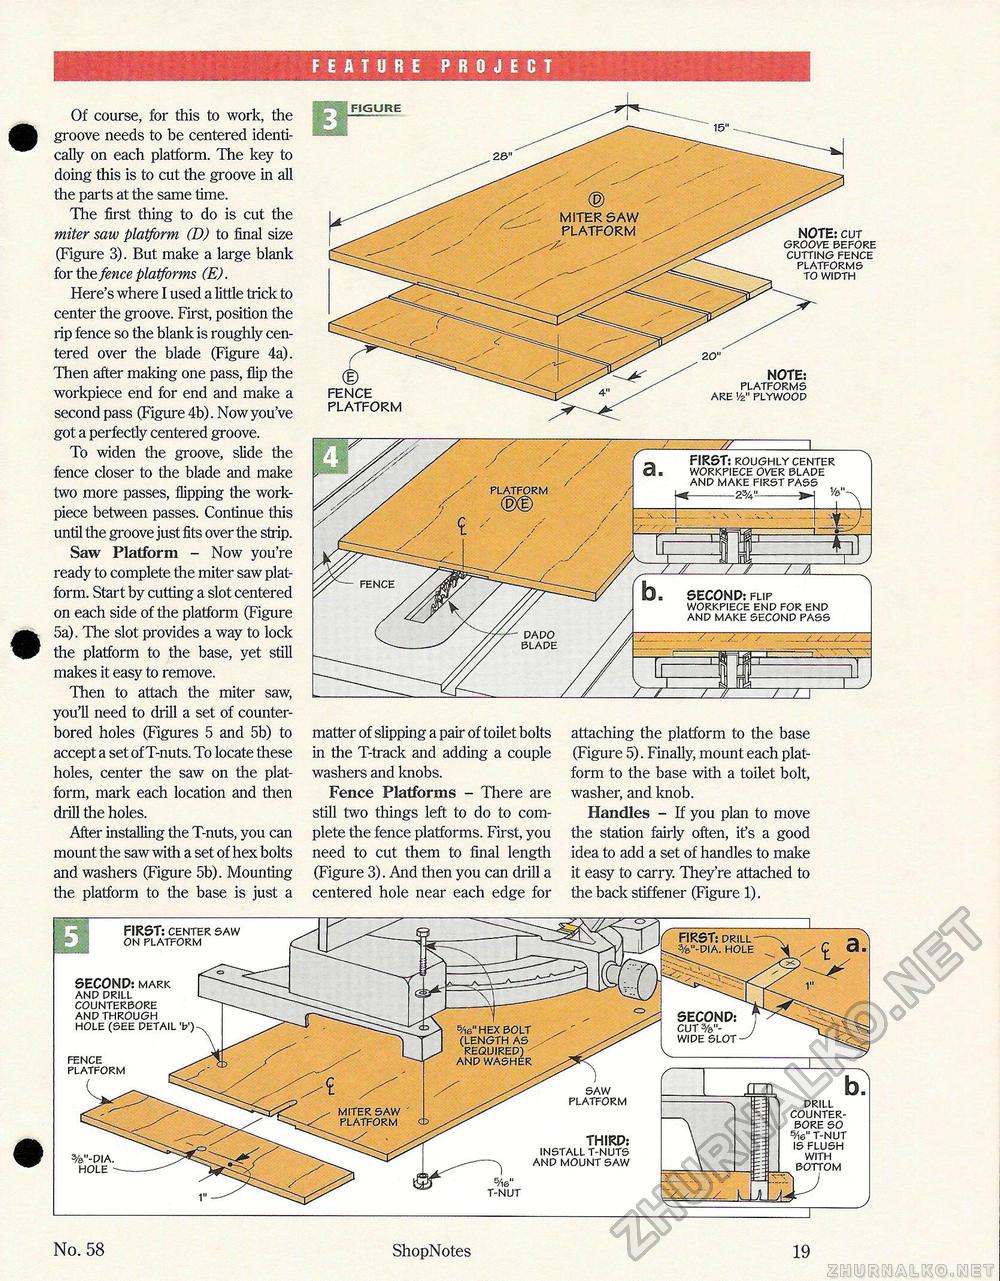
FEATURE PROJECT Of course, for this to work, the groove needs to be centered identically on each platform. The key to doing this is to cut the groove in all the parts at the same time. The first thing to do is cut the miter saw platform (D) to final size (Figure 3). But make a large blank for the fence platforms (E). Here's where I used a little trick to center the groove. First, position the rip fence so the blank is roughly centered over the blade (Figure 4a). Then after making one pass, flip the workpiece end for end and make a second pass (Figure 4b). Now you've got a perfectly centered groove. To widen the groove, slide the fence closer to the blade and make two more passes, flipping the work-piece between passes. Continue this until the groove just fits over the strip. Saw Platform - Now you're ready to complete the miter saw platform. Start by cutting a slot centered on each side of the platform (Figure 5a). The slot provides a way to lock the platform to the base, yet still makes it easy to remove. Then to attach the miter saw, you'll need to drill a set of counter-bored holes (Figures 5 and 5b) to accept a set of T-nuts. To locate these holes, center the saw on the platform, mark each location and then drill the holes. After installing the T-nuts, you can mount the saw with a set of hex bolts and washers (Figure 5b). Mounting the platform to the base is just a matter of slipping a pair of toilet bolts in the T-track and adding a couple washers and knobs. Fence Platforms - There are still two things left to do to complete the fence platforms. First, you need to cut them to final length (Figure 3). And then you can drill a centered hole near each edge for attaching the platform to the base (Figure 5). Finally, mount each platform to the base with a toilet bolt, washer, and knob. Handles - If you plan to move the station fairly often, it's a good idea to add a set of handles to make it easy to carry. They're attached to the back stiffener (Figure 1). platform FIRST: roughly center workpiece over blade and make first pass E- dado blade SECOND: flip workpiece end for end and make second pass No. 58 ShopNotes 19 |


