62 - Box Joint Jig, страница 21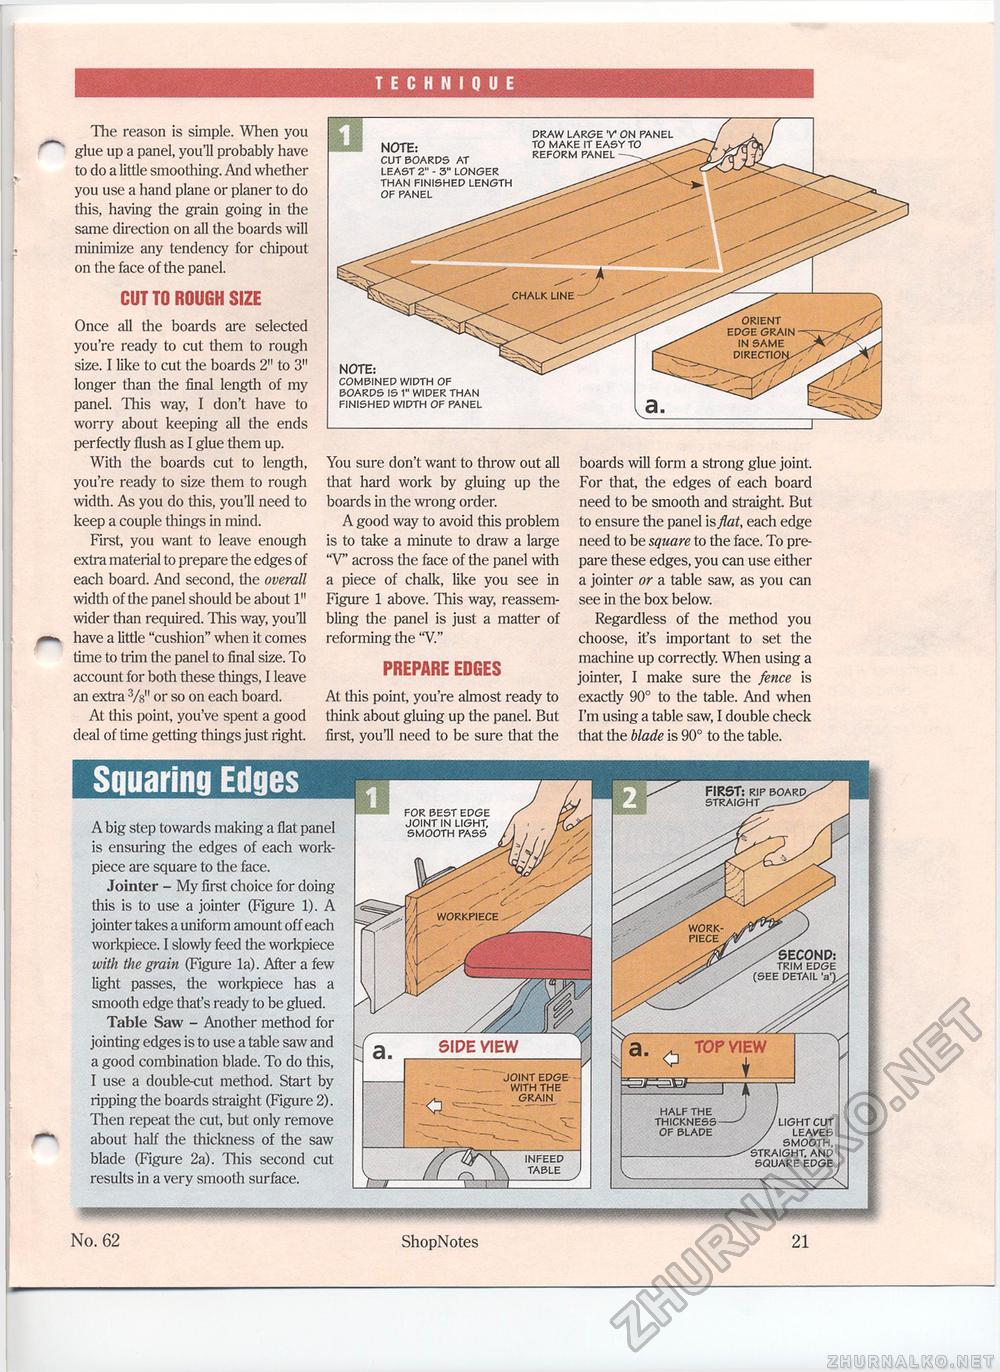
TECHNIQUE The reason is simple. When you glue up a panel, you'll probably have to do a little smoothing. And whether you use a hand plane or planer to do this, having the grain going in the same direction on all the boards will minimize any tendency for chipout on the face of the panel. CUT TO ROUGH SIZEOnce all the boards are selected you're ready to cut them to rough size. I like to cut the boards 2" to 3" longer than the final length of my panel. This way, I don't have to worry about keeping all the ends perfectly flush as I glue them up. With the boards cut to length, you're ready to size them to rough width. As you do this, you'll need to keep a couple things in mind. First, you want to leave enough extra material to prepare the edges of each board. And second, the overall width of the panel should be about 1" wider than required. This way, youH have a little "cushion" when it comes time to trim the panel to final size. To account for both these things, I leave an extra 3/«" or so on each board. At this point, you've spent a good deal of time getting things just right. Squaring EdgesA big step towards making a flat panel is ensuring the edges of each work-piece are square to the face. Jointer - My first choice for doing this is to use a jointer (Figure 1). A jointer takes a uniform amount off each workpiece. I slowly feed the workpiece with the grain (Figure la). After a few light passes, the workpiece has a smooth edge that's ready to be glued. Table Saw - Another method for jointing edges is to use a table saw and a good combination blade. To do this, I use a double-cut method. Start by ripping the boards straight (Figure 2). Then repeat the cut, but only remove about half the thickness of the saw blade (Figure 2a). This second cut results in a very smooth surface. You sure don't want to throw out all that hard work by gluing up the boards in the wrong order. A good way to avoid this problem is to take a minute to draw a large "V" across the face of the panel with a piece of chalk, like you see in Figure 1 above. This way, reassembling the panel is just a matter of reforming the "V." PREPARE EDGESAt this point, you're almost ready to think about gluing up the panel. But first, you'll need to be sure that the boards will form a strong glue joint. For that, the edges of each board need to be smooth and straight But to ensure the panel is flat, each edge need to be square to the face. To prepare these edges, you can use either a jointer or a table saw, as you can see in the box below. Regardless of the method you choose, ifs important to set the machine up correctly. When using a jointer, I make sure the fence is exactly 90° to the table. And when I'm using a table saw, I double check that the blade is 90° to the table. NOTE: COMBINED WIDTH OF BOARDS IS 1" WIDER THAN FINISHED WIDTH OF PANEL NOTE: CUT BOARDS AT LEAST 2" - 3" LONGER THAN FINISHED LENGTH OF PANEL DRAW LARGE V ON PANEL TO MAKE IT EASY TO REFORM PANEL WORKPIECE WORK-PIECE /SECOND: ^ TRIM EDGE (SEE DETAIL 'a'Y FIRST: RIP BOARD,. STRAIGHT TOP VIEW I HALF THE THICKNESS OF BLADE LIGHT CUT LEAVES SMOOTH, 'STRAIGHT. AND SQUARE EDGE SIDE VIEW JOINT EDGE WITH THE GRAIN INFEED TABLE FOR BEST EDGE JOINT IN LIGHT, SMOOTH PASS No. 62 ShopNotes 21 |


