69 - Bench Top Storage System, страница 7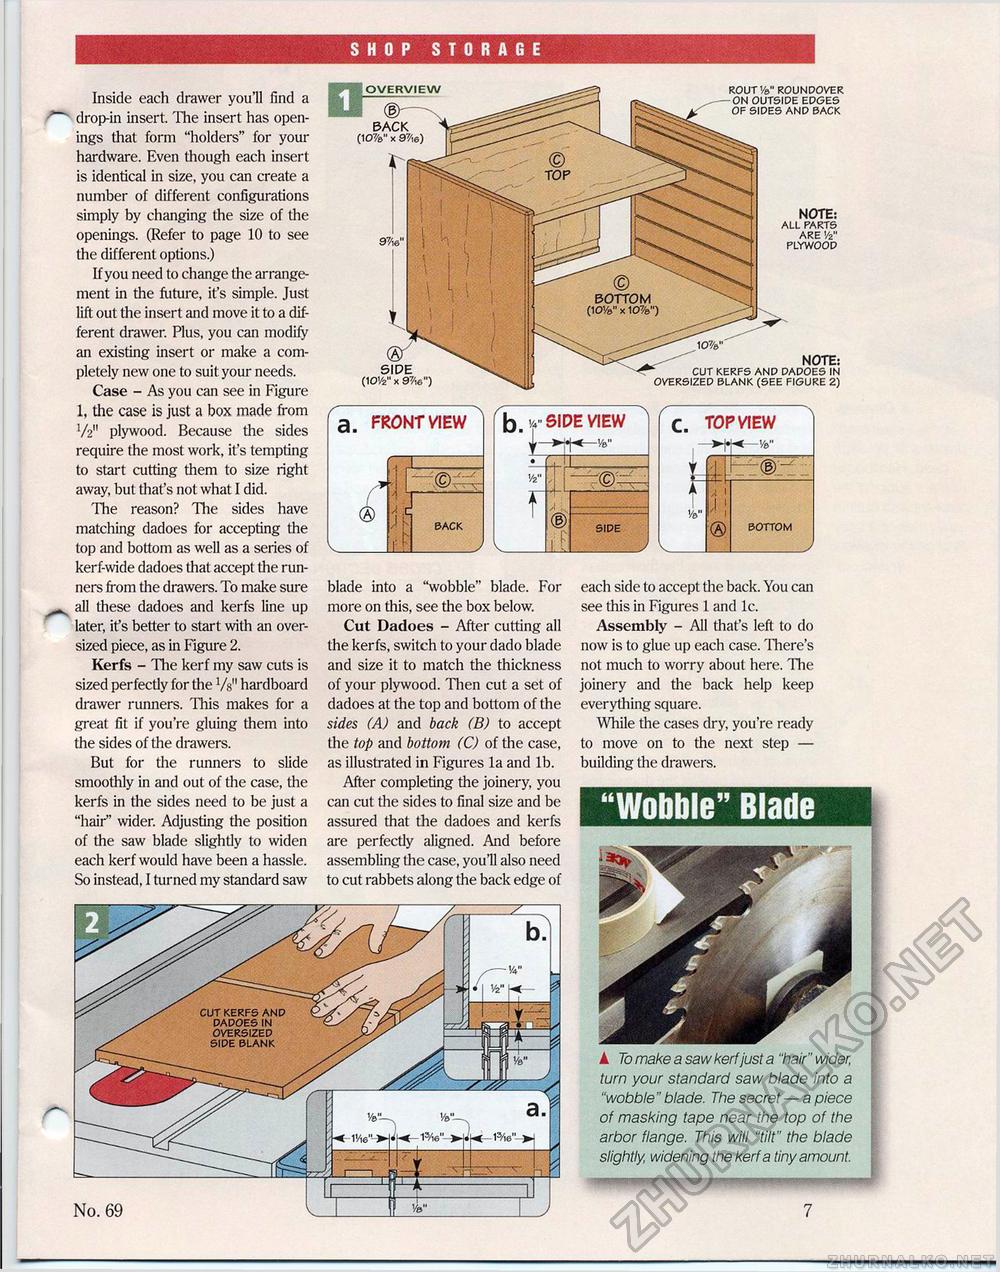
SHOP STORAGE Wobble" Blade3. front view BACK blade into a "wobble" blade. For more on this, see the box below. Cut Dadoes - After cutting all the kerfs, switch to your dado blade and size it to match the thickness of your plywood. Then cut a set of dadoes at the top and bottom of the sides (A) and back (B) to accept the top and bottom (C) of the case, as illustrated in Figures la and lb. After completing the joinery, you can cut the sides to final size and be assured that the dadoes and kerfs are perfectly aligned. And before assembling the case, you'll also need to cut rabbets along the back edge of c. topview BOTTOM : J Inside each drawer you'll find a drop-in insert. The insert has openings that form "holders" for your hardware. Even though each insert is identical in size, you can create a number of different configurations simply by changing the size of the openings. (Refer to page 10 to see the different options.) If you need to change the arrangement in the future, it's simple. Just lift out the insert and move it to a different drawer. Plus, you can modify an existing insert or make a completely new one to suit your needs. Case - As you can see in Figure 1, the case is just a box made from V211 plywood. Because the sides require the most work, it's tempting to start cutting them to size right away, but that's not what I did. The reason? The sides have matching dadoes for accepting the top and bottom as well as a series of kerf-wide dadoes that accept the runners from the drawers. To make sure ^^ all these dadoes and kerfs line up later, it's better to start with an oversized piece, as in Figure 2. Kerfs - The kerf my saw cuts is sized perfectly for the Vs" hardboard drawer runners. This makes for a great fit if you're gluing them into the sides of the drawers. But for the runners to slide smoothly in and out of the case, the kerfs in the sides need to be just a "hair" wider. Adjusting the position of the saw blade slightly to widen each kerf would have been a hassle. So instead, I turned my standard saw each side to accept the back. You can see this in Figures 1 and lc. Assembly - All that's left to do now is to glue up each case. There's not much to worry about here. The joinery and die back help keep everything square. While the cases dry, you're ready to move on to the next step — building the drawers. ▲ To make a saw kerf just a "hair" wider, turn your standard saw blade into a "wobble" blade. The secret — a piece of masking tape near the top of the arbor flange. This will "tilt" the blade slightly, widening the kerf a tiny amount. ROUT '/a" ROUNDOVER ON OUTSIDE EDGES OF SIDES AND BACK OVERVIEW BACK (10%" x 97/\e) SIDE (IOV2" x 97/ie") NOTE: ALL PARTS ARE '/•>" PLYWOOD BOTTOM (10'/a" x 10%") NOTE: KERFS AND DADOES IN BLANK (SEE FIGURE 2) side view side |


