69 - Bench Top Storage System, страница 10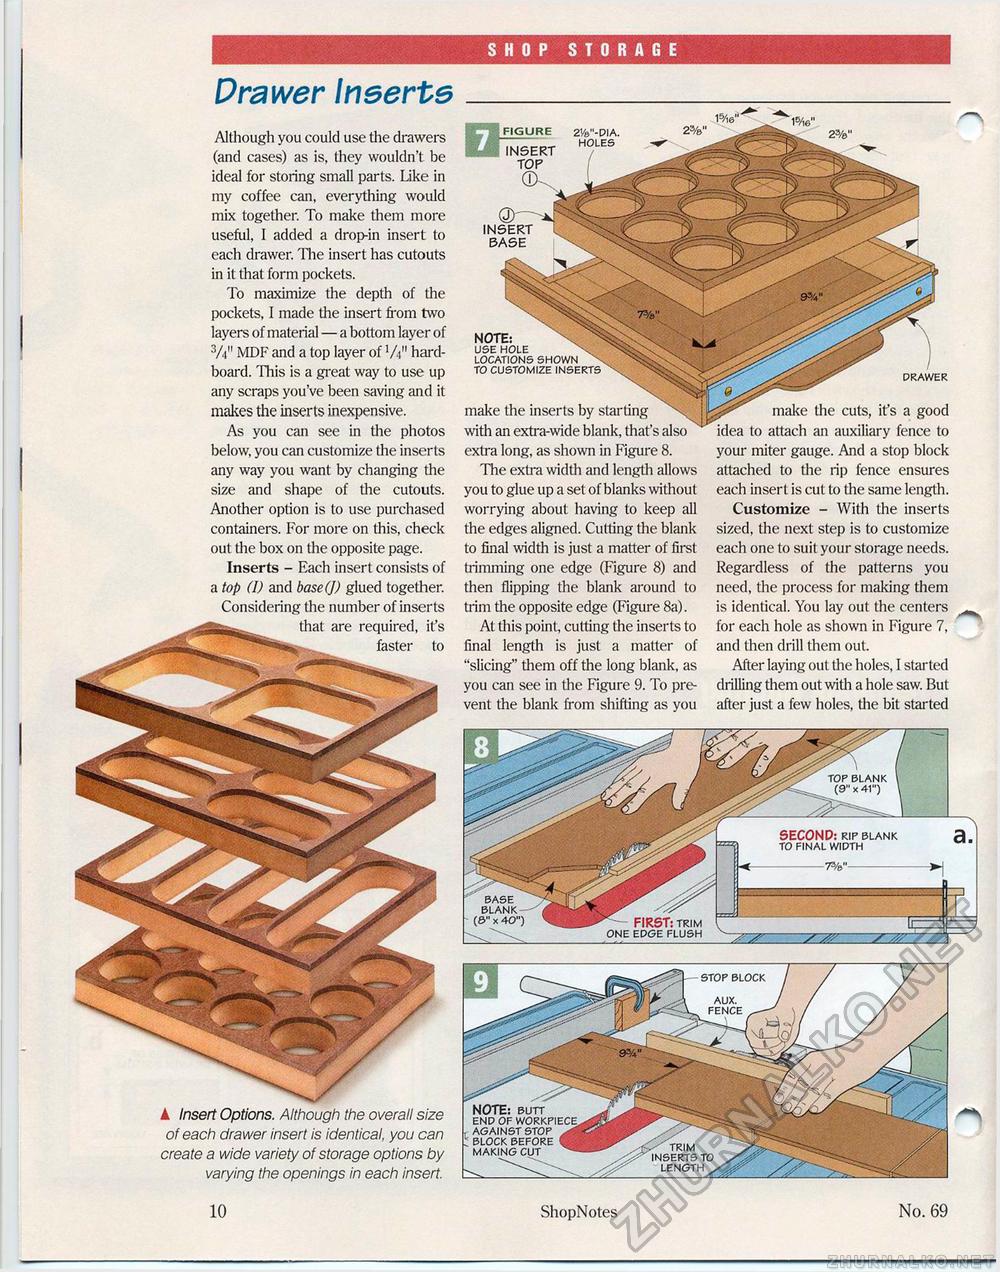
SHOP STORAGE Drawer IneerteD FIGURE 2'/e"-DIA. "TNSERT H°LES NOTE: use hole locations shown to customize inserts drawer make the inserts by starting with an extra-wide blank, that's also extra long, as shown in Figure 8. The extra width and length allows you to glue up a set of blanks without worrying about having to keep all the edges aligned. Cutting the blank to final width is just a matter of first trimming one edge (Figure 8) and then flipping the blank around to trim the opposite edge (Figure 8a). At this point, cutting the inserts to final length is just a matter of "slicing" them off the long blank, as you can see in the Figure 9. To prevent the blank from shifting as you make the cuts, it's a good idea to attach an auxiliary fence to your miter gauge. And a stop block attached to the rip fence ensures each insert is cut to the same length. Customize - With the inserts sized, the next step is to customize each one to suit your storage needs. Regardless of the patterns you need, the process for making them is identical. You lay out the centers for each hole as shown in Figure 7, and then drill them out. After laying out the holes, I started drilling diem out witii a hole saw. But after just a few holes, die bit started Although you could use the drawers (and cases) as is, they wouldn't be ideal for storing small parts. Like in my coffee can, everything would mix together. To make them more useful, I added a drop-in insert to each drawer. 'Hie insert has cutouts in it that form pockets. To maximize the depth of the pockets, I made the insert from two layers of material — a bottom layer of 3/V' MDF and a top layer of V4" hard-board. This is a great way to use up any scraps you've been saving and it makes the inserts inexpensive. As you can see in the photos below, you can customize the inserts any way you want by changing the size and shape of the cutouts. Another option is to use purchased containers. For more on this, check out the box on the opposite page. Inserts - Each insert consists of a top (I) and base(J) glued together. Considering the number of inserts that are required, it's faster to ▲ Insert Options. Although the overall size of each drawer insert is identical, you can create a wide variety of storage options by varying the openings in each insert. top blank (9" x 41") SECOND: rip blank to final width stop block aux. fence NOTE: butt end of workpiece against stop ^ block before §« making cut .-•■' trim inserts to length , 10 ShopNotes No. 69 |


