79 - Slant Front Tool Cart, страница 29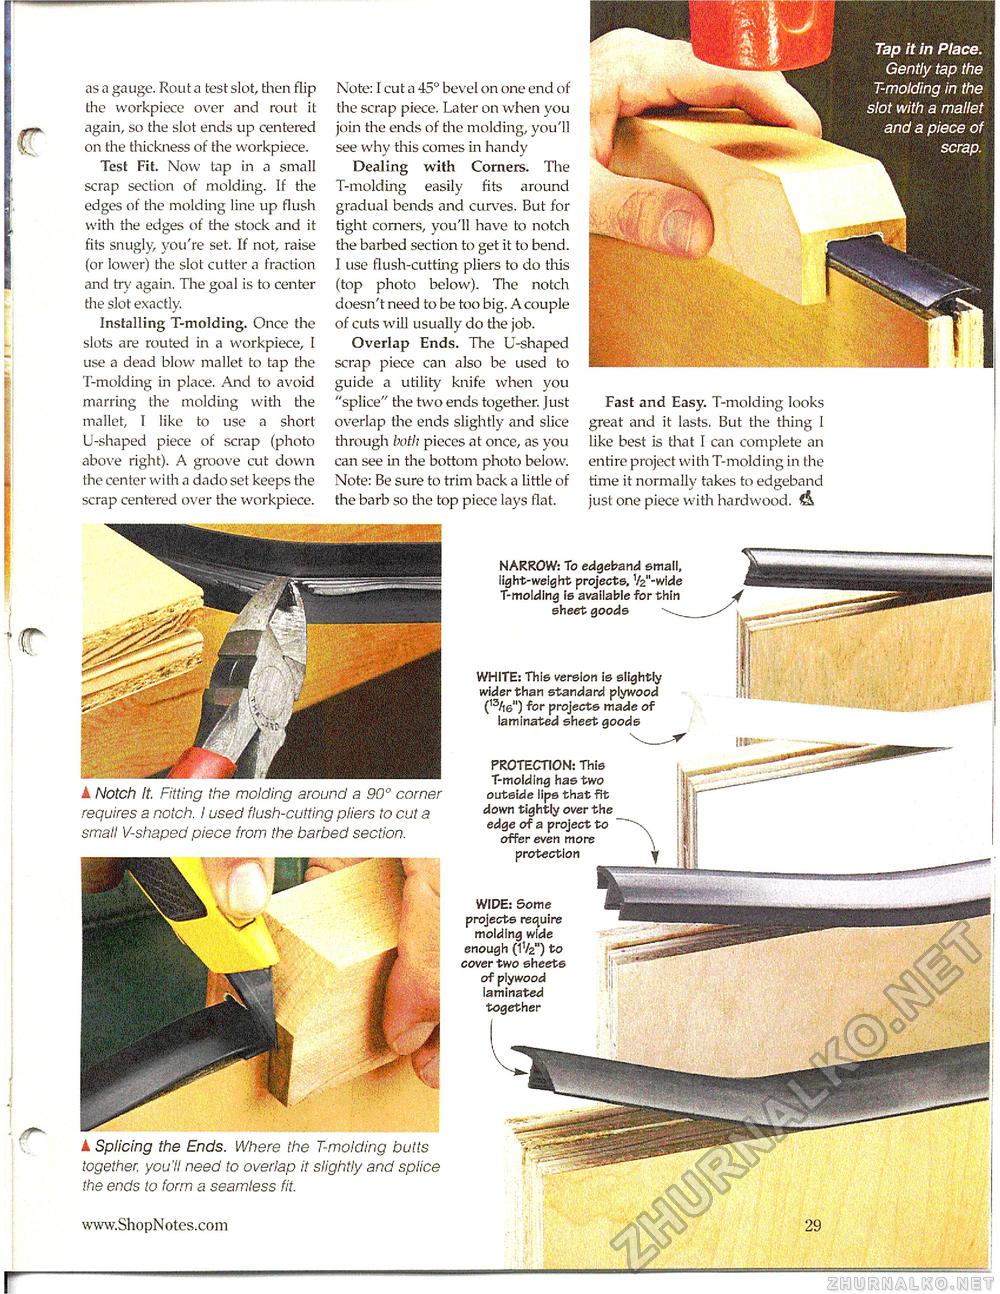
as a gauge. Rout a test slot, then flip the workpiece over and rout it again, so the slot ends up centered on the thickness of the workpiece. Test Fit. Now tap in a small scrap section of molding. If the edges of the molding line up flush with the edges of the stock and it fits snugly, you're set. If not, raise (or lower) the slot cutter a fraction and try again. The goal is to center the slot exactly. Installing T-moIding. Once the slots are routed in a workpiece, I use a dead blow mallet to tap the T-moiding in place. And to avoid marring the molding with the mallet, 1 like to use a short U-shaped piece of scrap (photo above right). A groove cut down the center with a dado set keeps the scrap centered over the workpiece. Note: I cut a 45° bevel on one end of the scrap piece. Later on when you join the ends of the molding, you'll see why this comes in handy Dealing with Comers. The T-molding easily fits around gradual bends and curves. But for tight corners, you'll have to notch the barbed section to get it to bend. I use flush-cutting pliers to do tliis (top photo below). The notch doesn't need to be too big. A couple of cuts will usually do the job. Overlap Ends. The U-shaped scrap piece can also be used to guide a utility knife when you "splice" the two ends together, just overlap the ends slightly and slice through both pieces at once, as you can see in the bottom photo below. Note: Be sure to trim back a little of the barb so the top piece lays flat. Fast and Easy. T-molding looks great and it lasts. But the thing 1 like best is that I can complete an entire project with T-molding in the time it normally takes to edgeband just one piece with hardwood. A Notch It. Fitting the molding around a 90° corner requires a notch. I used flush-cutting pliers to cut a small V-shaped piece from the barbed section. k Splicing the Ends. Where the T-molding butts together, you'll need to overlap it slightly and splice the ends to form a seamless fit. Tap it in Place. Gently tap the T-molding in the ■lot with a mallet and a piece of scrap. NARROW: to edgeband small, light-weight projects, Vz'-wide T-molding is available for thin sheet goods WHITE: This version is slightly wider than standard plywood (13/ie") for projects made of laminated sheet goods PROTECTION: This T-molding has two outside lips that fit down tightly over the edge of a project to offer even more protection WIPE: Some projects require molding wide enough (1 V2°) to cover two sheets of plywood laminated |


