80 - Heirloom Tool Cabinet, страница 29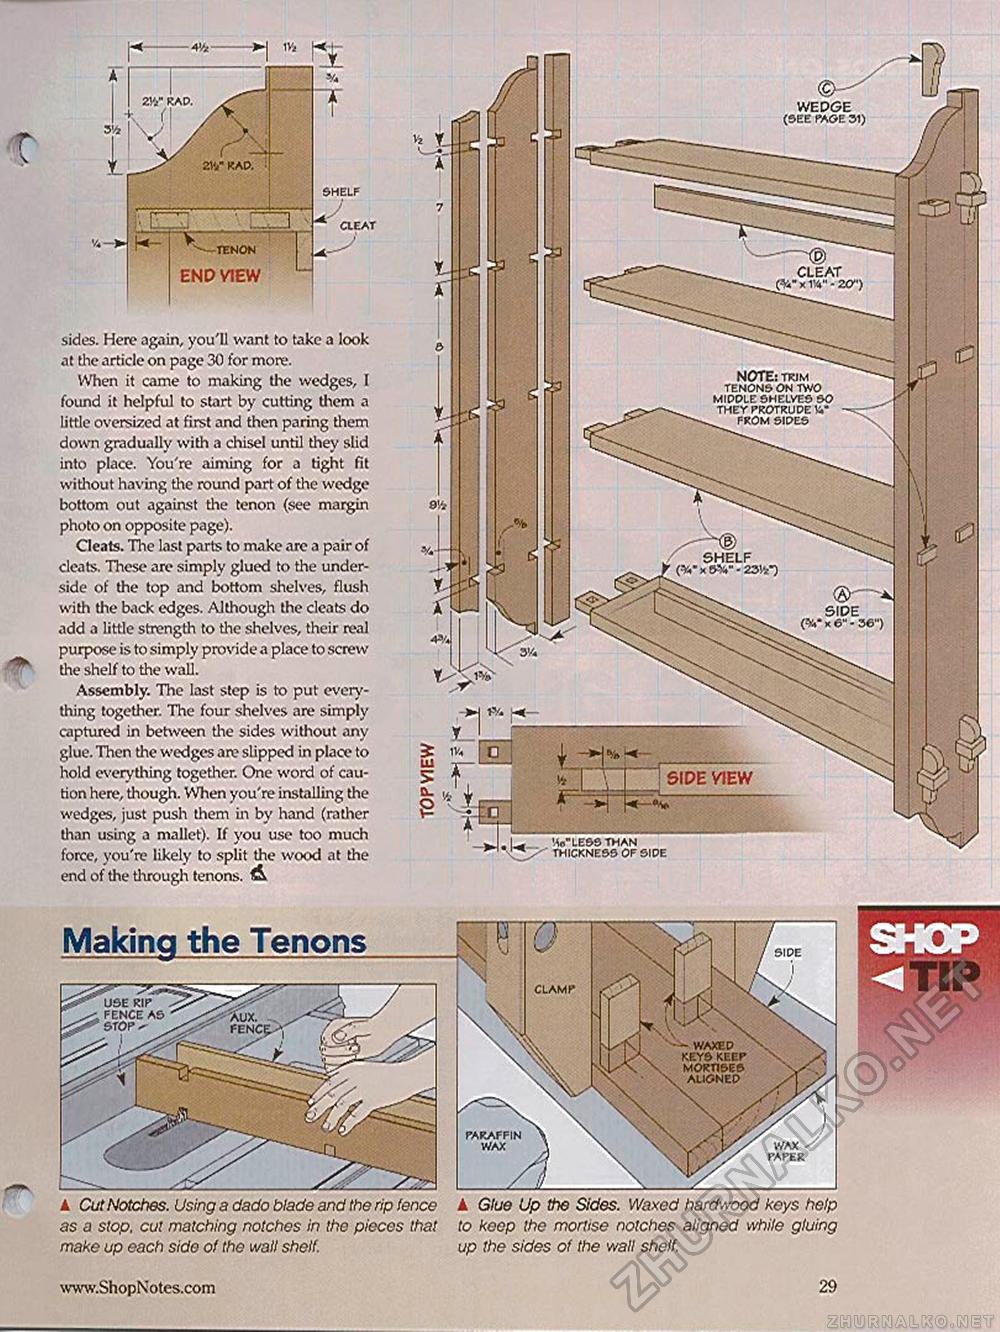
Making the Tenons sides. Here again, you'll want to take a look at the article on page 30 for more. When it came to making the wedges, I found it helpful to start by cutting them a little oversized at first and then paring them down gradually with a chisel until they slid into place. You're aiming for a tight fit without having the round part of the wedge bottom out against the tenon (see margin photo on opposite page). Cleats. The last parts to make are a pair of cleats. These are simply glued to the underside of the top and bottom shelves, flush with the back edges. Although the cleats do add a little strength to the shelves, their real purpose is to simply provide a place to screw the shelf to the wall. Assembly. The last step is to put everything together. The four shelves are simply captured in between the sides without any glue. Then the wedges are slipped in place to hold everything together. One word of caution here, though. When you're installing the wedges, just push them in by hand (rather than using a mallet). If you use too much force, you're likely to split the wood at the end of the through tenons. A A Cut Notches. Using a dado blade and the rip fence as a stop, cut matching notches in the pieces that make up each side of the wall shelf. v*->> N- tenon END VIEW WEDGE (SEE PAGE 31) CLEAT x 1W ■ 2O") NOTE: TRIM TENONS ON TWO MIDDLE SHELVES SO THEY PROTRUDE V w FROM SIDES •V LESS THAN THICKNESS OF SIDE PARAFFIN WAX ▲ Glue Up the Sides. Waxed hardwood keys help to keep the mortise notches aligned while gluing up the sides of the wall shelf. |


