80 - Heirloom Tool Cabinet, страница 27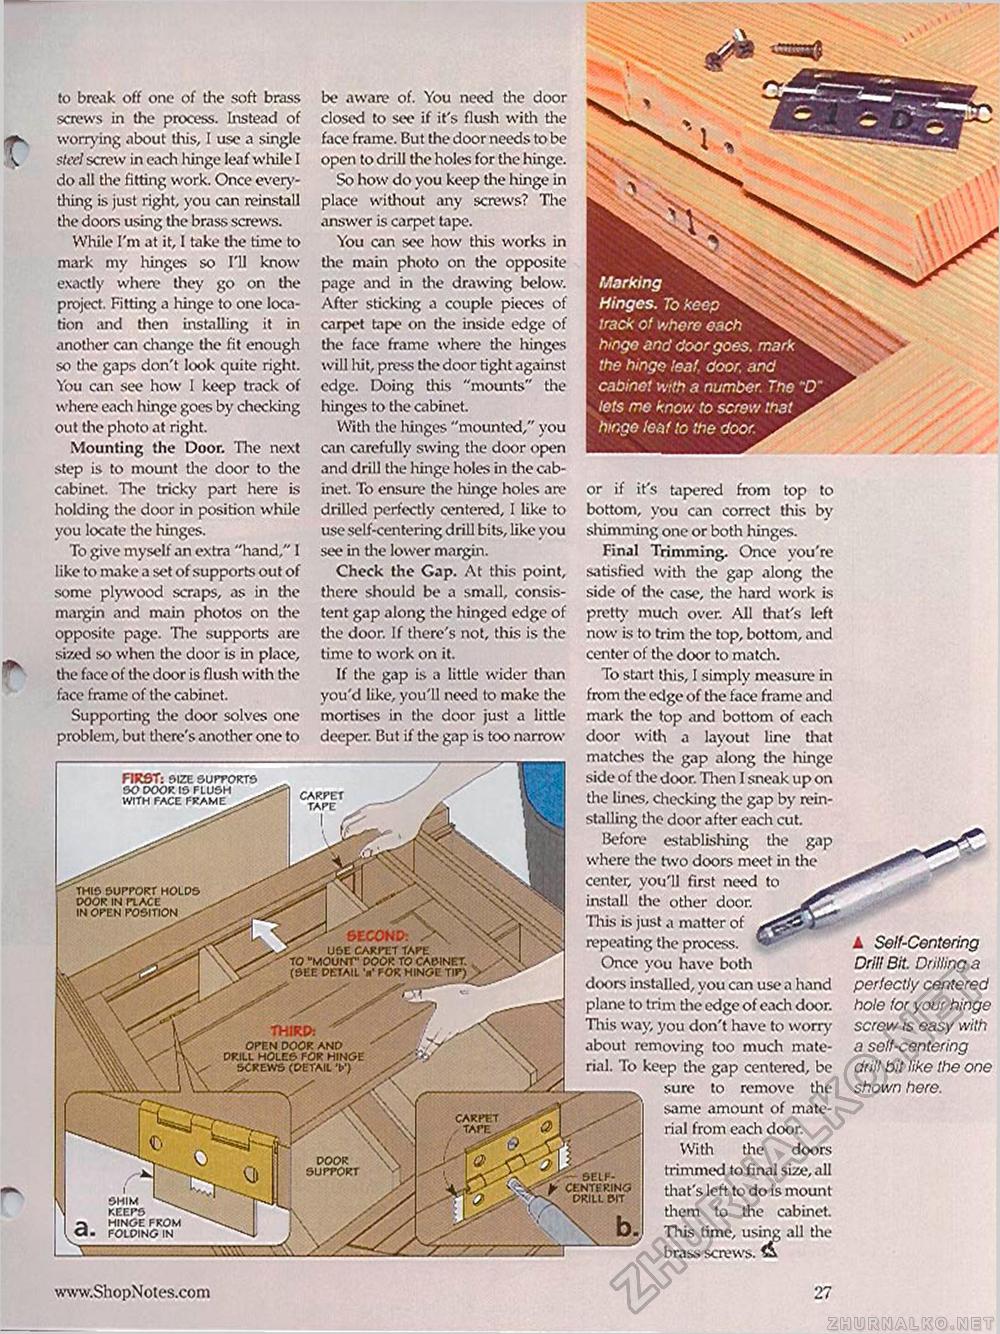
FIRST: SIZE SUPPORTS SO DOOR IS FLUSH WITH FACE FRAME CARPET TAPE this support holds door in place in open position 61C0UD: use carpet tape to "mount' poor to casinet. (see detail v for hinge tip) THIRP: open door and drill holes for hinge screws (detail v) carpet • TAPE.; door support self-* centering drill sit SHIM KEEPS HINGE FROM FOLDING IN www.ShopNotcs.com 27 or if it's tapered from top to bottom, you can correct this by slumming one or both hinges. Final Trimming. Once you're satisfied with the gap along the side of the case, the hard work is pretty much over. All that's left now is to trim the top, bottom, and center of the door to match. To start this, I simply measure in from the edge of the face frame and mark the top and bottom of each door with a layout line that matches the gap along the hinge side of the door. Then I sneak up on the lines, checking the gap by reinstalling the door after each cut. Before establishing the gap where the two doors meet in the center, you'll first need to install the other door. This is just a matter of repeating the process. Once you have both doors installed, you can use a hand plane to trim the edge of each door. Tliis way, you don't have to worry about removing too much material. To keep the gap centered, be sure to remove the same amount of material from each door. With the doors trimmed to final size, all that's left to do is mount them to the cabinet. This time, using all the brass screws. & A Self-Centering Drill Bit. Drilling a perfectly centered hole tor your hinge screw is easy with a self-centering drill bit like the one shown here. to break off one of the soft brass screws in the process. Instead of worrying about this, I use a single steel screw in each hinge leaf while I do all the fitting work. Once everything is just right, you can reinstall the doors using the brass screws. While I'm at it, I take tine time to nnark my hinges so I'll know exactly where they go on tine project. Fitting a hinge to one location and then installing it in another can change the fit enough so the gaps don't look quite right. You can see how I keep track of where each hinge goes by checking out the photo at right. Mounting the Door. Tine next step is to mount the door to the cabinet. Tine tricky part here is holding the door in position while you locate the hinges. To give myself an extra "hand," 1 like to make a set of supports out of some plywood scraps, as in the margin and main photos on tine opposite page. The supports are sized so when tine door is in place, the face of tine door is flush with the lace frame of the cabinet. Supporting the door solves one problem, but there's another one to be aware of. You need the door closed to see if it's flush with tine face frame. But the door needs to be open to drill the holes for the hinge. So how do you keep tine hinge in place without any screws? The answer is carpet' tape. You can see how this works in the main photo on tine opposite page and in tine drawing below. After sticking a couple pieces of carpet tape on the inside edge of the face frame where tine hinges will hit, press the door tight against edge. Doing this "mounts" the hinges to the cabinet. With tine hinges "mounted," you can carefully swing the door open and drill the hinge holes in tine cabinet. To ensure the hinge holes are drilled perfectly centered, I like to use self-centering drill bits, like you see in tine lower margin. Check the Gap. At this point, there should be a small, consistent gap along the hinged edge of the door. If there's not, this is the time to work on it. If the gap is a little wider than you'd like, you'll need to make the mortises in the door just a little deeper. But if tine gap is too narrow |


