80 - Heirloom Tool Cabinet, страница 24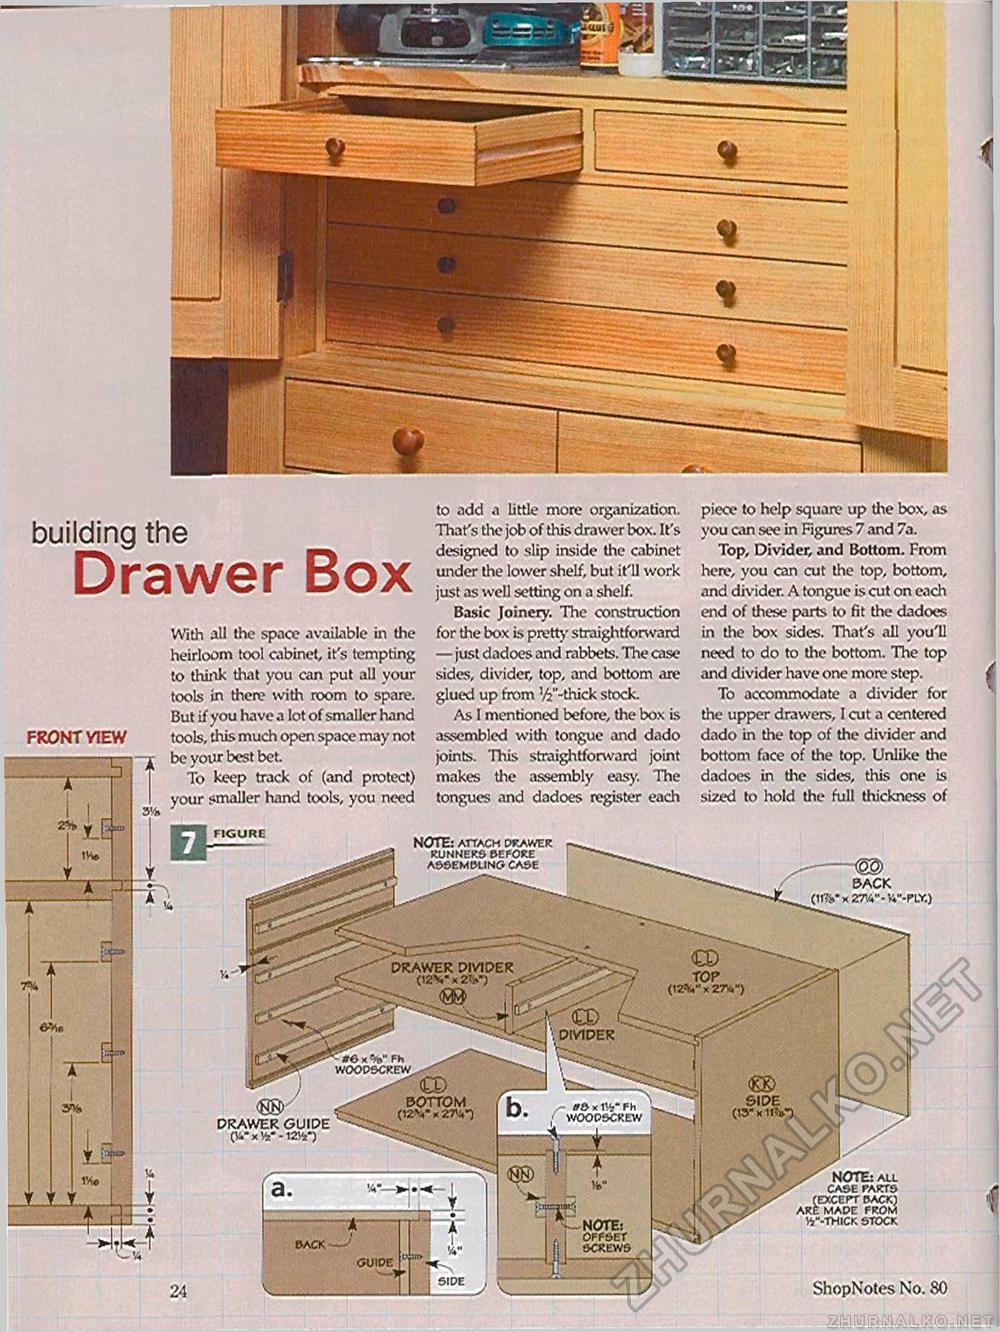
( NOTE: attach drawer runners before assembling case BACK (11%* K 27W-W-PLY.) DRAWER DIVIDER rxD • DIVIDER - tte x Fh woodscrew BOTTOM (12N" x 27%*) <W" DRAWER GUIDE (%" X v - 12&-) ffS x TV Fh woodscrew NOTE: all case parts (except back) are made from v-thick stock GUIDE ShopNotes No. building the Drawer Box With all the space available in the heirloom tool cabinet, it's tempting to think that you can put all your tools in there with room to spare. But if you have a lot of smaller hand tools, this much open space may not be your best bet. To keep track of (and protect) your smaller hand tools, you need FRONT VIEW to add a little more organization. That's the job of this drawer box. It's designed to slip inside the cabinet under the lower shelf, but it'll work just as well setting on a shelf. Basic Joinery. The construction for the box is pretty straightforward —just dadoes and rabbets. The case sides, divider, top, and bottom are glued up from ^"-thick stock. As I mentioned before, the box is assembled with tongue and dado joints. This straightforward joint makes the assembly easy. The tongues and dadoes register each piece to help square up the box, as you can see in Figures 7 and 7a. Top, Divider, and Bottom. From here, you can cut the top, bottom, and divider. A tongue is cut on each end of these parts to fit the dadoes in the box sides. That's all you'll need to do to the bottom. The top and divider have one more step. To accommodate a divider for the upper drawers, I cut a centered dado in the top of the divider and bottom face of the top. Unlike the dadoes in die sides, this one is sized to hold the full thickness of JT l •A" side BACK NOTE: OFFSET SCREWS |


