80 - Heirloom Tool Cabinet, страница 35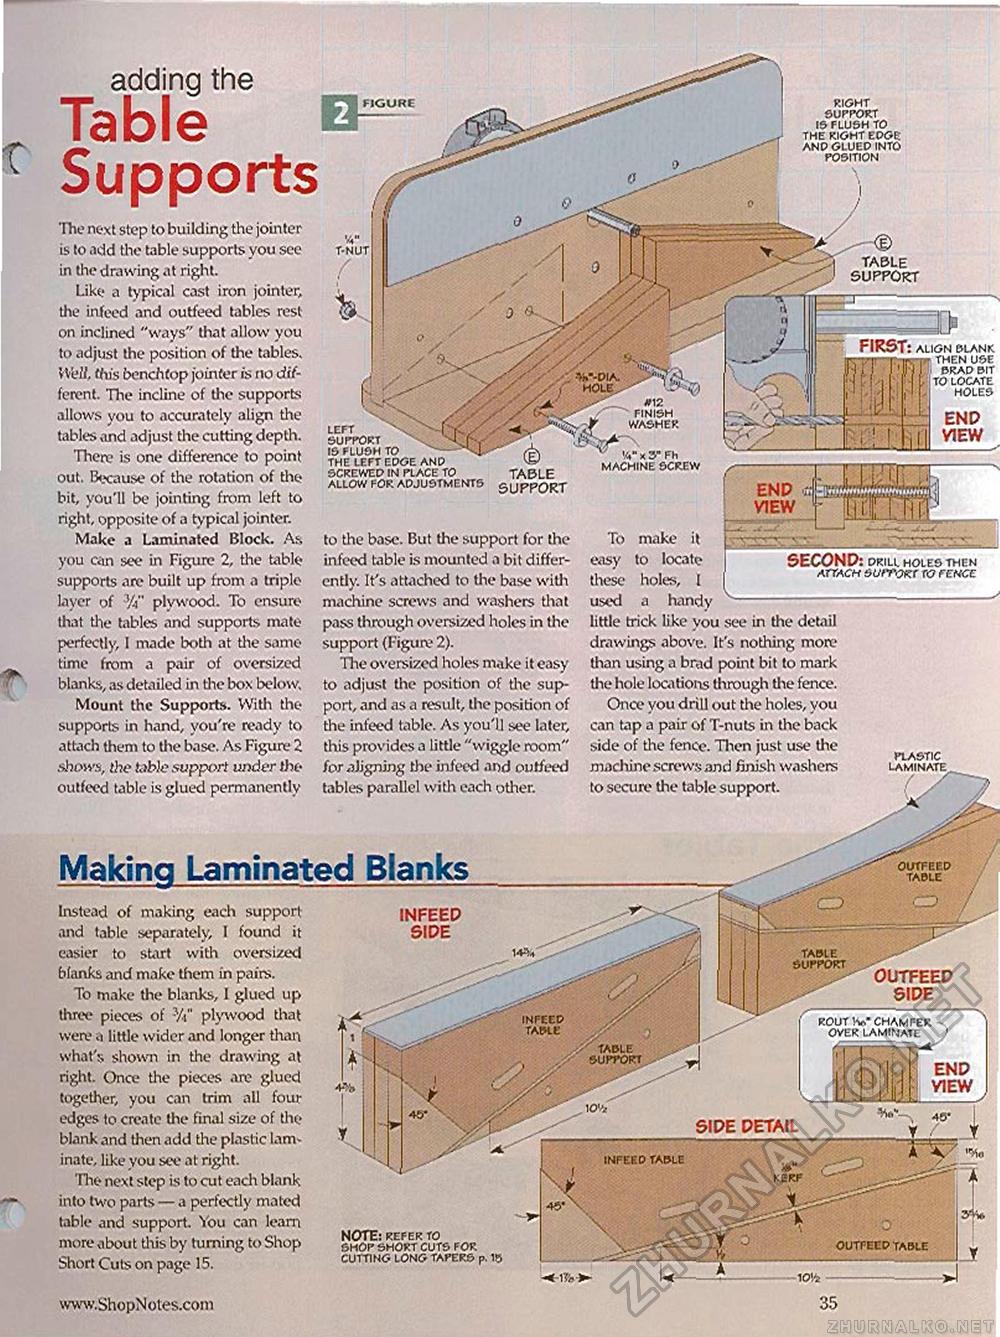
TABLE 5UPP0RT FIRST: ALIGN BLANK •prjT ,r • THEN USE H 1: table support infeed table ROUT V OVER L table support adding the Table SupportsThe next step to building the jointer is to add the table supports you see in the drawing at right. Like.- a typical cast iron jointer, the infeed and outfeed tables rest on inclined "ways" that allow you to adjust the position of the tables. Wei/, this bench (op jointer is no different. The incline of the supports allows you to accurately align the tables and adjust the cutting depth. There is one difference to point out. Because of the rotation of the bit, you'll be jointing from left to right, opposite of a typical jointer. Make a Laminated Block. As you can see in Figure 2, the table supports are built up from a triple layer of Va" plywood. To ensure that the tables and supports mate perfectly, I made both at the same-time from a pair of oversized blanks, as detailed in the box below. Mount the Supports. With the supports in hand, you're ready to attach them to the base. As Figure 2 .shows, the table support under the outfeed table is glued permanently RIGHT SUPPORT 15 FLU5H TO THE RIGHT EDGE: AND GLUED INTO POSITION FIGURE T-NUT END VIEW LEFT SUPPORT IS FLUSH TO THE LEFT EDGE AND SCREWED IN PLACE TO ALLOW FOR ADJUSTMENTS TABLE SUPPORT ■%--dia. jhole #12 FINISH WASHER KjTg V x 3" Fh MACHINE SCREW to the base. But the support for the infeed table is mounted a bit differently. It's attached to the base with machine screws and washers that pass through oversized holes in the support (Figure 2). The oversized holes make it easy to adjust the position of the support, and as a result, the position of the infeed table. As you'll see later, this provides a little "wiggle room" for aligning the infeed and outfeed tables parallel with each other. To easy these used make it to locate holes, I a handy make it to locate holes, I a handy
little trick like you see in the detail drawings above. It's nothing more than using a brad point bit to mark the hole locations through the fence. Once you drill out the holes, you can tap a pair of T-nuts in the back side of the fence. Then just use the machine screws and finish washers to secure the table support. Making Laminated Blanks Instead of making each support and table separately, I found it easier to start with oversized blanks and make them in pairs. To make the blanks, 1 glued up three pieces of %" plywood that were a little wider and longer than what's shown in the drawing at right. Once the pieces are glued together, you can trim all foui-edges to create the final size of the blank and then add the plastic lam-inate, like you see at right. The next step is to cut each blank into two parts — a perfectly mated table and support. You can learn more about tliis by turning to Shop Short Cuts on page 15. INFEEP SIPE PLASTIC LAMINATE outfeed TABLE OUTFEED SIPE ENP VIEW SIPE PETAIL infeed table NOTE: REFER TO SHOP SHORT CUTS FOR CUTTING LONG TAPERS p. 10 www.ShopNotcs.com 35 |
|||||||


