81 - Ultimate Sharpening Station, страница 14
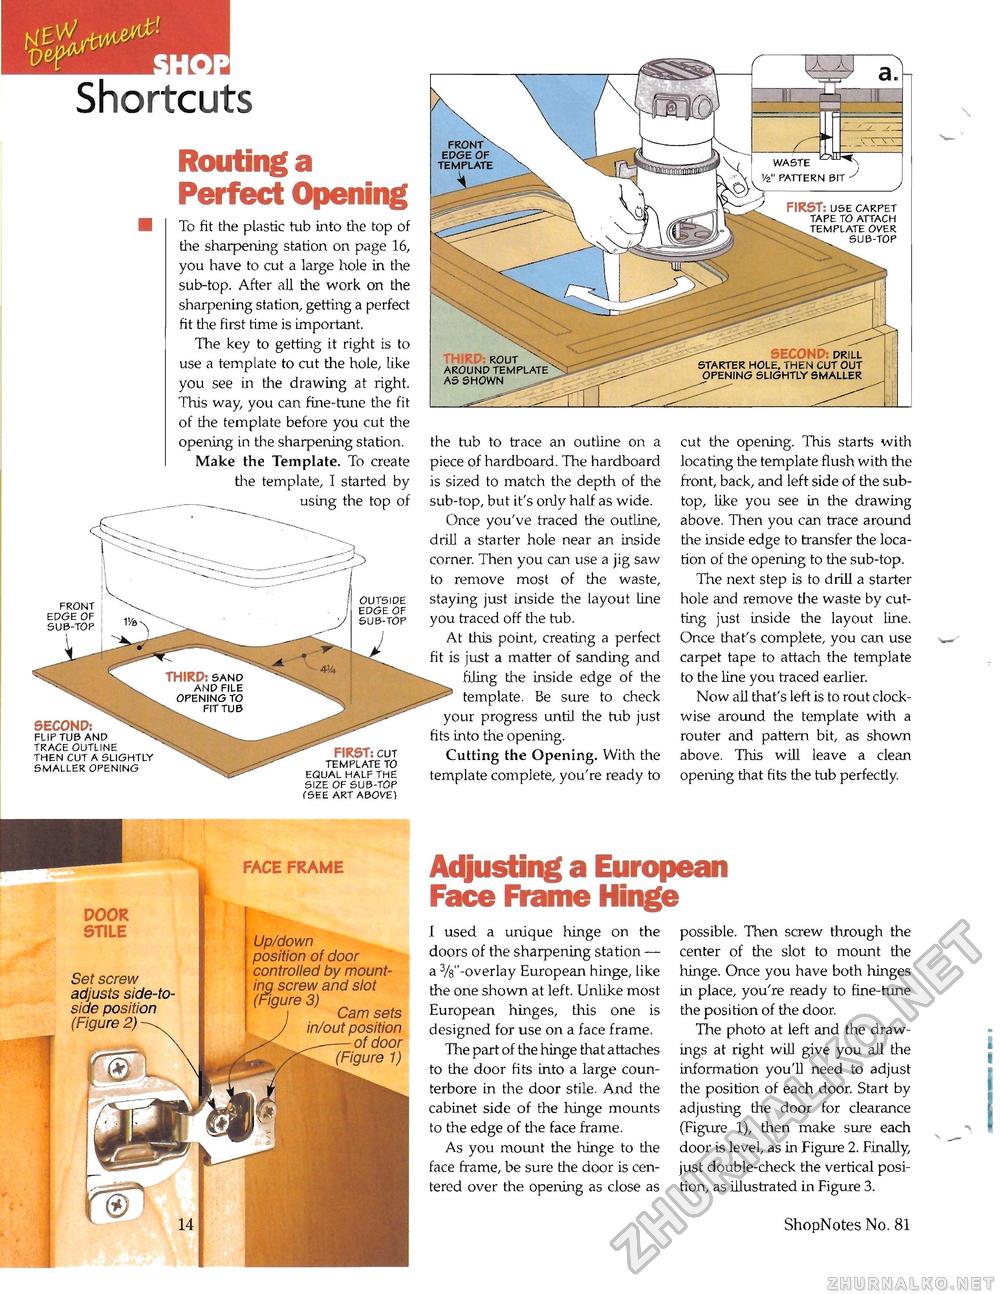
Shortcuts Routing a Perfect Opening To fit the plastic tub into the top of the sharpening station on page 16, you have to cut a large hole in the sub-top. After all the work on the sharpening station, getting a perfect fit the first time is important. The key to getting it right is to use a template to cut the hole, like you see in the drawing at right. This way, you can fine-tune the fit of the template before you cut the opening in the sharpening station. Make the Template. To create the template, I started by using the top of SECOND: FLIP TUB AND TRACE OUTLINE THEN CUT A SLIGHTLY SMALLER OPENING FIRST: CUT TEMPLATE TO EQUAL HALF THE SIZE OF SUB-TOP (SEE ART ABOVE) the tub to trace an outline on a piece of hardboard. The hardboard is sized to match the depth of the sub-top, but it's only half as wide. Once you've traced the outline, drill a starter hole near an inside corner. Then you can use a jig saw to remove most of the waste, staying just inside the layout line you traced off the tub. At this point, creating a perfect fit is just a matter of sanding and filing the inside edge of the template. Be sure to check your progress until the tub just fits into the opening. Cutting the Opening. With the template complete, you're ready to cut the opening. This starts with locating the template flush with the front, back, and left side of the sub-top, like you see in the drawing above. Then you can trace around the inside edge to transfer the location of the opening to the sub-top. The next step is to drill a starter hole and remove the waste by cutting just inside the layout line. Once that's complete, you can use carpet tape to attach the template to the line you traced earlier. Now all that's left is to rout clockwise around the template with a router and pattern bit, as shown above. This will leave a clean opening that fits the tub perfectly. 1 door stile Set screw adjusts side-to-side position (Figure 2)- face frame Up/down position of door controlled by mounting screw and slot (Figure 3) Cam sets in/out position of door (Figure 1) Adjusting a European Face Frame Hinge 1 used a unique hinge on the doors of the sharpening station — a 3/8"-overlay European hinge, like the one shown at left. Unlike most European hinges, this one is designed for use on a face frame. The part of the hinge that attaches to the door fits into a large coun-terbore in the door stile. And the cabinet side of the hinge mounts to the edge of the face frame. As you mount the hinge to the face frame, be sure the door is centered over the opening as close as possible. Then screw through the center of the slot to mount the hinge. Once you have both hinges in place, you're ready to fine-tune the position of the door. The photo at left and the drawings at right will give you all the information you'll need to adjust the position of each door. Start by adjusting the door for clearance (Figure 1), then make sure each door is level, as in Figure 2. Finally, just double-check the vertical position, as illustrated in Figure 3. ShopNotes No. 81 |


