82 - The Complete Miter Saw Workstation, страница 8
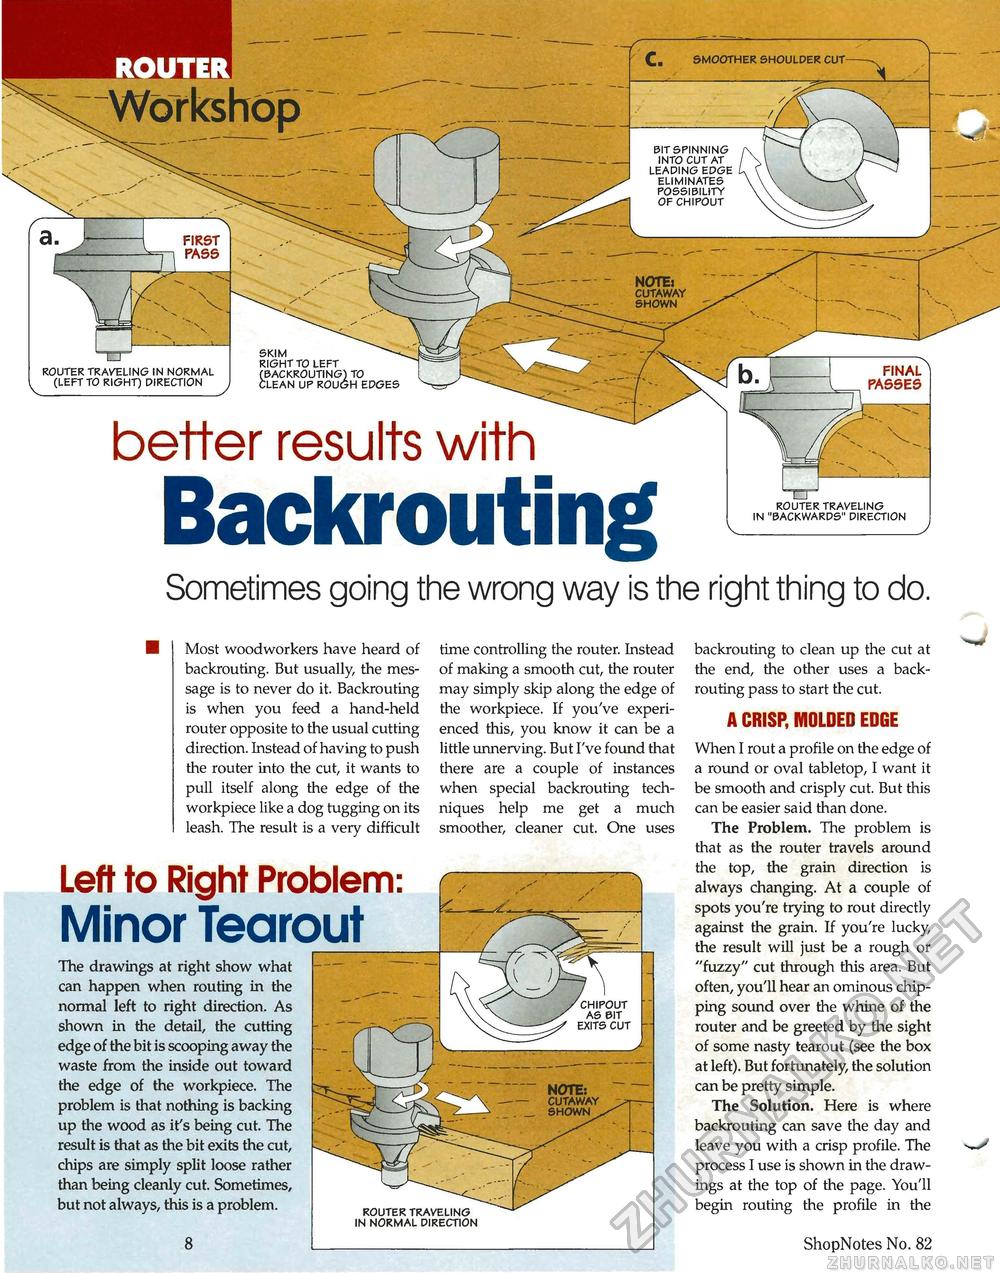
c. SMOOTHER SHOULDER CUT BIT SPINNING INTO CUT AT LEADING EDGE ELIMINATES POSSIBILITY OF CHIPOUT NOTE: CUTAWAY SHOWN ROUTER TRAVELING IN NORMAL (LEFT TO RIGHT) DIRECTION SKIM RIGHT TO LEFT (BACKROUTING) TO CLEAN UP ROUGH EDGES better results withBackroutingROUTER TRAVELING IN "BACKWARDS" DIRECTION Sometimes going the wrong way is the right thing to do. Most woodworkers have heard of backrouting. But usually, the message is to never do it. Backrouting is when you feed a hand-held router opposite to the usual cutting direction. Instead of having to push the router into the cut, it wants to pull itself along the edge of the workpiece like a dog tugging on its leash. The result is a very difficult time controlling the router. Instead of making a smooth cut, the router may simply skip along the edge of the workpiece. If you've experienced this, you know it can be a little unnerving. But I've found that there are a couple of instances when special backrouting techniques help me get a much smoother, cleaner cut. One uses Left to Right Problem: Minor Tearout The drawings at right show what can happen when routing in the normal left to right direction. As shown in the detail, the cutting edge of the bit is scooping away the waste from the inside out toward the edge of the workpiece. The problem is that nothing is backing up the wood as it's being cut. The result is that as the bit exits the cut, chips are simply split loose rather than being cleanly cut. Sometimes, but not always, this is a problem. 8 ROUTER TRAVELING IN NORMAL DIRECTION backrouting to clean up the cut at the end, the other uses a back-routing pass to start the cut. A CRISP, MOLDED EDGE When I rout a profile on the edge of a round or oval tabletop, I want it be smooth and crisply cut. But this can be easier said than done. The Problem. The problem is that as the router travels around the top, the grain direction is always changing. At a couple of spots you're trying to rout directly against the grain. If you're lucky, the result will just be a rough or "fuzzy" cut through this area. But ofteny you'll hear an ominous chipping sound over the whine of the router and be greeted by the sight of some nasty tearout (see the box at left). But fortunately, the solution can be pretty simple. The Solution. Here is where backrouting can save the day and leave you with a crisp profile. The process I use is shown in the drawings at the top of the page. You'll begin routing the profile in the ShopNotes No. 82 |


