83, страница 44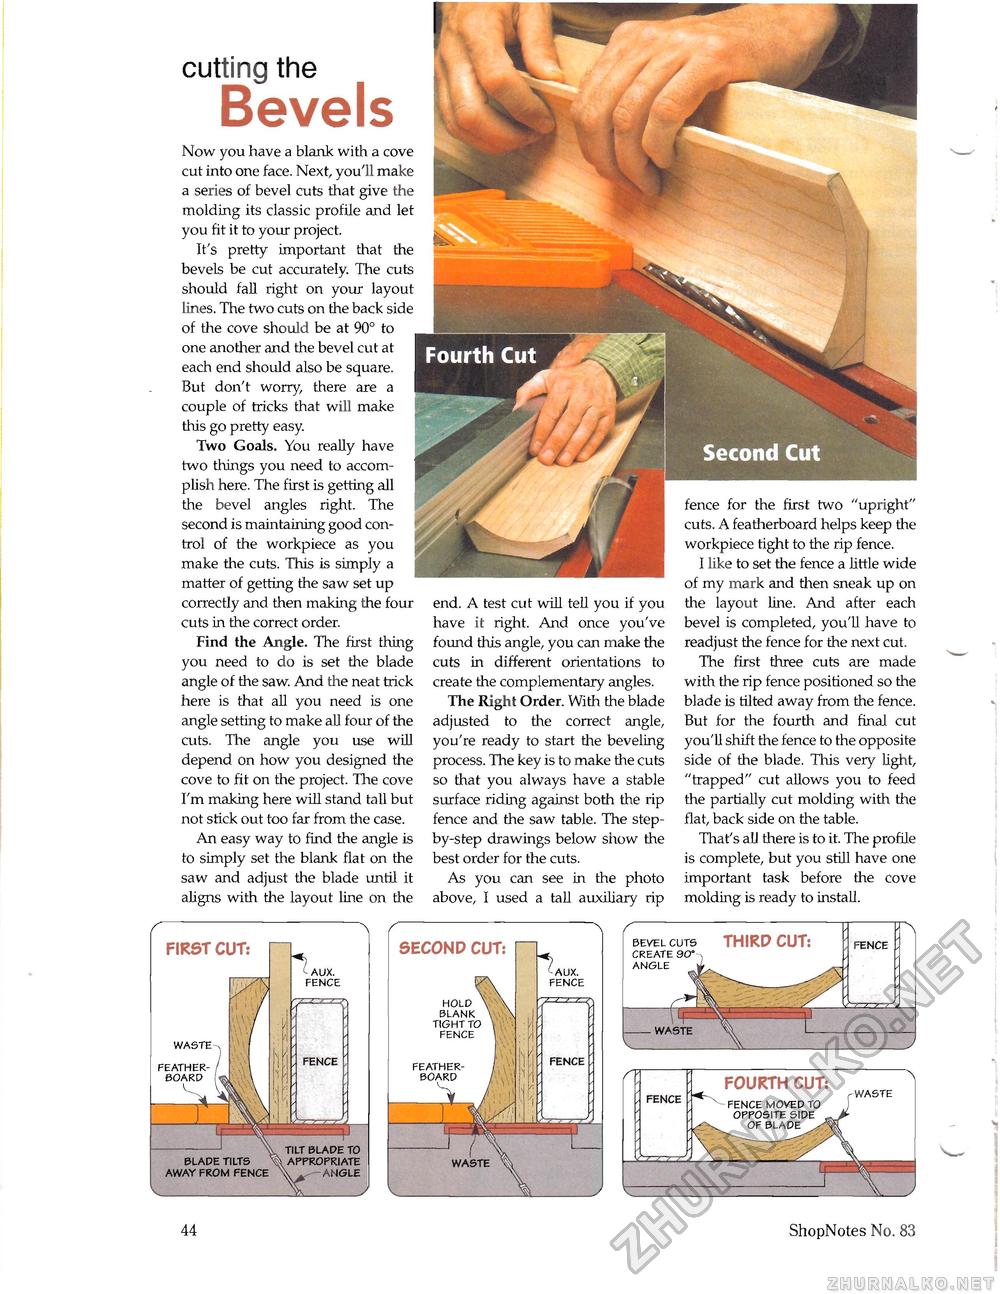
cutting the Bevels Now you have a blank with a cove cut into one face. Next, you'll make a series of bevel cuts that give the molding its classic profile and let you fit it to your project. It's pretty important that the bevels be cut accurately. The cuts should fall right on your layout lines. The two cuts on the back side of the cove should be at 90° to one another and the bevel cut at each end should also be square. But don't worry there are a couple of tricks that will make this go pretty easy. Two Goals. You really have two things you need to accomplish here. The first is getting all the bevel angles right. The second is maintaining good control of the workpiece as you make the cuts. This is simply a matter of getting the saw set up correctly and then making the four cuts in the correct order. Find the Angle. The first thing you need to do is set the blade angle of the saw. And the neat trick here is that all you need is one angle setting to make all four of the cuts. The angle you use will depend on how you designed the cove to fit on the project. The cove I'm making here will stand tall but not stick out too far from the case. An easy way to find the angle is to simply set the blank flat on the saw and adjust the blade until it aligns with the layout line on the end. A test cut will tell you if you have it right. And once you've found this angle, you can make the cuts in different orientations to create the complementary angles. The Right Order. With the blade adjusted to the correct angle, you're ready to start the beveling process. The key is to make the cuts so that you always have a stable surface riding against both the rip fence and the saw table. The step-by-step drawings below show the best order for the cuts. As you can see in the photo above, I used a tall auxiliary rip fence for the first two "upright" cuts. A featherboard helps keep the workpiece tight to the rip fence. I like to set the fence a little wide of my mark and then sneak up on the layout line. And after each bevel is completed, you'll have to readjust the fence for the next cut. The first three cuts are made with the rip fence positioned so the blade is tilted away from the fence. But for the fourth and final cut you'll shift the fence to the opposite side of the blade. This very light, "trapped" cut allows you to feed the partially cut molding with the flat, back side on the table. That's all there is to it. The profile is complete, but you still have one important task before the cove molding is ready to install. 44 ShopNotes No. 83 |


