83, страница 43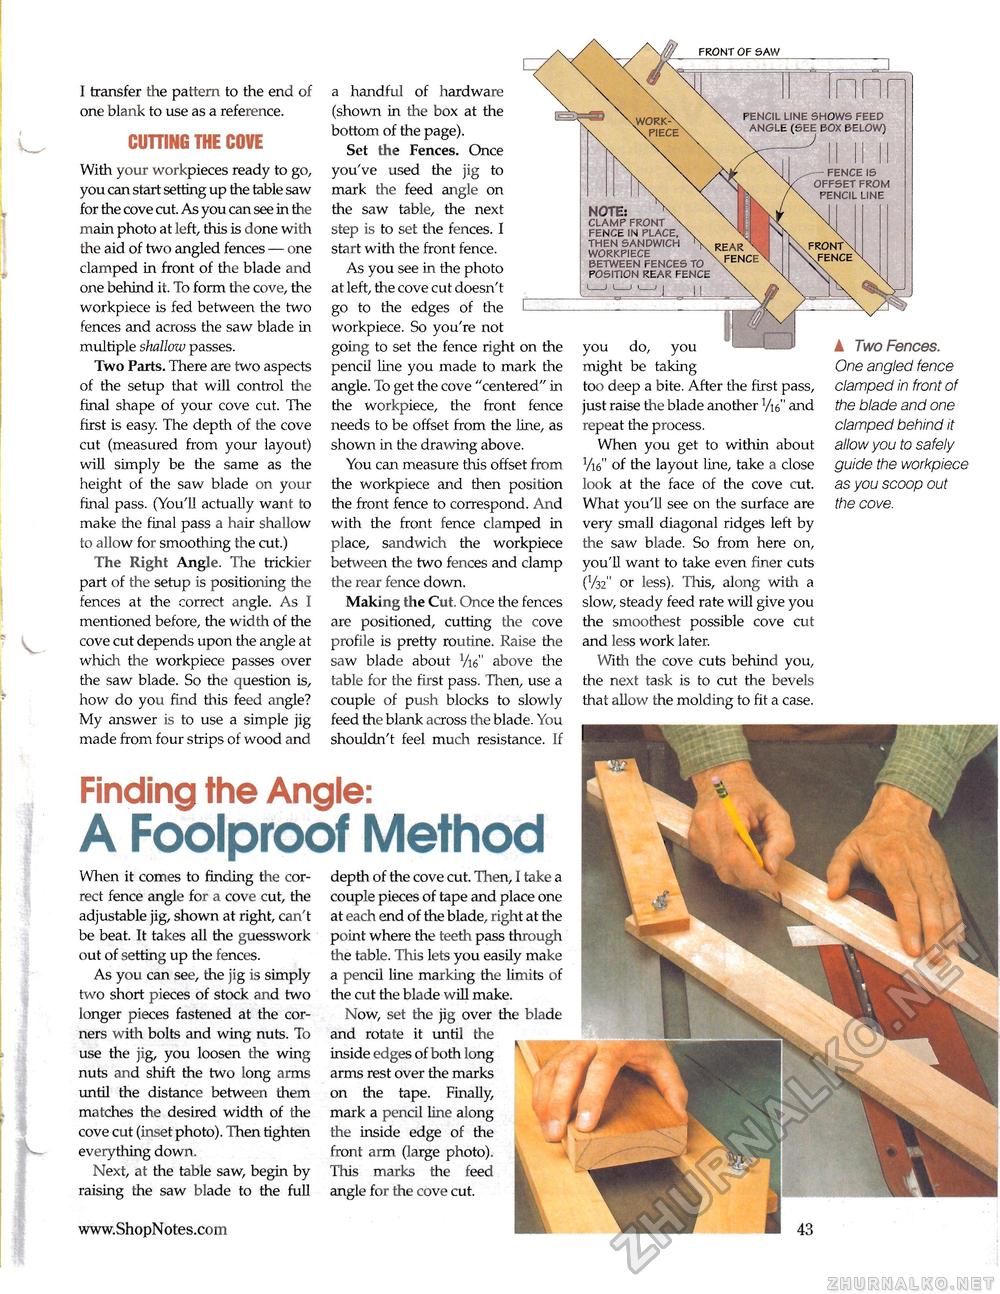
I transfer the pattern to the end of one blank to use as a reference. CUTTING THE COVE With your workpieces ready to go, you can start setting up the table saw for the cove cut. As you can see in the main photo at left, this is done with the aid of two angled fences — one clamped in front of the blade and one behind it. To form the cove, the workpiece is fed between the two fences and across the saw blade in multiple shallow passes. Two Parts. There are two aspects of the setup that will control the final shape of your cove cut. The first is easy. The depth of the cove cut (measured from your layout) will simply be the same as the height of the saw blade on your final pass. (You'll actually want to make the final pass a hair shallow to allow for smoothing the cut.) The Right Angle. The trickier part of the setup is positioning the fences at the correct angle. As I mentioned before, the width of the cove cut depends upon the angle at which the workpiece passes over the saw blade. So the question is, how do you find this feed angle? My answer is to use a simple jig made from four strips of wood and a handful of hardware (shown in the box at the bottom of the page). Set the Fences. Once you've used the jig to mark the feed angle on the saw table, the next step is to set the fences. I start with the front fence. As you see in the photo at left, the cove cut doesn't go to the edges of the C workpiece. So you're not going to set the fence right on the pencil line you made to mark the angle. To get the cove "centered" in the workpiece, the front fence needs to be offset from the line, as shown in the drawing above. You can measure this offset from the workpiece and then position the front fence to correspond. And with the front fence clamped in place, sandwich the workpiece between the two fences and clamp the rear fence down. Making the Cut. Once the fences are positioned, cutting the cove profile is pretty routine. Raise the saw blade about Vi6" above the table for the first pass. Then, use a couple of push blocks to slowly feed the blank across the blade. You shouldn't feel much resistance. If Finding the Angle: A Foolproof Method PENCIL LINE SHOWS FEED BOX BELOW) you do, you might be taking too deep a bite. After the first pass, just raise the blade another l/u" and repeat the process. When you get to within about Vie" of the layout line, take a close look at the face of the cove cut. What you'll see on the surface are very small diagonal ridges left by the saw blade. So from here on, you'll want to take even finer cuts (V32" or less). This, along with a slow, steady feed rate will give you the smoothest possible cove cut and less work later. With the cove cuts behind you, the next task is to cut the bevels that allow the molding to fit a case. ▲ Two Fences. One angled fence clamped In front of the blade and one clamped behind it allow you to safely guide the workpiece as you scoop out the cove. When it comes to finding the correct fence angle for a cove cut, the adjustable jig, shown at right, can't be beat. It takes all the guesswork out of setting up the fences. As you can see, the jig is simply two short pieces of stock and two longer pieces fastened at the corners with bolts and wing nuts. To use the jig, you loosen the wing nuts and shift the two long arms until the distance between them matches the desired width of the cove cut (inset photo). Then tighten everything down. Next, at the table saw, begin by raising the saw blade to the full FRONT OF SAW NOTE: CLAMP FRONT FENCE IN PLACE. THEN SANDWICH WORKPIECE BETWEEN FENCES TO POSITION REAR FENCE FENCE FENCE IS OFFSET FROM PENCIL LINE depth of the cove cut. Then, I take a couple pieces of tape and place one at each end of the blade, right at the point where the teeth pass through the table. This lets you easily make a pencil line marking the limits of tire cut the blade will make. Now, set the jig over the blade and rotate it until the inside edges of both long arms rest over the marks on the tape. Finally, mark a pencil line along the inside edge of the front arm (large photo). This marks the feed angle for the cove cut. |


