85 - Router Table, страница 11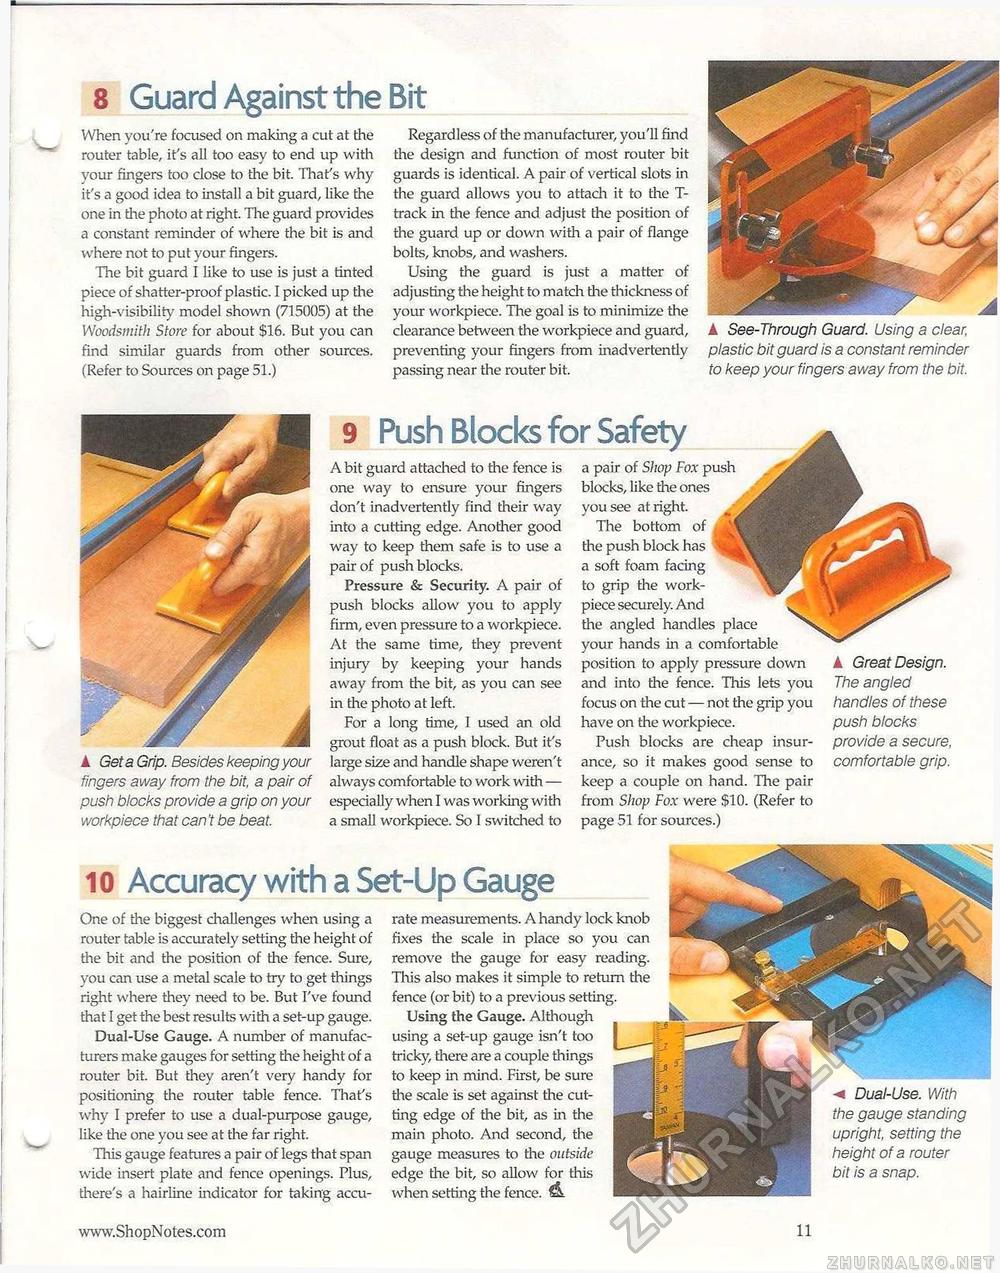
8 Guard Against the Bit When you're focused on making a cut at the router table, it's all too easy to end up with your fingers too close to the bit. That's why it's a good idea to install a bit guard, like the one in the photo at right. The guard provides a constant reminder of where the bit is and where not to put your fingers. The bit guard I like to use is just a tinted piece of shatter-proof plastic. I picked up the high-visibility model shown (715005) at the Woodsmith Store for about $16. But you can find similar guards from other sources. (Refer to Sources on page 51.) Regardless of the manufacturer, you'll find the design and function of most router bit guards is identical. A pair of vertical slots in the guard allows you to attach it to the T-track in the fence and adjust the position of the guard up or down with a pair of flange bolts, knobs, and washers. Using the guard is just a matter of adjusting the height to match die thickness of your workpiece. The goal is to minimize the clearance between the workpiece and guard, preventing your fingers from inadvertently passing near the router bit. ▲ See-Through Guard. Using a clear, plastic bit guard is a constant reminder to keep your fingers away from the bit. ▲ Get a Grip. Besides keeping your fingers away from the bit, a pair of push blocks provide a grip on your workpiece that can't be beat. 9 Push Blocks for Safety A bit guard attached to the fence is one way to ensure your fingers don't inadvertently find their way into a cutting edge. Another good way to keep them safe is to use a pair of push blocks. Pressure & Security. A pair of push blocks allow you to apply firm, even pressure to a workpiece. At the same time, they prevent injury by keeping your hands away from die bit, as you can see in the photo at left. For a long time, I used an old grout float as a push block. But it's large size and handle shape weren't always comfortable to work with — especially when I was working with a small workpiece. So I switched to a pair of Shop Fox push blocks, like the ones you see at right. The bottom of die push block has a soft foam facing to grip die work-piece securely. And the angled handles place your hands in a comfortable position to apply pressure down and into the fence. This lets you focus on the cut — not the grip you have on the workpiece. Push blocks are cheap insurance, so it makes good sense to keep a couple on hand. The pair from Shop Fox were $10. (Refer to page 51 for sources.) ▲ Great Design. The angled handles of these push blocks provide a secure, comfortable grip. 10 Accuracy with a Set-Up Gauge One of the biggest challenges when using a router table is accurately setting the height of the bit and the position of die fence. Sure, you can use a metal scale to try to get things right where they need to be. But I've found that I get the best results with a set-up gauge. Dual-Use Gauge. A number of manufacturers make gauges for setting the height of a router bit. But they aren't very handy for positioning the router table fence. That's why I prefer to use a dual-purpose gauge, like the one you see at the far right. This gauge features a pair of legs that span wide insert plate and fence openings. Plus, there's a hairline indicator for taking accu rate measurements. A handy lock knob fixes the scale in place so you can remove the gauge for easy reading. This also makes it simple to return the fence (or bit) to a previous setting. Using the Gauge. Although using a set-up gauge isn't too tricky, tiiere are a couple things to keep in mind. First, be sure die scale is set against die cutting edge of the bit, as in the main photo. And second, the gauge measures to die outside edge the bit, so allow for this when setting the fence. & Dual-Use. With the gauge standing upright, setting the height of a router bit is a snap. 11 |


