85 - Router Table, страница 13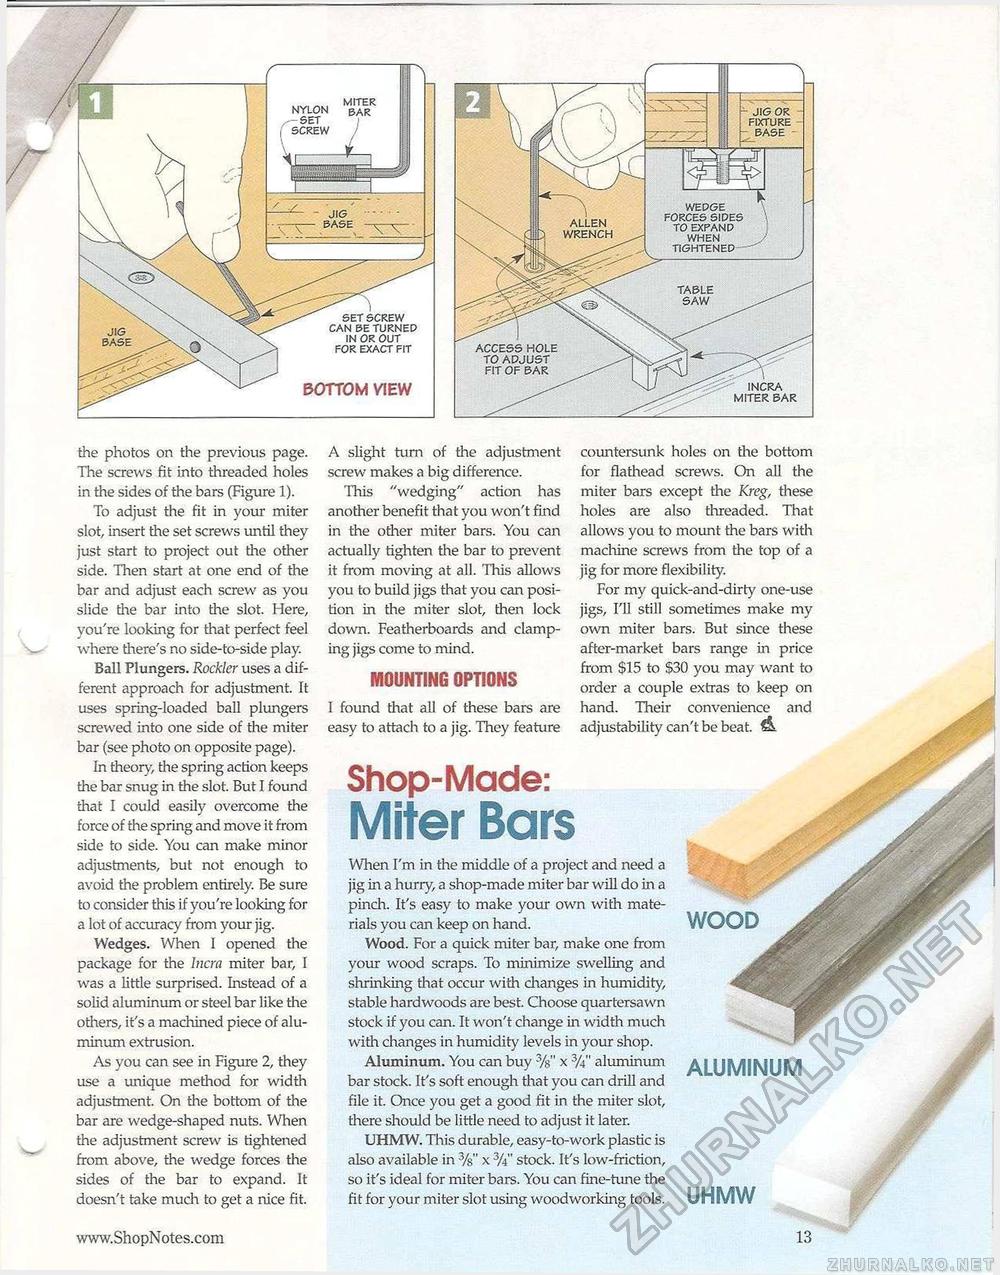
SET SCREW CAN BE TURNED IN OR OUT FOR EXACT FIT BOTTOM VIEW - JIG ...... —^— BASE ^ v NYLON M'TER JIG OR FIXTURE BASE - WEDGE FORCES SIDES TO EXPAND WHEN TIGHTENED "" access hole to adjust fit of bar the photos on the previous page. The screws fit into threaded holes in the sides of the bars (Figure 1). To adjust the fit in your miter slot, insert the set screws until they just start to project out the other side. Then start at one end of the bar and adjust each screw as you slide the bar into the slot. Here, you're looking for that perfect feel where there's no side-to-side play. Ball Plungers. Rockier uses a different approach for adjustment. It uses spring-loaded ball plungers screwed into one side of the miter bar (see photo on opposite page). In theory, the spring action keeps the bar snug in the slot. But I found that I could easily overcome the force of the spring and move it from side to side. You can make minor adjustments, but not enough to avoid the problem entirely. Be sure to consider this if you're looking for a lot of accuracy from your jig. Wedges. When 1 opened the package for the Incra miter bar, I was a little surprised. Instead of a solid aluminum or steel bar like the others, it's a machined piece of aluminum extrusion. As you can see in Figure 2, they use a unique method for width adjustment. On the bottom of the bar are wedge-shaped nuts. When the adjustment screw is tightened from above, the wedge forces the sides of the bar to expand. It doesn't take much to get a nice fit. A slight turn of the adjustment screw makes a big difference. This "wedging" action has another benefit that you won't find in the other miter bars. You can actually tighten the bar to prevent it from moving at all. This allows you to build jigs that you can position in the miter slot, then lock down. Featherboards and clamping jigs come to mind. MOUNTING OPTIONS I found that all of these bars are easy to attach to a jig. They feature countersunk holes on the bottom for flathead screws. On all the miter bars except the Kreg, these holes are also threaded. That allows you to mount the bars with machine screws from the top of a jig for more flexibility. For my quick-and-dirty one-use jigs, I'll still sometimes make my own miter bars. But since these after-market bars range in price from $15 to $30 you may want to order a couple extras to keep on hand. Their convenience and adjustability can't be beat. & Shop-Made: Miter BarsWhen I'm in the middle of a project and need a jig in a hurry, a shop-made miter bar will do in a pinch. It's easy to make your own with materials you can keep on hand. Wood. For a quick miter bar, make one from your wood scraps. To minimize swelling and shrinking that occur with changes in humidity, stable hardwoods are best. Choose quartersawn stock if you can. It won't change in width much with changes in humidity levels in your shop. Aluminum. You can buy x 'A" aluminum bar stock. It's soft enough that you can drill and file it. Once you get a good fit in the miter slot, there should be little need to adjust it later. UHMW. This durable, easy-to-work plastic is also available in x%" stock. It's low-friction, so it's ideal for miter bars. You can fine-tune the fit for your miter slot using woodworking tools. UHMW WOOD ALUMINUM |


