85 - Router Table, страница 17
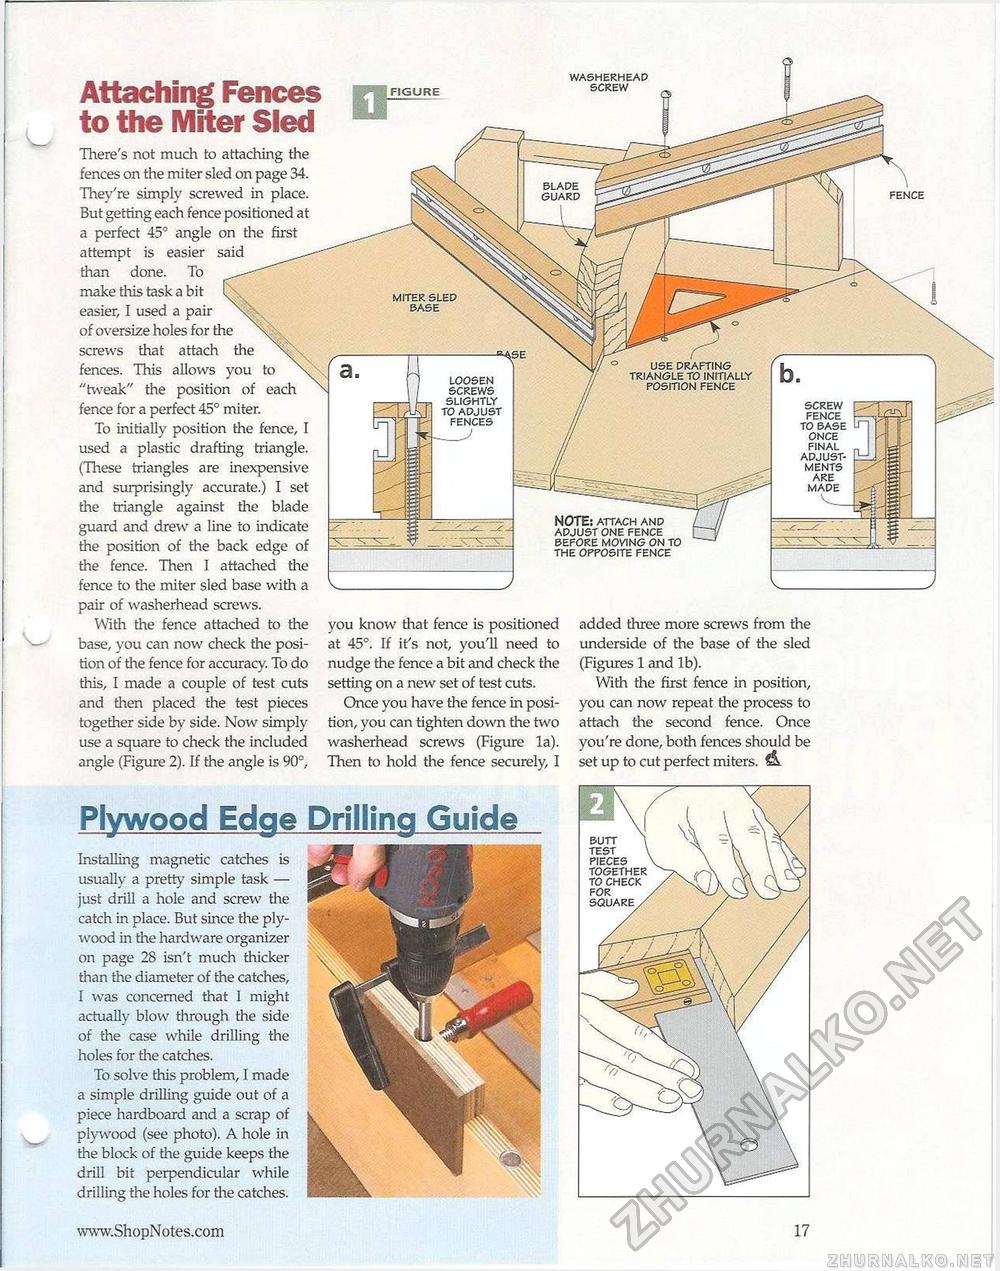
Plywood Edge Drilling Guide Installing magnetic catches Is usually a pretty simple task — just drill a hole and screw the catch in place. But since the plywood in the hardware organizer on page 28 isn't much thicker than the diameter of the catches, I was concerned that 1 might actually blow through the side of the case while drilling the holes for the catches. To solve this problem, I made a simple drilling guide out of a piece hardboard and a scrap of plywood (see photo). A hole in the block of the guide keeps the drill bit perpendicular while drilling the holes for the catches. BLADE GUARD MITER SLED BASE USE DRAFTING TRIANGLE TO INITIALLY POSITION FENCE Attaching Fences to the Miter Sled There's not much to attaching the fences on the miter sled on page 34. They're simply screwed in place. But getting each fence positioned at a perfect 45° angle on the first attempt is easier said than done. To make this task a bit easier, I used a pair of oversize holes for the screws that attach the x fences. This allows you to "tweak" the position of each fence for a perfect 45° miter. To initially position the fence, I used a plastic drafting triangle. (These triangles are inexpensive and surprisingly accurate.) I set the triangle against the blade guard and drew a line to indicate the position of the back edge of the fence. Then I attached the fence to the miter sled base with a pair of washerhead screws. With the fence attached to the base, you can now check the position of the fence for accuracy. To do this, I made a couple of test cuts and then placed the test pieces together side by side. Now simply use a square to check the included angle (Figure 2). If the angle is 90°, WASHERHEAD SCREW F GURE FENCE LOOSEN SCREWS SLIGHTLY SCREW FENCE TO BASE ONCE FINAL ADJUSTMENTS ARE MADE TO ADJUST FENCES NOTE: ATTACH AND ADJUST ONE FENCE BEFORE MOVING ON TO THE OPPOSITE FENCE you know that fence is positioned at 45°. If it's not, you'll need to nudge the fence a bit and check the setting on a new set of test cuts. Once you have the fence in position, you can tighten down the two washerhead screws (Figure la). Then to hold the fence securely, I added three more screws from the underside of the base of the sled (Figures 1 and lb). With the first fence in position, you can now repeat tire process to attach the second fence. Once you're done, both fences should be set up to cut perfect miters. & BUTT TEST PIECES TOGETHER TO CHECK FOR SQUARE |


