86, страница 15
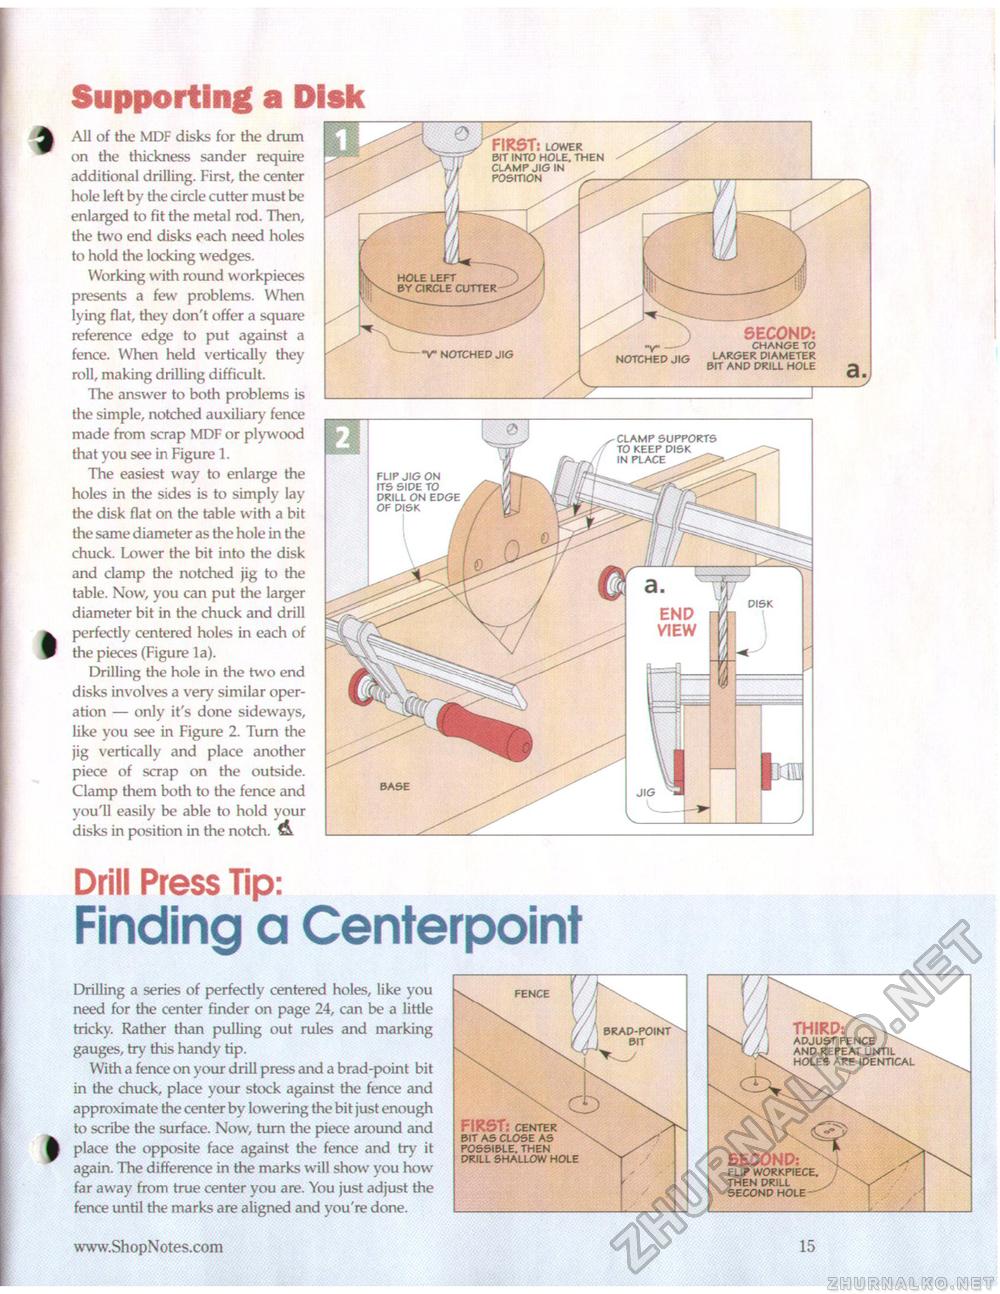
Supporting a Disk All of the MDF disks for the drum on the thickness sander require additional drilling. First, the center hole left by the circle cutter must be enlarged to fit the metal rod. Then, the two end disks each need holes to hold the locking wedges. Working with round workpieces presents a few problems. When lying flat, they don't offer a square reference edge to put against a fence. When held vertically they roll, making drilling difficult. The answer to both problems is the simple, notched auxiliary fence made from scrap MDF or plywood that you see in Figure 1. The easiest way to enlarge the holes in the sides is to simply lay the disk flat on the table with a bit the same diameter as the hole in the chuck. Lower the bit into the disk and clamp the notched jig to the table. Now, you can put the larger diameter bit in the chuck and drill perfectly centered holes in each of the pieces (Figure la). Drilling the hole in the two end disks involves a very similar operation — only it's done sideways, like you see in Figure 2. Turn the jig vertically and place another piece of scrap on the outside. Clamp them both to the fence and you'll easily be able to hold your disks in position in the notch. & Drill Press Tip: Finding a CenterpointFIRST: center pit as close as possible. then drill shallow hole Drilling a series of perfectly centered holes, like you need for the center finder on page 24, can be a little tricky. Rather than pulling out rules and marking gauges, try this handy tip. With a fence on your drill press and a brad-point bit in the chuck, place your stock against the fence and approximate the center by lowering the bit just enough to scribe the surface. Now, turn the piece around and place the opposite face against the fence and try it again. The difference in the marks will show you how far away from true center you are. You just adjust the fence until the marks are aligned and you're done. SECOND: flip workpiece. then drill second hole |


