86, страница 36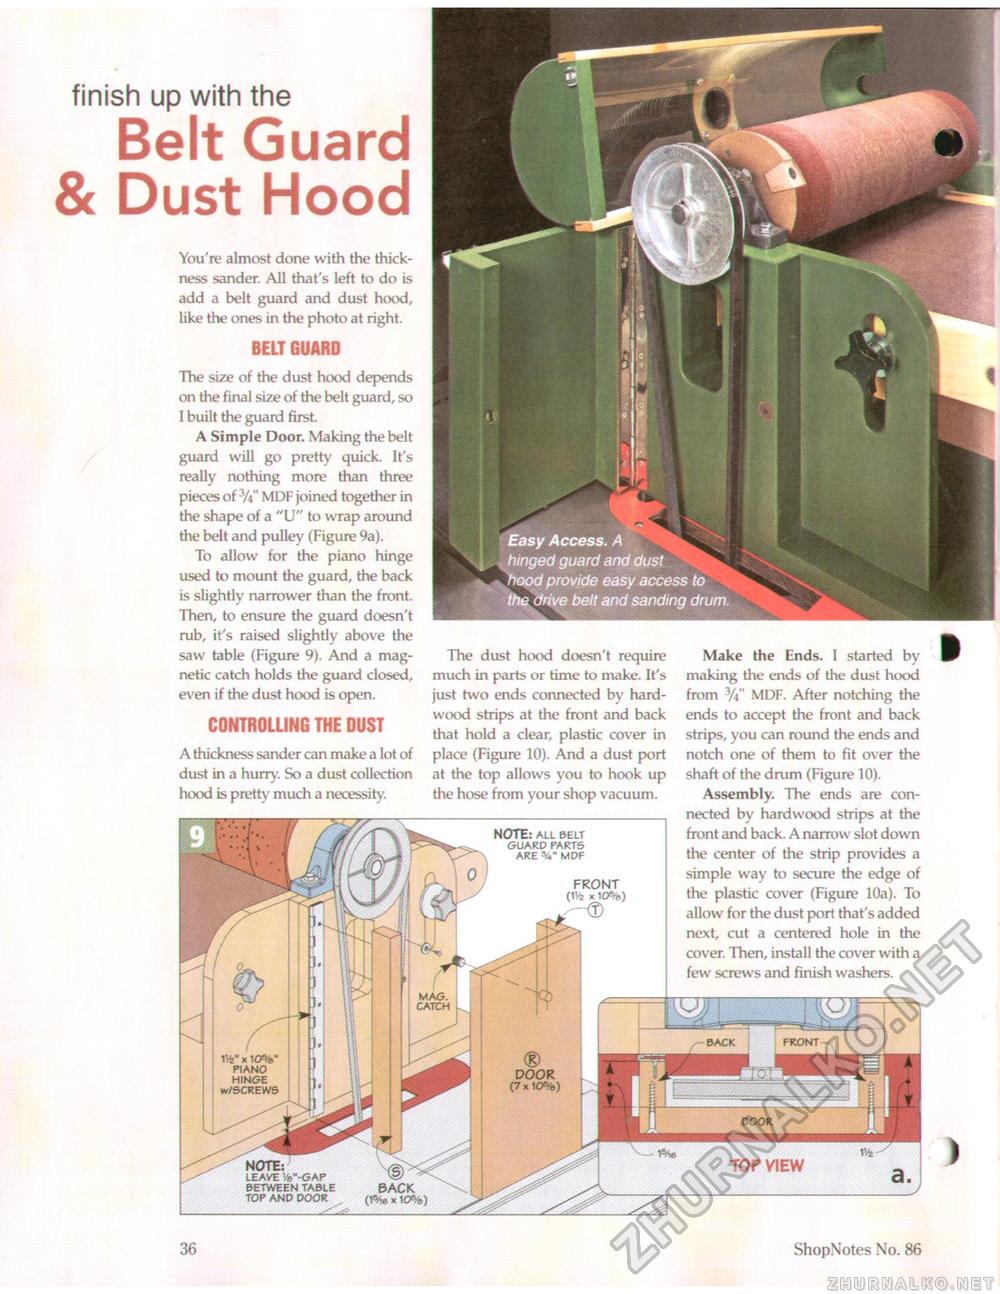
finish up with the Belt Guard & Dust HoodYou're almost done with the thickness sander. All that's left to do is add a belt guard and dust hood, like the ones in the photo at right. BELT GUARD The size of the dust hood depends on the final size of the belt guard, so I built the guard first. A Simple Door. Making the belt guard will go pretty quick. It's really nothing more than three pieces of 3/t" MDF joined together in the shape of a "U" to wrap around the belt and pulley (Figure 9a). To allow for the piano hinge used to mount the guard, the back is slightly narrower than the front. Then, to ensure the guard doesn't rub, it's raised slightly above the saw table (Figure 9). And a magnetic catch holds the guard closed, even if the dust hood is open. CONTROLLING THE DUST A thickness sander can make a lot of dust in a hurry. So a dust collection hood is pretty much a necessity. The dust hood doesn't require much in parts or time to make. It's just two ends connected by hardwood strips at the front and back that hold a clear, plastic cover in place (Figure 10). And a dust port at the top allows you to hook up the hose from your shop vacuum. NOTE: ALL BELT GUARD PARTS ARE MDF FRONT (1H. x 10%) Make the Ends. I started by making the ends of the dust hood from 3/j" MDF. After notching the ends to accept the front and back strips, you can round the ends and notch one of them to fit over the shaft of the drum (Figure 10). Assembly. The ends are connected by hardwood strips at the front and back. A narrow slot down the center of the strip provides a simple way to secure the edge of the plastic cover (Figure 10a). To allow for the dust port that's added next, cut a centered hole in the cover. Then, install the cover with a few screws and finish washers. > 36 ShopNotes No. 86 |


