87, страница 13
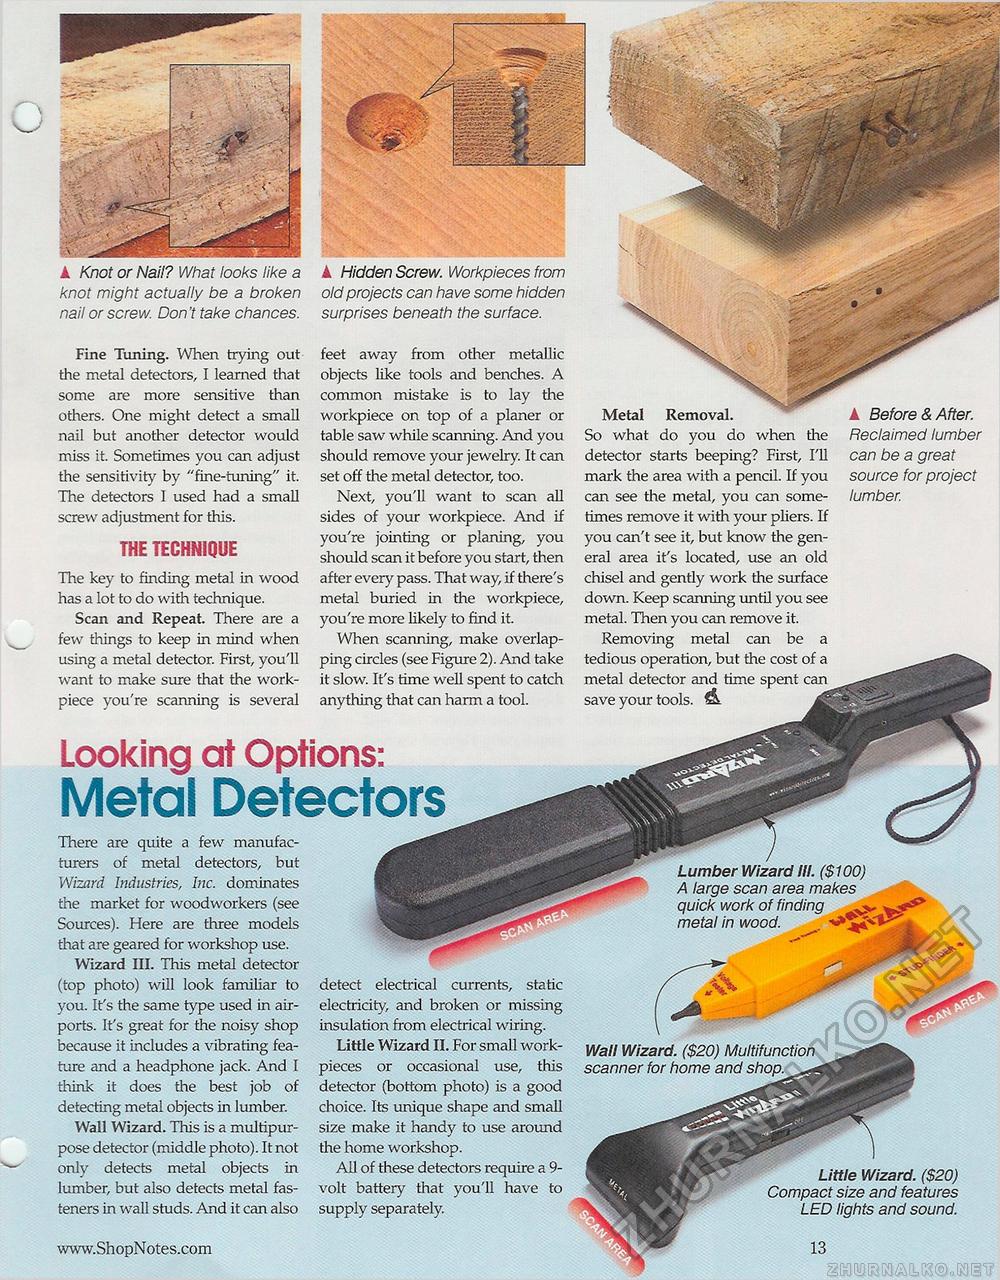
▲ Hidden Screw. Workpieces from old projects can have some hidden surprises beneath the surface. k Knot or Nail? What looks like a knot might actually be a broken nail or screw. Don't take chances. feet away from other metallic objects like tools and benches. A common mistake is to lay the workpiece on top of a planer or table saw while scanning. And you should remove your jewelry. It can set off the metal detector, too. Next, you'll want to scan all sides of your workpiece. And if you're jointing or planing, you should scan it before you start, then after every pass. That way, if there's metal buried in the workpiece, you're more likely to find it. When scanning, make overlapping circles (see Figure 2). And take it slow. It's time well spent to catch anything that can harm a tool. Fine Tuning. When trying out the metal detectors, I learned that some are more sensitive than others. One might detect a small nail but another detector would miss it. Sometimes you can adjust the sensitivity by "fine-tuning" it. The detectors 1 used had a small screw adjustment for this. THE TECHNIQUE The key to finding metal in wood has a lot to do with technique. Scan and Repeat. There are a few things to keep in mind when using a metal detector. First, you'll want to make sure that the work-piece you're scanning is several Metal Removal. ▲ Before & After. So what do you do when the Reclaimed lumber detector starts beeping? First, I'll can be a great mark the area with a pencil. If you source for project can see the metal, you can some- lumber. times remove it with your pliers. If you can't see it, but know the general area it's located, use an old chisel and gently work the surface down. Keep scanning until you see metal. Then you can remove it. Removing metal can be a tedious operation, but the cost of a metal detector and time spent can^^^gtfB save your tools. & Looking at Options: Metal Detectors There are quite a few manufacturers of metal detectors, but Wizard Industries, Inc. dominates the market for woodworkers (see Sources). Here are three models that are geared for workshop use. Wizard III. This metal detector (top photo) will look familiar to you. It's the same type used in airports. It's great for the noisy shop because it includes a vibrating feature and a headphone jack. And I think it does the best job of detecting metal objects in lumber. Wall Wizard. This is a multipurpose detector (middle photo). It not only detects metal objects in lumber, but also detects metcil fasteners in wall studs. And it can also Lumber Wizard III. ($100) A large scan area makes quick work of finding metal in wood. detect electrical currents, static electricity, and broken or missing insulation from electrical wiring. Little Wizard II. For small work-pieces or occasional use, this detector (bottom photo) is a good choice. Its unique shape and small size make it handy to use around the home workshop. All of these detectors require a 9-volt battery that you'll have to supply separately. Wall Wizard. ($20) Multifunction scanner for home and shop. Little Wizard. ($20) Compact size and features LED lights and sound. |


