87, страница 14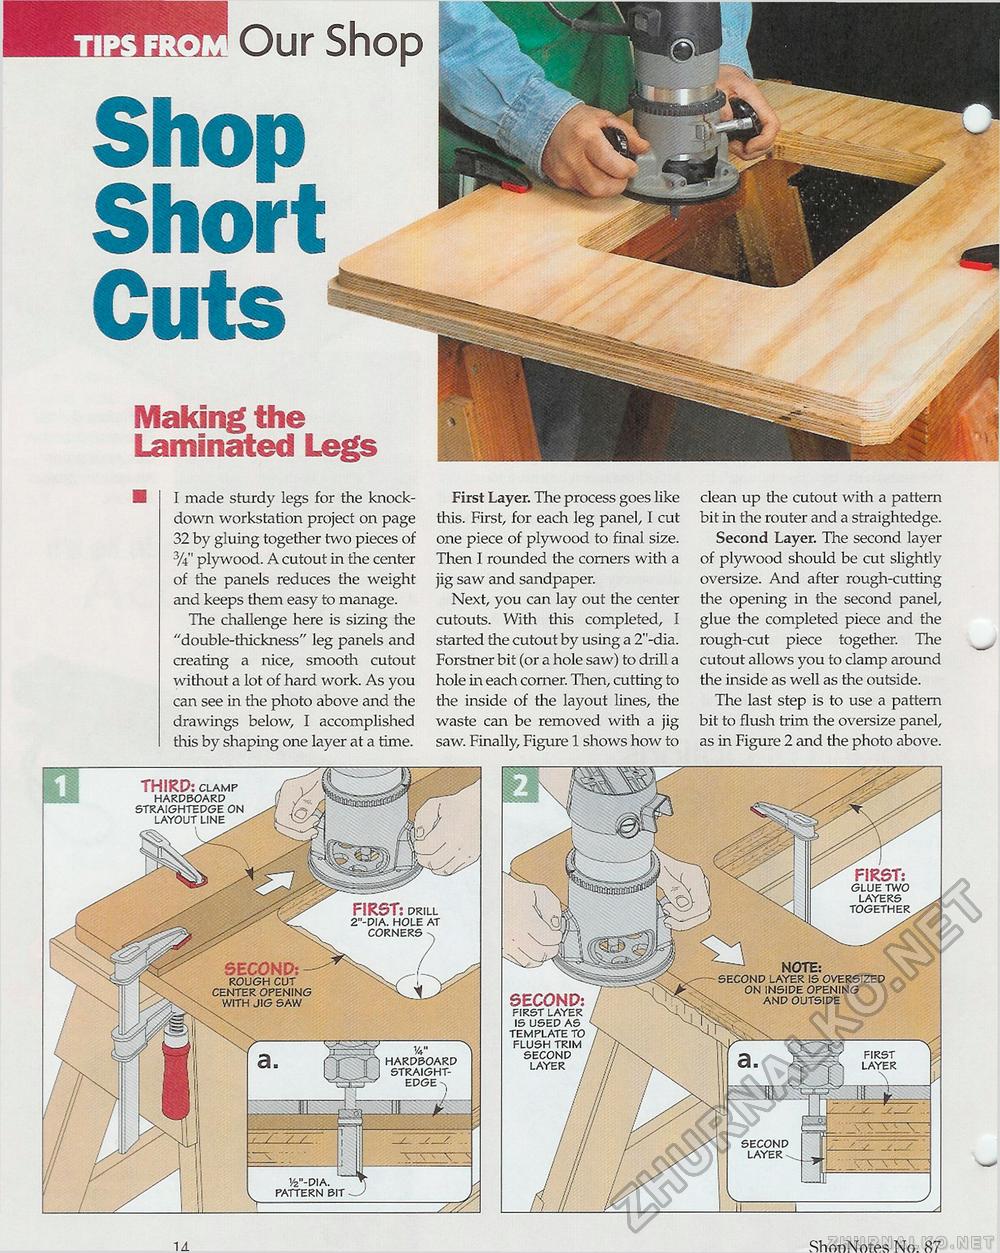
TIPS FR Iff Our Shop Shop Short Cuts Making the Laminated Legs I made sturdy legs for the knockdown workstation project on page 32 by gluing together two pieces of 3/.i" plywood. A cutout in the center of the panels reduces the weight and keeps them easy to manage. The challenge here is sizing the "double-thickness" leg panels and creating a nice, smooth cutout without a lot of hard work. As you can see in the photo above and the drawings below, I accomplished this by shaping one layer at a time. First Layer. The process goes like this. First, for each leg panel, I cut one piece of plywood to final size. Then I rounded the corners with a jig saw and sandpaper. Next, you can lay out the center cutouts. With this completed, I started the cutout by using a 2"-dia. Forstner bit (or a hole saw) to drill a hole in each corner. Then, cutting to the inside of the layout lines, the waste can be removed with a jig saw. Finally, Figure 1 shows how to clean up the cutout with a pattern bit in the router and a straightedge. Second Layer. The second layer of plywood should be cut slightly oversize. And after rough-cutting the opening in the second panel, glue the completed piece and the rough-cut piece together. The cutout allows you to clamp around the inside as well as the outside. The last step is to use a pattern bit to flush trim the oversize panel, as in Figure 2 and the photo above. Vz"-D\A. pattern bit hardboard straight- THIRD: clamp hardboard straightedge on layout line ShonNotes No. 87 SECOND: first layer is used as template to flush trim second layer FIRST: glue two NOTE: second layer is oversized on inside opening and outside 1A |


