87, страница 43
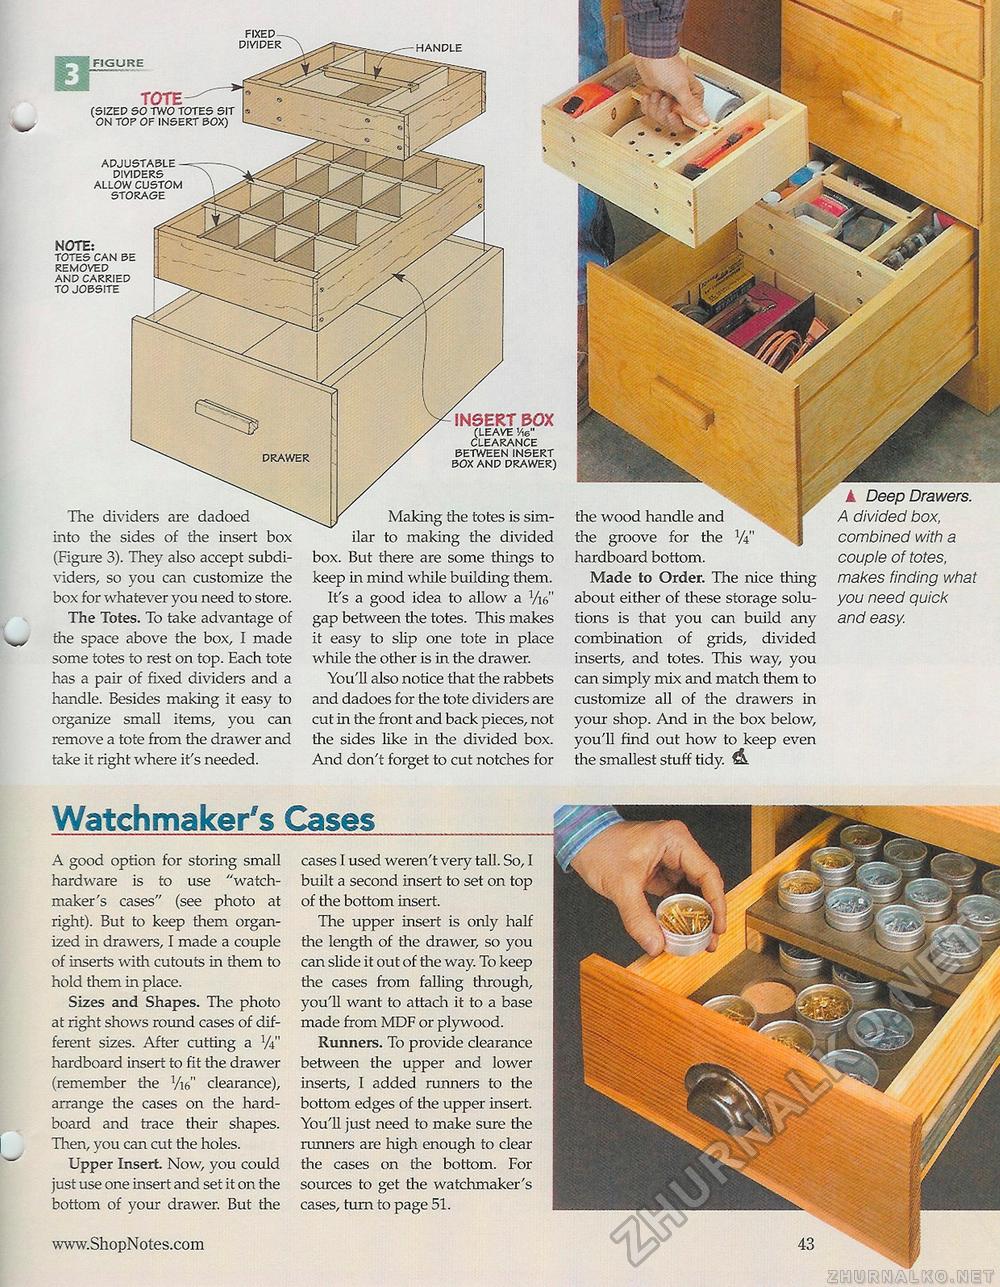
(SIZED ONTO ^ FIGURE HANDLE The dividers are dadoed into the sides of the insert box (Figure 3). They also accept subdivide^ so you can customize the box for whatever you need to store. The Totes. To take advantage of the space above the box, I made some totes to rest on top. Each tote has a pair of fixed dividers and a handle. Besides making it easy to organize small items, you can remove a tote from the drawer and take it right where it's needed. #' the wood handle and the groove for the Vi" hardboard bottom. Made to Order. The nice thing about either of these storage solutions is that you can build any combination of grids, divided inserts, and totes. This way, you can simply mix and match them to customize all of the drawers in your shop. And in the box below, you'll find out how to keep even the smallest stuff tidy. ▲ Deep Drawers. A divided box, combined with a couple of totes, makes finding what you need quick and easy. NOTE: TOTES CAN BE REMOVED AND CARRIED TO JOBSITE INSERT BOX (LEAVE Vte" CLEARANCE BETWEEN INSERT BOX AND DRAWER) Making the totes is similar to making the divided box. But there are some things to keep in mind while building them. It's a good idea to allow a VW' gap between the totes. This makes it easy to slip one tote in place while the other is in the drawer. You'll also notice that the rabbets and dadoes for the tote dividers are cut in the front and back pieces, not the sides like in the divided box. And don't forget to cut notches for ADJUSTABLE DIVIDERS ALLOW CUSTOM STORAGE A good option for storing small hardware is to use "watchmaker's cases" (see photo at right). But to keep them organized in drawers, I made a couple of inserts with cutouts in them to hold them in place. Sizes and Shapes. The photo at right shows round cases of different sizes. After cutting a V4" hardboard insert to fit the drawer (remember the Vw" clearance), arrange the cases on the hard-board and trace their shapes. Then, you can cut the holes. Upper Insert Now, you could just use one insert and set it on the bottom of your drawer. But the cases 1 used weren't very tall. So, I built a second insert to set on top of the bottom insert. The upper insert is only half the length of the drawer, so you can slide it out of the way. To keep the cases from falling through, you'll want to attach it to a base made from MDF or plywood. Runners. To provide clearance between the upper and lower inserts, I added runners to the bottom edges of the upper insert. You'll just need to make sure the runners are high enough to clear the cases on the bottom. For sources to get the watchmaker's cases, turn to page 51. Watchmaker's Cases |


