88, страница 31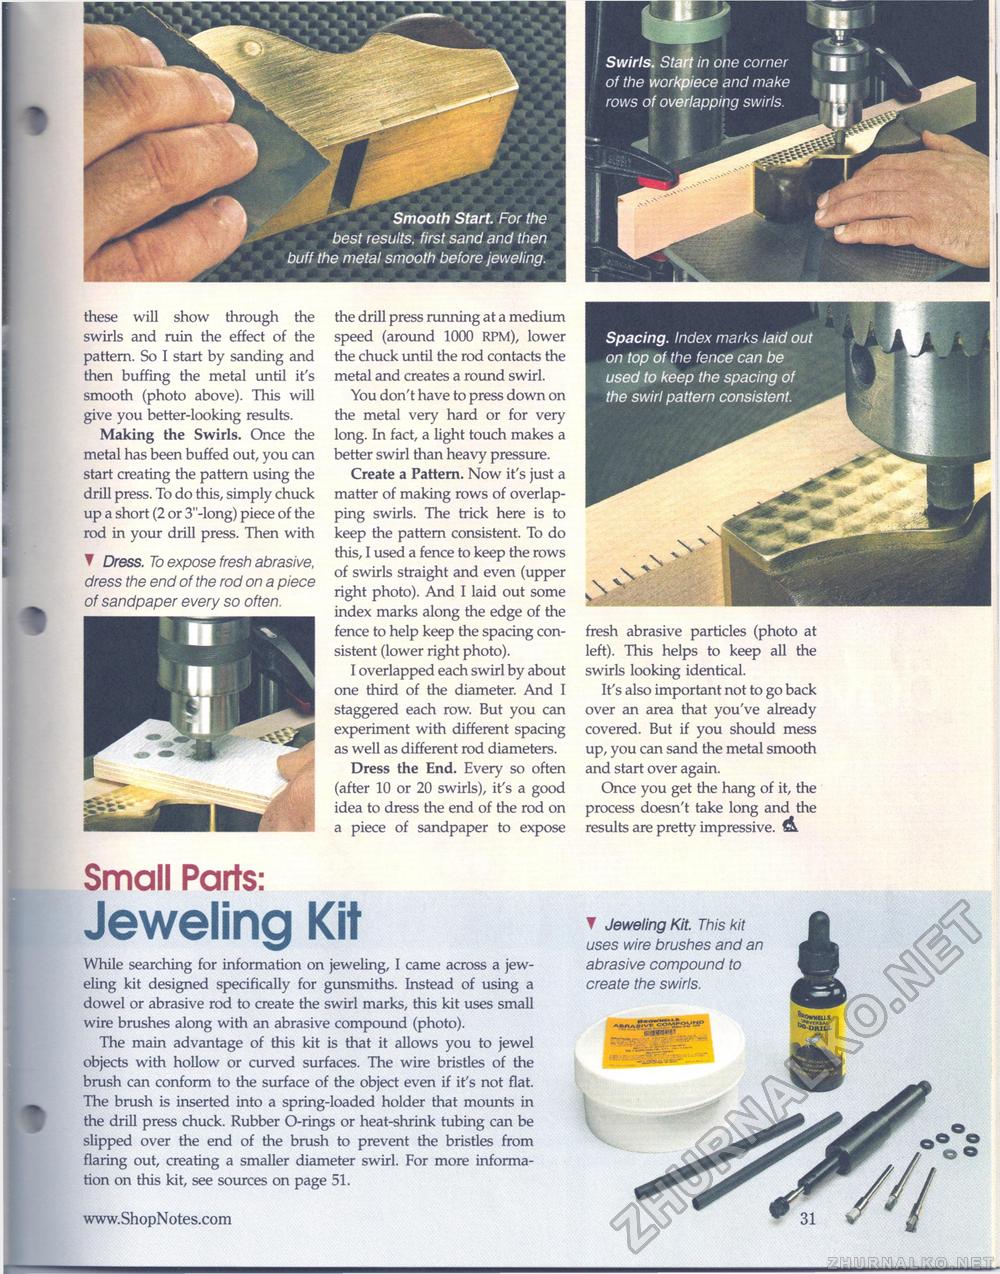
these will show through the swirls and ruin the effect of the pattern. So I start by sanding and then buffing the metal until it's smooth (photo above). This will give you better-looking results. Making the Swirls. Once the metal has been buffed out, you can start creating the pattern using the drill press. To do this, simply chuck up a short (2 or 3"-long) piece of the rod in your drill press. Then with ▼ Dress. To expose fresh abrasive, dress the end of the rod on a piece of sandpaper every so often. the drill press running at a medium speed (around 1000 RPM), lower the chuck until the rod contacts the metal and creates a round swirl. You don't have to press down on the metal very hard or for very long. In fact, a light touch makes a better swirl than heavy pressure. Create a Pattern. Now it's just a matter of making rows of overlapping swirls. The trick here is to keep the pattern consistent. To do this, I used a fence to keep the rows of swirls straight and even (upper right photo). And I laid out some index marks along the edge of the fence to help keep the spacing consistent (lower right photo). I overlapped each swirl by about one third of the diameter. And I staggered each row. But you can experiment with different spacing as well as different rod diameters. Dress the End. Every so often (after 10 or 20 swirls), it's a good idea to dress the end of the rod on a piece of sandpaper to expose fresh abrasive particles (photo at left). This helps to keep all the swirls looking identical. It's also important not to go back over an area that you've already covered. But if you should mess up, you can sand the metal smooth and start over again. Once you get the hang of it, the process doesn't take long and the results are pretty impressive. & Small Parts:Jeweling KitWhile searching for information on jeweling, I came across a jeweling kit designed specifically for gunsmiths. Instead of using a dowel or abrasive rod to create the swirl marks, this kit uses small wire brushes along with an abrasive compound (photo). The main advantage of this kit is that it allows you to jewel objects with hollow or curved surfaces. The wire bristles of the brush can conform to the surface of the object even if it's not flat. The brush is inserted into a spring-loaded holder that mounts in the drill press chuck. Rubber O-rings or heat-shrink tubing can be slipped over the end of the brush to prevent the bristles from flaring out, creating a smaller diameter swirl. For more information on this kit, see sources on page 51. ▼ Jeweling Kit. This kit uses wire brushes and an abrasive compound to create the swirls. |


