88, страница 28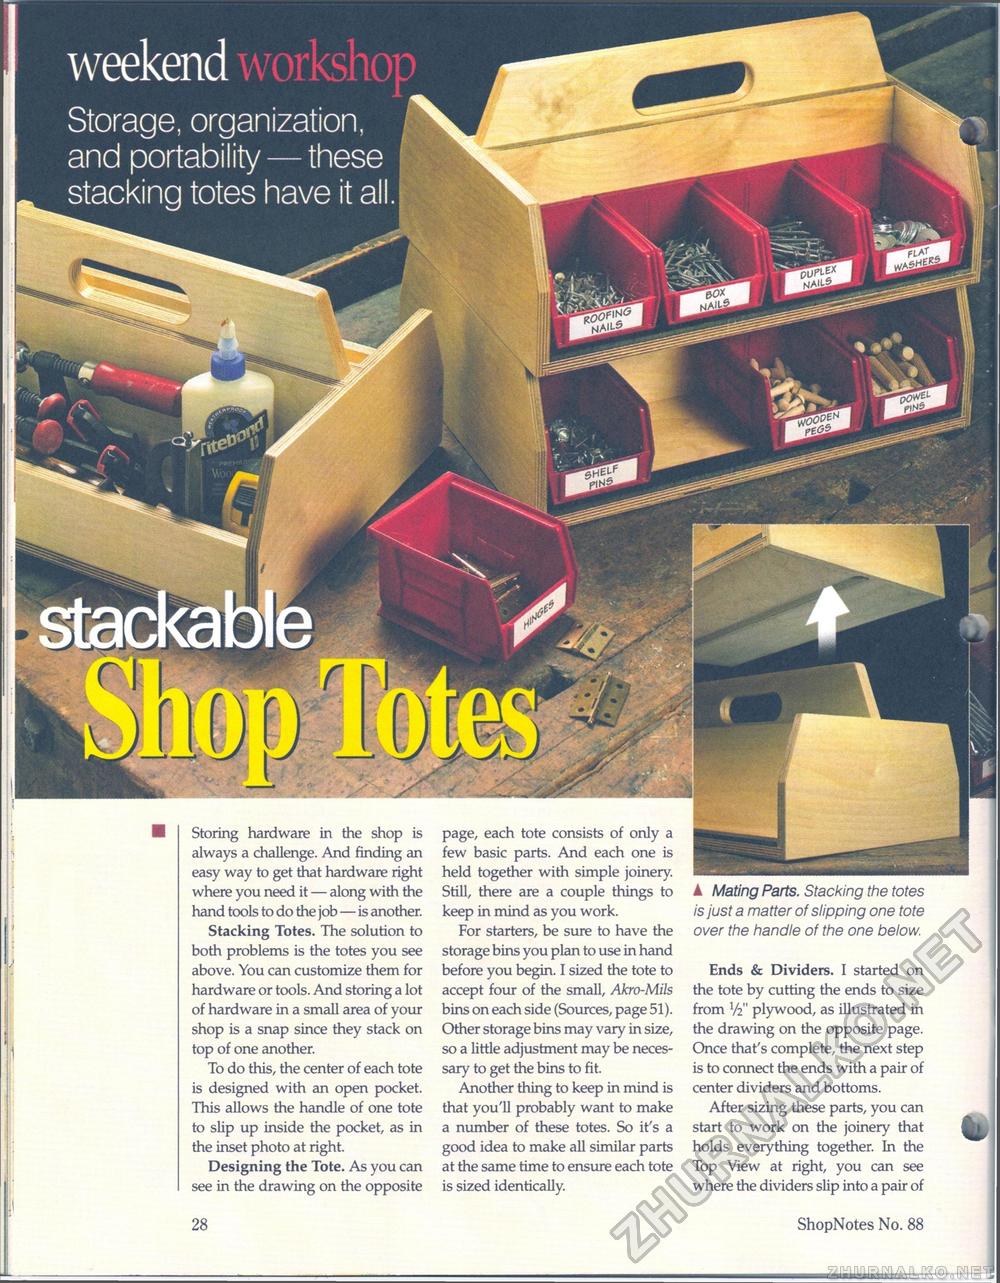
weekend Storage, organization, and portability — these stacking totes have it all. 28 ShopNotes No. 88 Storing hardware in the shop is always a challenge. And finding an easy way to get that hardware right where you need it — along with the hand tools to do the job — is another. Stacking Totes. The solution to both problems is the totes you see above. You can customize them for hardware or tools. And storing a lot of hardware in a small area of your shop is a snap since they stack on top of one another. To do this, the center of each tote is designed with an open pocket. This allows the handle of one tote to slip up inside the pocket, as in the inset photo at right. Designing the Tote. As you can see in the drawing on the opposite page, each tote consists of only a few basic parts. And each one is held together with simple joinery. Still, there are a couple things to keep in mind as you work. For starters, be sure to have the storage bins you plan to use in hand before you begin. I sized the tote to accept four of the small, Akro-Mils bins on each side (Sources, page 51). Other storage bins may vary in size, so a little adjustment may be necessary to get the bins to fit. Another thing to keep in mind is that you'll probably want to make a number of these totes. So it's a good idea to make all similar parts at the same time to ensure each tote is sized identically. ▲ Mating Parts. Stacking the totes is just a matter of slipping one tote over the handle of the one below. Ends & Dividers. I started on the tote by cutting the ends to size from V2" plywood, as illustrated in the drawing on the opposite page. Once that's complete, the next step is to connect the ends with a pair of center dividers and bottoms. After sizing these parts, you can start to work on the joinery that holds everything together. In the Top View at right, you can see where the dividers slip into a pair of |


