88, страница 26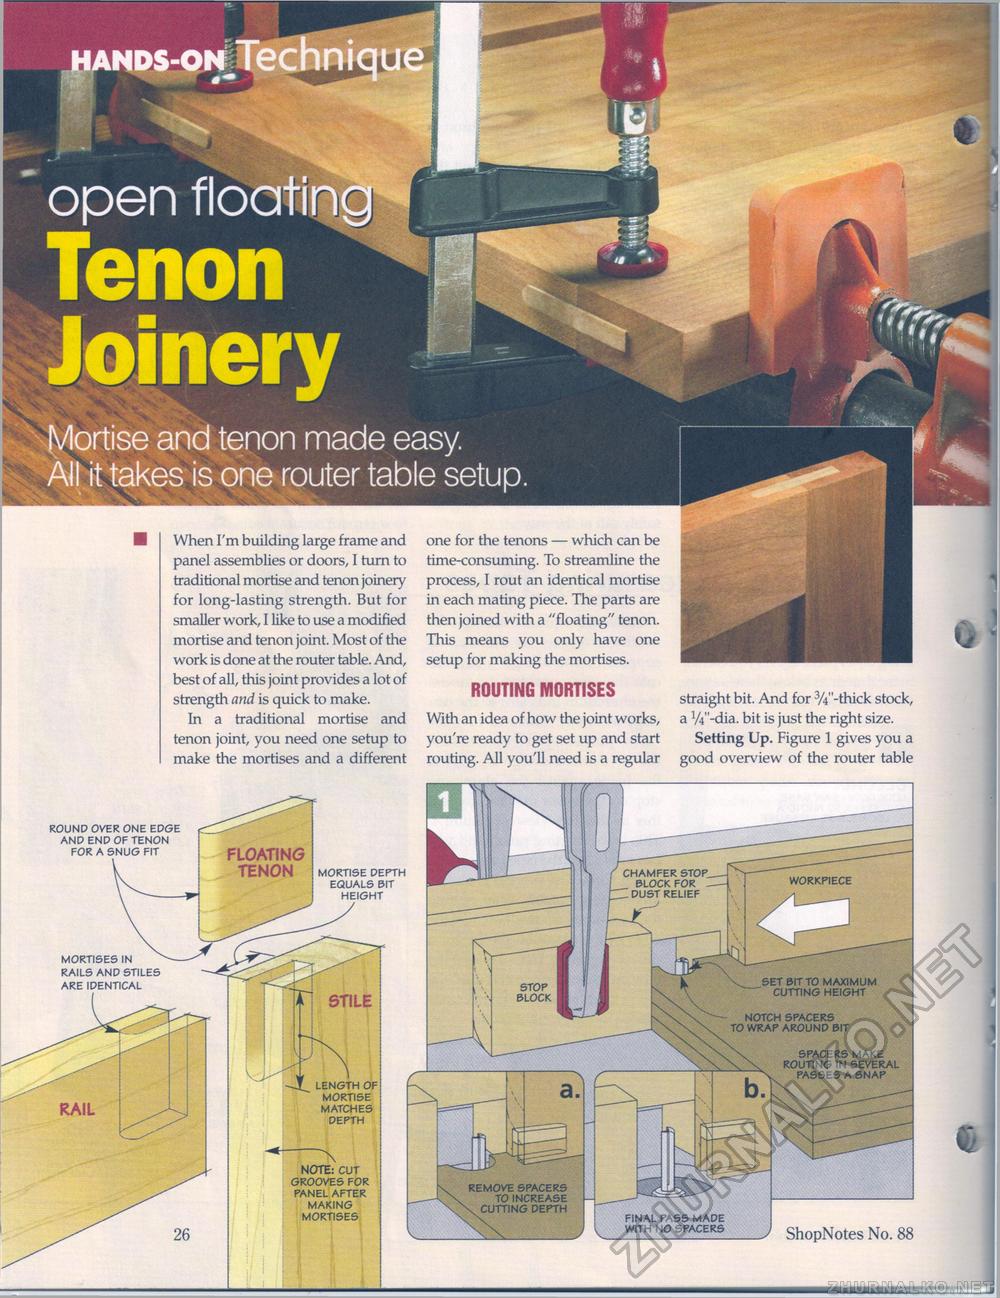
open Tiocr TenonAll it takes is one router table setup one for the tenons — which can be time-consuming. To streamline the process, I rout an identical mortise in each mating piece. The parts are then joined with a "floating" tenon. This means you only have one setup for making the mortises. ROUTING MORTISES With an idea of how the joint works, you're ready to get set up and start routing. All you'll need is a regular When I'm building large frame and panel assemblies or doors, I turn to traditional mortise and tenon joinery for long-lasting strength. But for smaller work, I like to use a modified mortise and tenon joint. Most of the work is done at the router table. And, best of all, this joint provides a lot of strength and is quick to make. In a traditional mortise and tenon joint, you need one setup to make the mortises and a different straight bit. And for 3/4"-thick stock, a V4"-dia. bit is just the right size. Setting Up. Figure 1 gives you a good overview of the router table round over one edge and end of tenon for a snug fit FLOATING TENON mortise depth equals bit height CHAMFER STOP BLOCKFOR -_ DUST RELIEF WORKPIECE mortises in rails and stiles are identical SET BIT TO MAXIMUM CUTTING HEIGHT STOP BLOCK STILE NOTCH SPACERS TO WRAP AROUND BIT SPACERS MAKE ROUTING IN SEVERAL PASSES A SNAP LENGTH OF MORTISE MATCHES DEPTH NOTE: CUT GROOVES FOR PANEL AFTER MAKING MORTISES REMOVE SPACERS TO INCREASE v CUTTING DEPTH FINAL PASS MADE WITH NO SPACERS J ShopNotes No. 88 |


