90 - Get the Most out of a Plunge Router, страница 20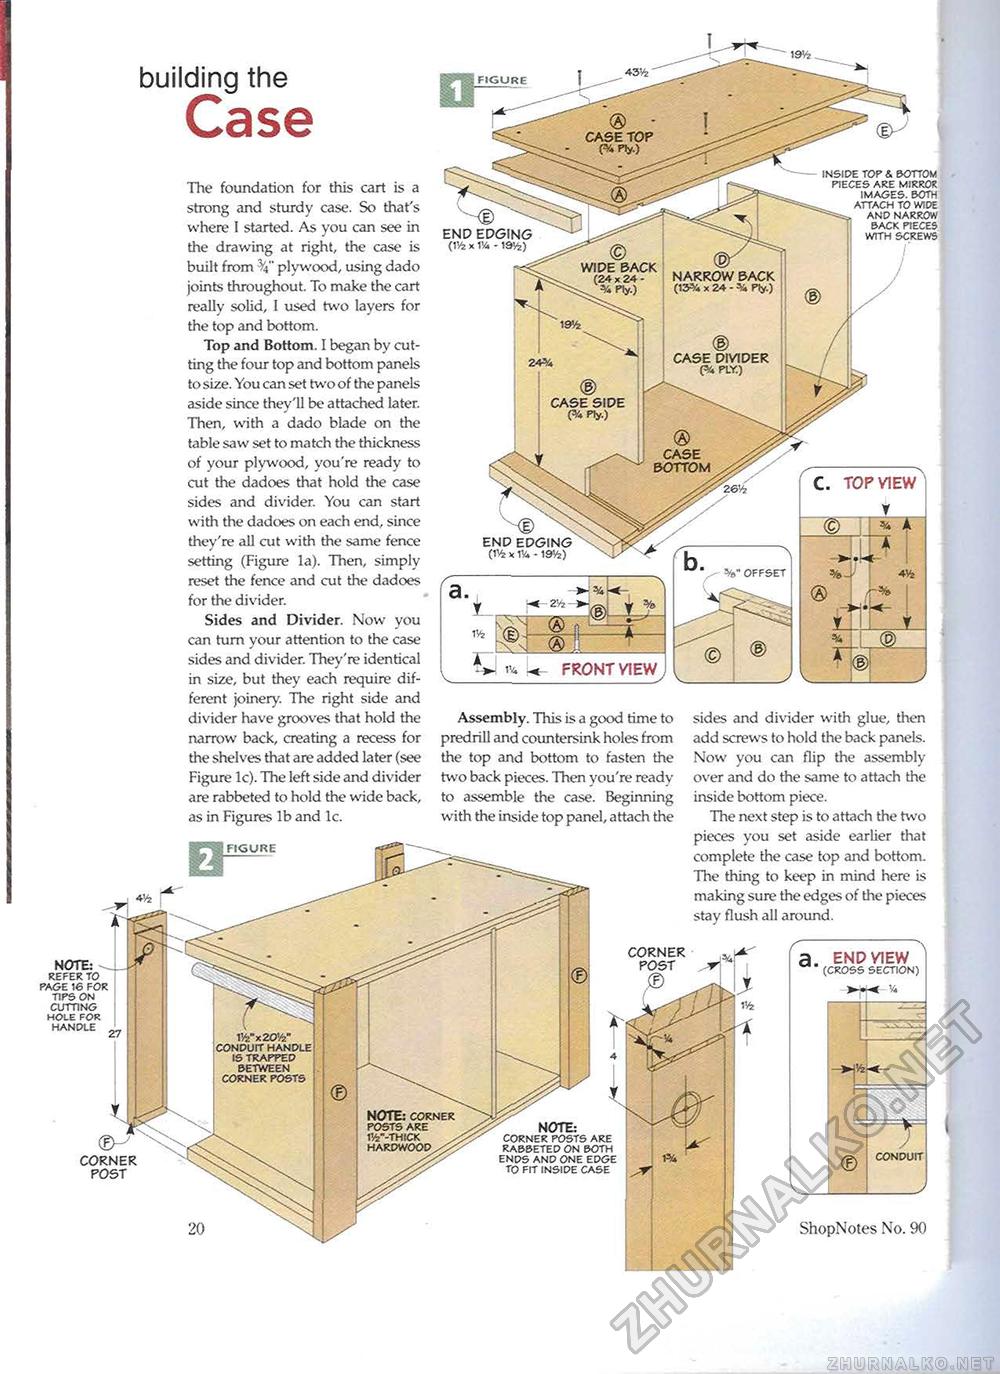
building the inside top & bottom pieces are mirror images. both attach to wide and narrow back pieces with screws The foundation for this cart is a strong and sturdy case. So that's where I started. As you can see in the drawing at right, the case is built from V plywood, using dado joints throughout. To make the cart really solid, I used two layers for the top and bottom. Top and Bottom. I began by cutting the four top and bottom panels to size. You can set two of the panels aside since they'll be attached later. Then, with a dado blade on the table saw set to match the thickness of your plywood, you're ready to cut the dadoes that hold the case sides and divider. You can start with the dadoes on each end, since they're all cut with the same fence setting (Figure la). Then, simply reset the fence and cut the dadoes for the divider. Sides and Divider. Now you can turn your attention to the case sides and divider. They're identical in size, but they each require different joinery. The right side and divider have grooves that hold the narrow back, creating a recess for the shelves that are added later (see Figure lc). The left side and divider are rabbeted to hold the wide back, as in Figures lb and lc. gPD FIGURE END EDGING (H4 x VU - 19^) WIDE BACK (24 x 24 - % fy.) NARROW BACK (13% x 24 - % Ply.) CASE DIVIDER (% PLY.) CASE BOTTOM FRONT VIEW Assembly. This is a good time to predrill and countersink holes from the top and bottom to fasten the two back pieces. Then you're ready to assemble the case. Beginning with the inside top panel, attach the sides and divider with glue, then add screws to hold the back panels. Now you can flip the assembly over and do the same to attach the inside bottom piece. The next step is to attach the two pieces you set aside earlier that complete the case top and bottom. The thing to keep in mind here is making sure the edges of the pieces stay flush all around. CORNER POST END VIEW (cross section) NOTE: - refer to page 16 for tips on cutting hole for handle . NOTE: CORNER POSTS ARE 1'/4"-THICK HARDWOOD XX NOTE: corner posts are rabbeted on both ends and one edge to fit inside case CORNER POST CONDUIT ShopNotes No. 90 |


