90 - Get the Most out of a Plunge Router, страница 22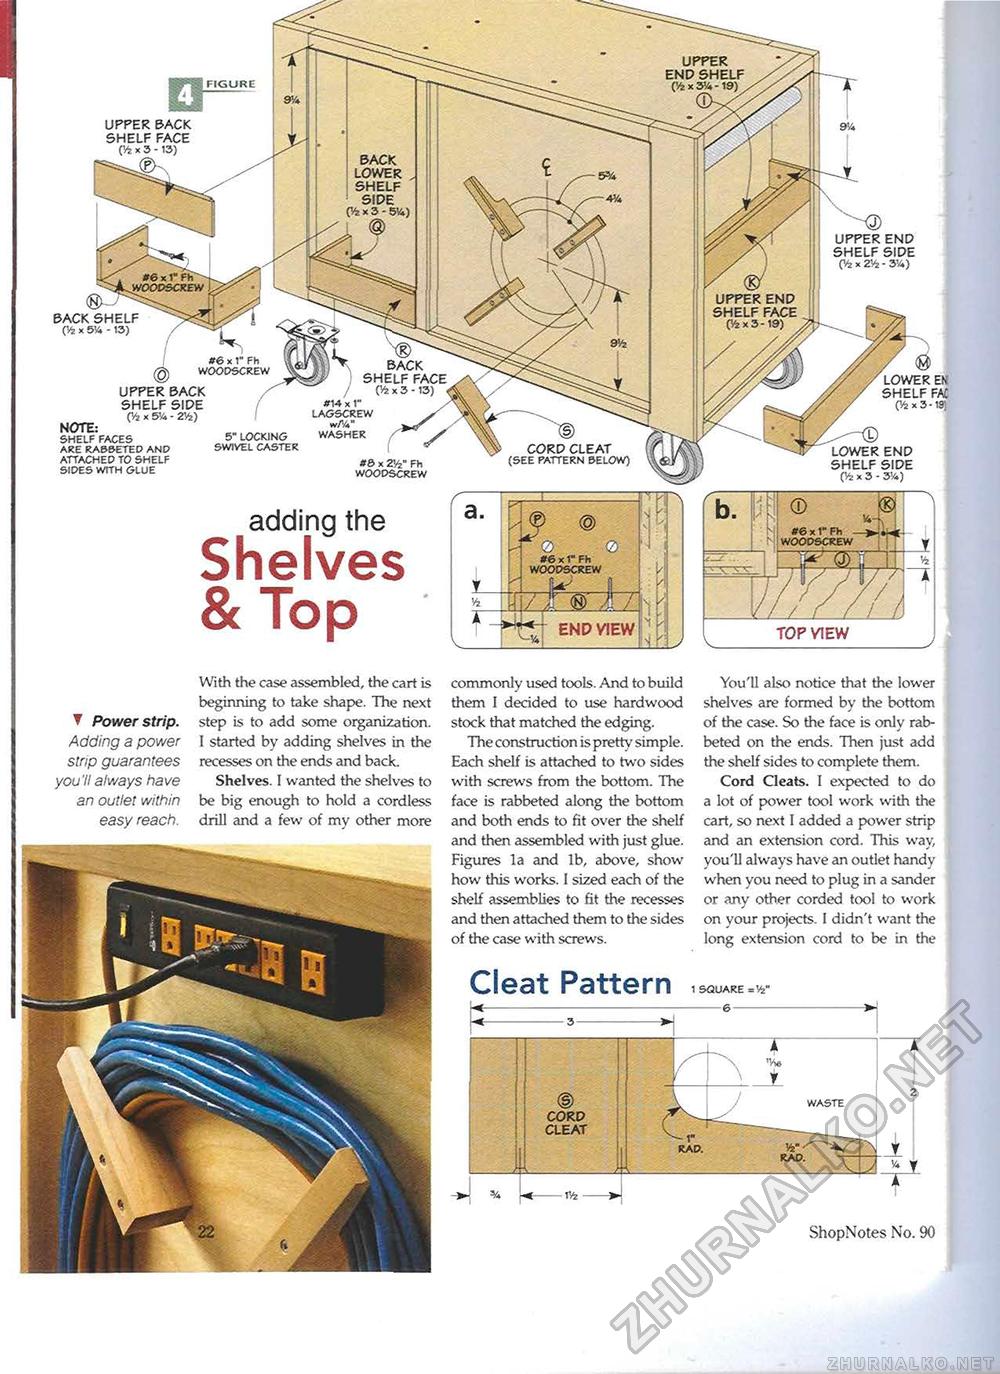
With the case assembled, the cart is beginning to take shape. The next ▼ Power strip, step is to add some organization. Adding a power I started by adding shelves in the strip guarantees recesses on the ends and back. you'll always have Shelves. I wanted the shelves to an outlet within be big enough to hold a cordless easy reach, drill and a few of my other more commonly used tools. And to build them I decided to use hardwood stock that matched the edging. The construction is pretty simple. Each shelf is attached to two sides with screws from the bottom. The face is rabbeted along the bottom and both ends to fit over the shelf and then assembled with just glue. Figures la and lb, above, show how this works. I sized each of the shelf assemblies to fit the recesses and then attached them to the sides of the case with screws. Cleat Pattern i You'll also notice that the lower shelves are formed by the bottom of the case. So the face is only rabbeted on the ends. Then just add the shelf sides to complete them. Cord Cleats. I expected to do a lot of power tool work with the cart, so next I added a power strip and an extension cord. This way, you'll always have an outlet handy when you need to plug in a sander or any other corded tool to work on your projects. I didn't want the long extension cord to be in the square =v CORD CLEAT 22 ShopNotes No. 90 'Vie 1 waste UPPER END SHELF (v4 X 3'a - 19) UPPER BACK SHELF FACE 04 x 3 - 13) BACK LOWER SHELF SIDE 04 x 3 - 5Vi) r BACK SHELF FACE / x 3 -13) < LOWER SHELF I 04x3- UPPER BACK SHELF SIDE 04 x - 2Vz) #14 X r lagscrew »«' washer 5" locking swivel caster lf faces rabbeted and vched to shelf ;s with glue CORD CLEAT (see pattern below) LOWER END SHELF SIDE 04 x 3 - 3'A) adding the Shelves & TopTOP VIEW ^3) UPPER END SHELF SIDE 04 x 2V4 - 3'A) |


