90 - Get the Most out of a Plunge Router, страница 25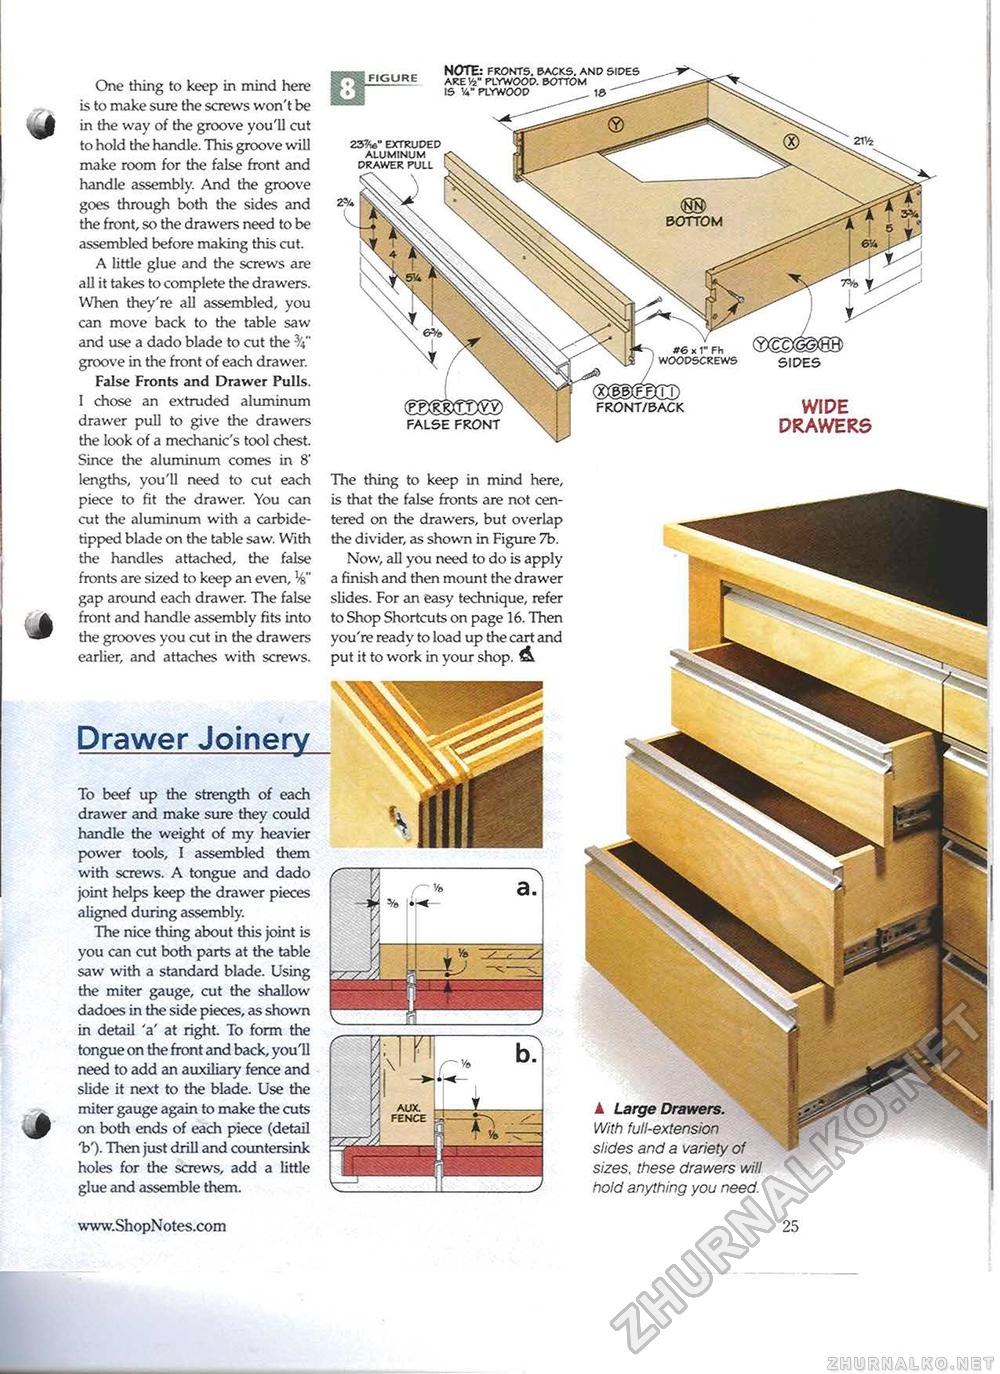
J J i Drawer Joinery To beef up the strength of each drawer and make sure they could handle the weight of my heavier power tools, I assembled them with screws. A tongue and dado joint helps keep the drawer pieces aligned during assembly. The nice thing about this joint is you can cut both parts at the table saw with a standard blade. Using the miter gauge, cut the shallow dadoes in the side pieces, as shown in detail 'a' at right. To form the tongue on the front and back, you'll need to add an auxiliary fence and slide it next to the blade. Use the miter gauge again to make the cuts on both ends of each piece (detail V). Then just drill and countersink holes for the screws, add a little glue and assemble them. One thing to keep in mind here is to make sure the screws won't be in the way of the groove you'll cut to hold the handle. This groove will make room for the false front and handle assembly. And the groove goes through both the sides and the front, so the drawers need to be assembled before making this cut. A little glue and the screws are all it takes to complete the drawers. When they're all assembled, you can move back to the table saw and use a dado blade to cut the groove in the front of each drawer. False Fronts and Drawer Pulls. I chose an extruded aluminum drawer pull to give the drawers the look of a mechanic's tool chest. Since the aluminum comes in 8' lengths, you'll need to cut each piece to fit the drawer. You can cut the aluminum with a carbide-tipped blade on the table saw. With the handles attached, the false fronts are sized to keep an even, gap around each drawer. The false front and handle assembly fits into the grooves you cut in the drawers earlier, and attaches with screws. ▲ Large Drawers. With full-extension slides and a variety of sizes, these drawers will hold anything you need. 237/W' EXTRUDED ALUMINUM DRAWER PULL SIDES WIPE DRAWERS FIGURE NOTE: FRONTS. BACKS. AND ARE Vz" PLYWOOD. BOTTOM IS Vi" PLYWOOD The thing to keep in mind here, is that the false fronts are not centered on the drawers, but overlap the divider, as shown in Figure 7b. Now, all you need to do is apply a finish and then mount the drawer slides. For an easy technique, refer to Shop Shortcuts on page 16. Then you're ready to load up the cart and put it to work in your shop. A 25 |


