90 - Get the Most out of a Plunge Router, страница 23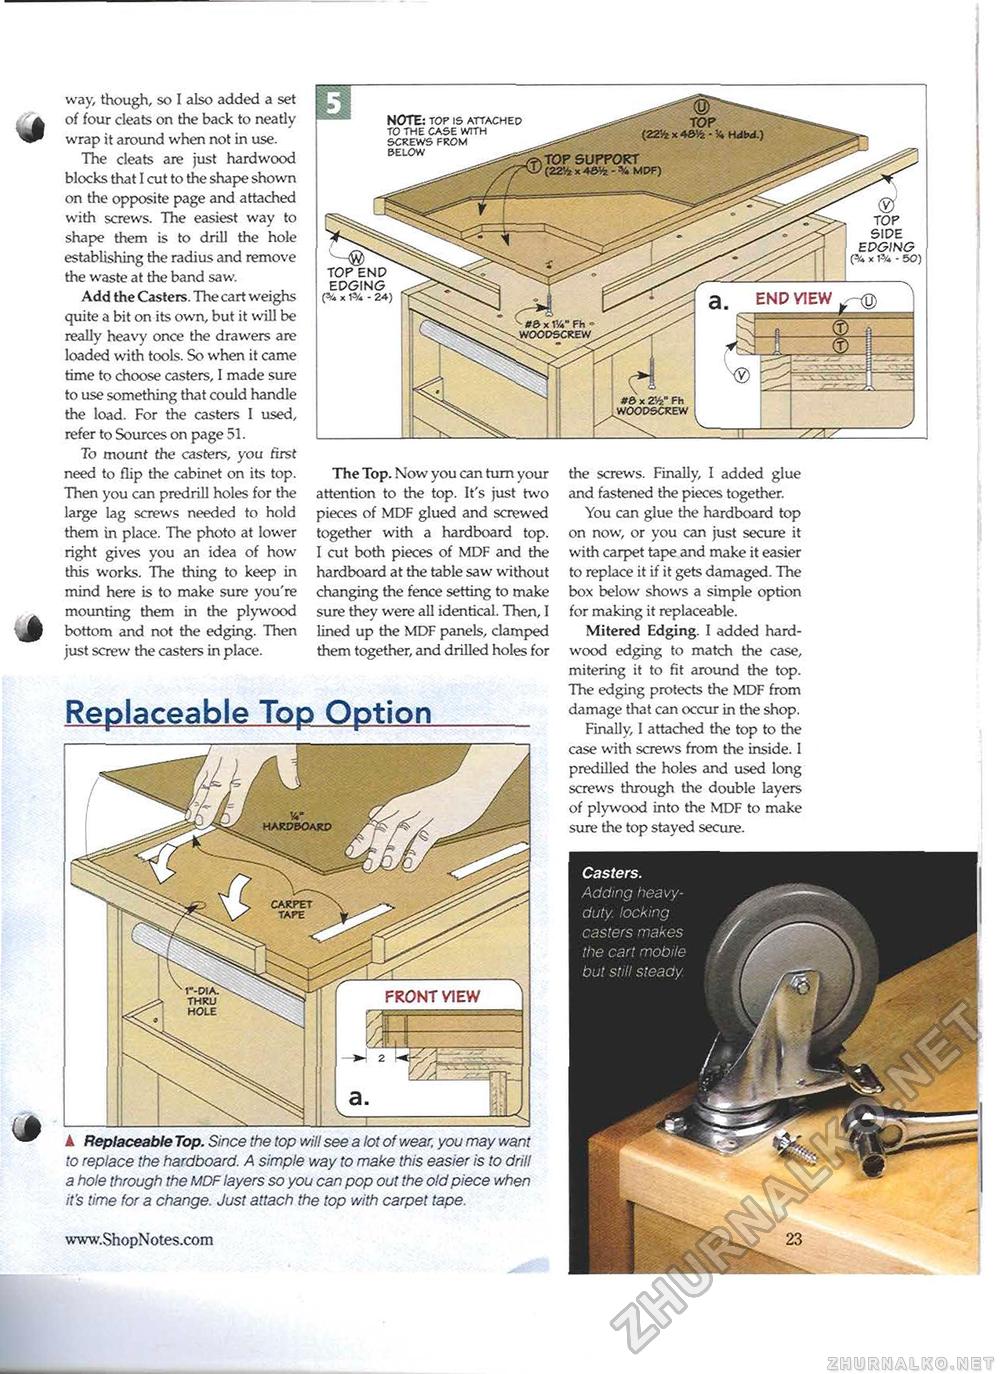
the screws. Finally, I added glue and fastened the pieces together. You can glue the hardboard top on now, or you can just secure it with carpet tape and make it easier to replace it if it gets damaged. The box below shows a simple option for making it replaceable. Mitered Edging. I added hardwood edging to match the case, mitering it to fit around the top. The edging protects the MDF from damage that can occur in the shop. Finally, I attached the top to the case with screws from the inside. 1 predilled the holes and used long screws through the double layers of plywood into the MDF to make sure the top stayed secure. Replaceable Top Option ▲ Replaceable Top. Since the top will see a lot of wear, you may want to replace the hardboard. A simple way to make this easier is to drill a hole through the MDF layers so you can pop out the old piece when it's time for a change. Just attach the top with carpet tape. SIDE EDGING X - 50) way, though, so I also added a set of four cleats on the back to neatly wrap it around when not in use. The cleats are just hardwood blocks that I cut to the shape shown on the opposite page and attached with screws. The easiest way to shape them is to drill the hole establishing the radius and remove the waste at the band saw. Add the Casters. The cart weighs quite a bit on its own, but it will be really heavy once the drawers are loaded with tools. So when it came time to choose casters, I made sure to use something that could handle the load. For the casters I used, refer to Sources on page 51. To mount the casters, you first need to flip the cabinet on its top. Then you can predrill holes for the large lag screws needed to hold them in place. The photo at lower right gives you an idea of how this works. The thing to keep in mind here is to make sure you're mounting them in the plywood bottom and not the edging. Then just screw the casters in place. The Top. Now you can turn your attention to the top. It's just two pieces of MDF glued and screwed together with a hardboard top. I cut both pieces of MDF and the hardboard at the table saw without changing the fence setting to make sure they were all identical. Then, I lined up the MDF panels, clamped them together, and drilled holes for FRONT VIEW EDGING (% x - 24) |


