90 - Get the Most out of a Plunge Router, страница 36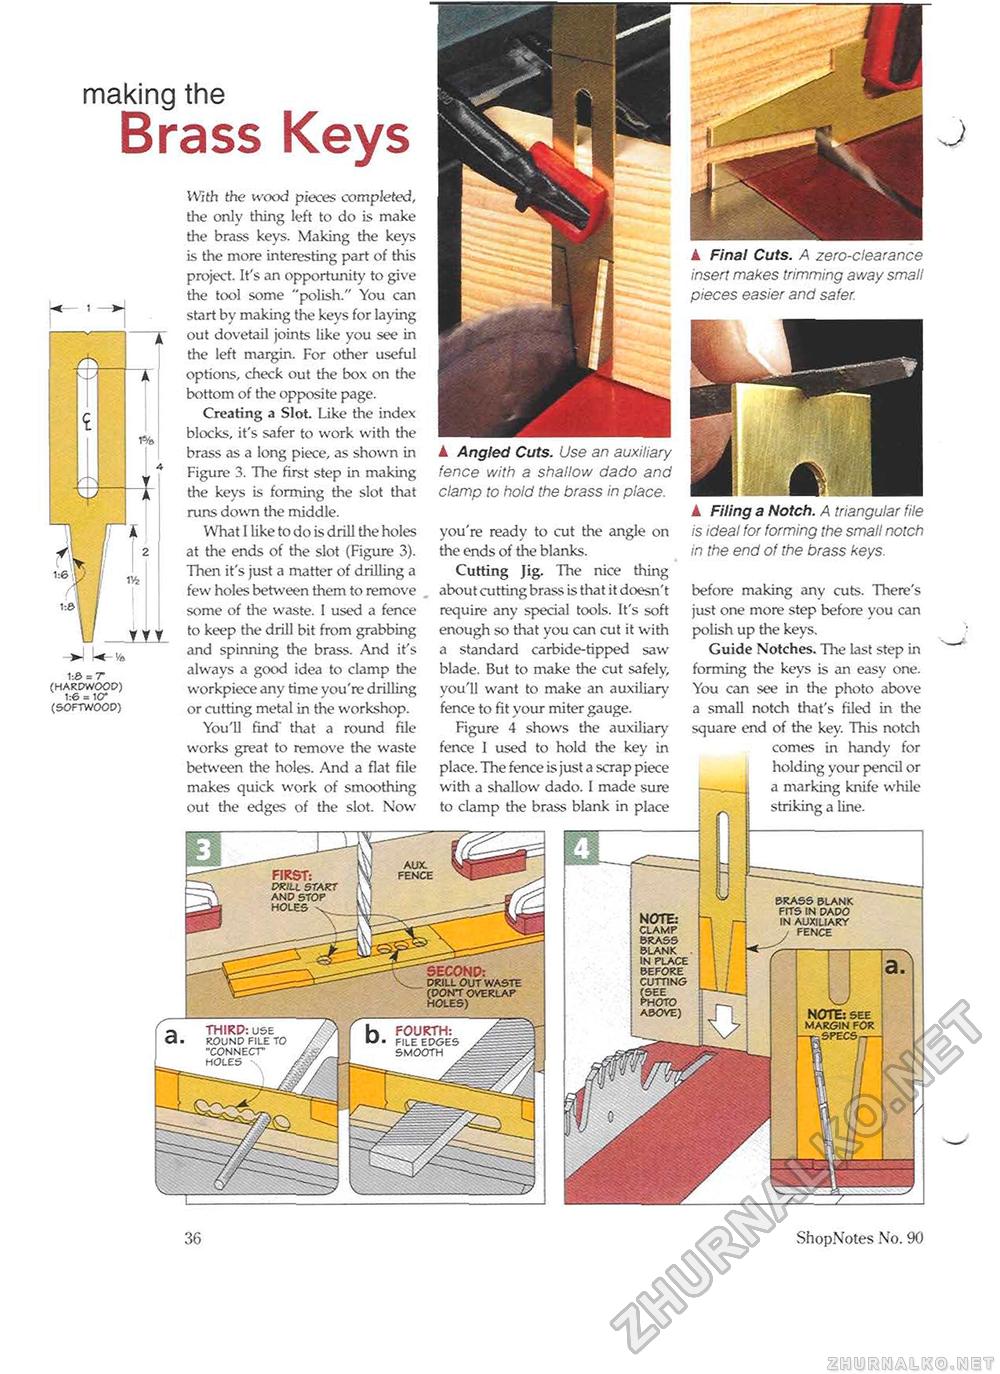
making the Brass Keys /-N >-; -<-1:6 = r (HARDWOOD) 1:6 = 10-(SOFTWOOD) With the wood pieces completed, the only thing left to do is make the brass keys. Making the keys is the more interesting part of this project. It's an opportunity to give the tool some "polish." You can start by making the keys for laying out dovetail joints like you see in the left margin. For other useful options, check out the box on the bottom of the opposite page. Creating a Slot. Like the index blocks, it's safer to work with the brass as a long piece, as shown in Figure 3. The first step in making the keys is forming the slot that runs down the middle. What I like to do is drill the holes at the ends of the slot (Figure 3). Then it's just a matter of drilling a few holes between them to remove some of the waste. I used a fence to keep the drill bit from grabbing and spinning the brass. And it's always a good idea to clamp the workpiece any time you're drilling or cutting metal in the workshop. You'll find' that a round file works great to remove the waste between the holes. And a flat file makes quick work of smoothing out the edges of the slot. Now A Final Cuts. A zero-clearance insert makes trimming away small pieces easier and safer A Angled Cuts. Use an auxiliary fence with a shallow dado and clamp to hold the brass in place. you're ready to cut the angle on the ends of the blanks. Cutting Jig. The nice thing about cutting brass is that it doesn't require any special tools. It's soft enough so that you can cut it with a standard carbide-tipped saw-blade. But to make the cut safely, you'll want to make an auxiliary fence to fit your miter gauge. Figure 4 shows the auxiliary fence I used to hold the key in place. The fence is just a scrap piece with a shallow dado. I made sure to clamp the brass blank in place ▲ Filing a Notch. A triangular file is ideal for forming the small notch in the end of the brass keys. before making any cuts. There's just one more step before you can polish up the keys. Guide Notches. The last step in forming the keys is an easy one. You can see in the photo above a small notch that's filed in the square end of the key. This notch comes in handy for holding your pencil or r—_| a marking knife while „ striking a line. 36 ShopNotes No. 90 |


