90 - Get the Most out of a Plunge Router, страница 37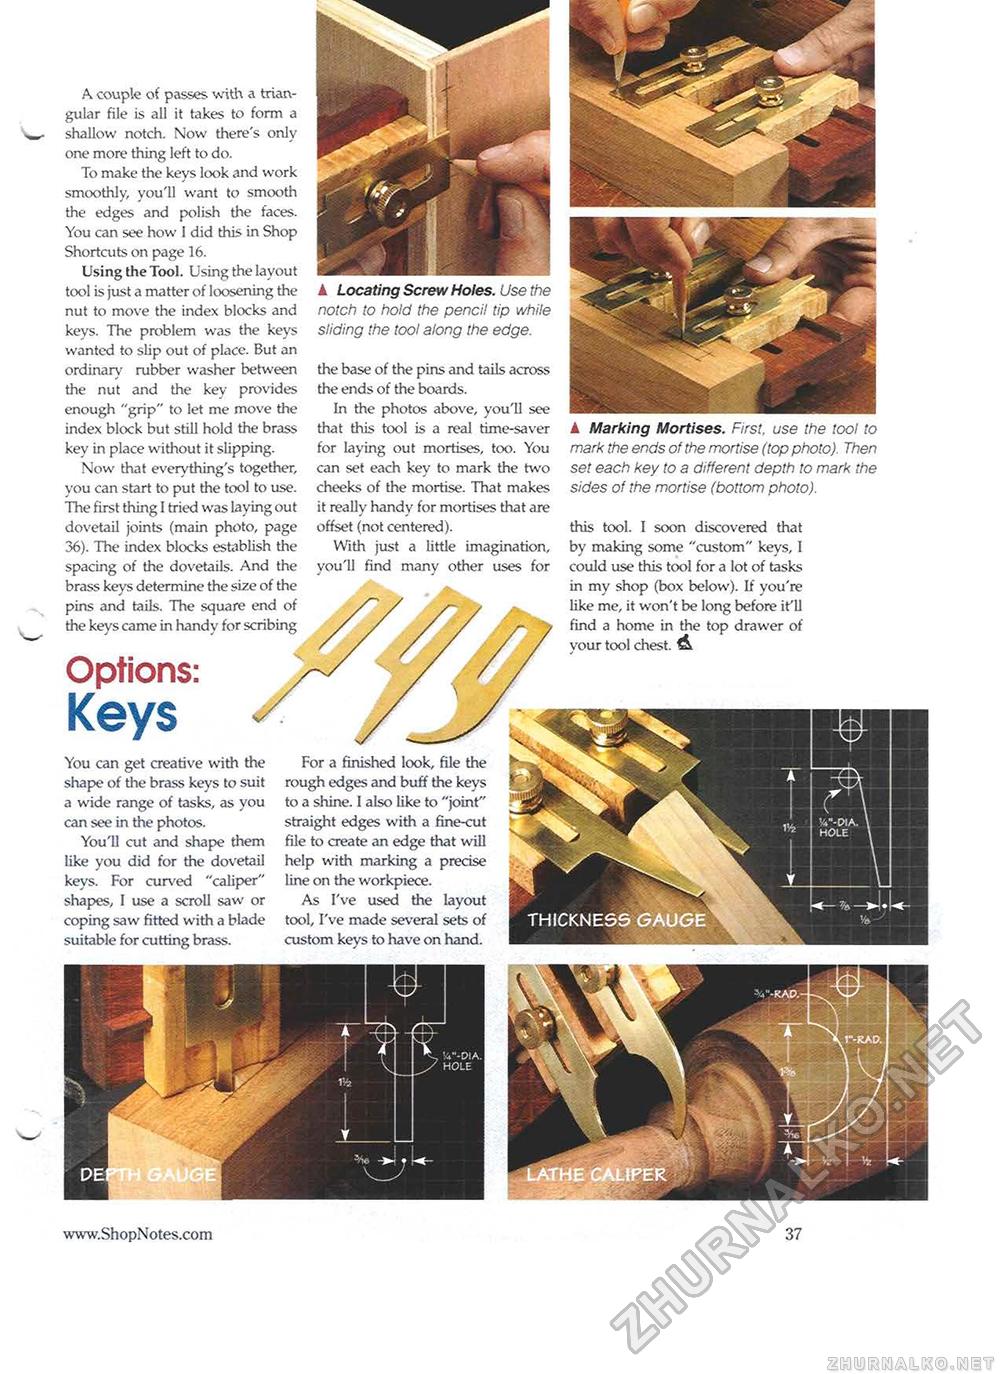
A Locating Screw Holes. Use the notch to hold the pencil tip while sliding the tool along the edge. Options: KeysYou can get creative with the shape of the brass keys to suit a wide range of tasks, as you can see in the photos. You'll cut and shape them like you did for the dovetail keys. For curved "caliper" shapes, I use a scroll saw or coping saw fitted with a blade suitable for cutting brass. For a finished look, file the rough edges and buff the keys to a shine. 1 also like to "joint" straight edges with a fine-cut file to create an edge that will help with marking a precise line on the workpiece. As I've used the layout tool, I've made several sets of custom keys to have on hand. A couple of passes with a triangular file is all it takes to form a shallow notch. Now there's only one more thing left to do. To make the keys look and work smoothly, you'll want to smooth the edges and polish the faces. You can see how I did this in Shop Shortcuts on page 16. Using the Tool. Using the layout tool is just a matter of loosening the nut to move the index blocks and keys. The problem was the keys wanted to slip out of place. But an ordinary rubber washer between the nut and the key provides enough "grip" to let me move the index block but still hold the brass key in place without it slipping. Now that everything's together, you can start to put the tool to use. The first thing I tried was laying out dovetail joints (main photo, page 36). The index blocks establish the spacing of the dovetails. And the brass keys determine the size of the pins and tails. The square end of the keys came in handy for scribing A Marking Mortises. First, use the tool to mark the ends of the mortise (top photo). Then set each key to a different depth to mark the sides of the mortise (bottom photo). the base of the pins and tails across the ends of the boards. In the photos above, you'll see that this tool is a real time-saver for laying out mortises, too. You can set each key to mark the two cheeks of the mortise. That makes it really handy for mortises that are offset (not centered). With just a little imagination, you'll find many other uses for this tool. I soon discovered that by making some "custom" keys, I could use this tool for a lot of tasks in my shop (box below). If you're like me, it won't be long before it'll find a home in the top drawer of your tool chest. A |


